20 DIY Front Yard Halloween Ideas for a Spooky Yard
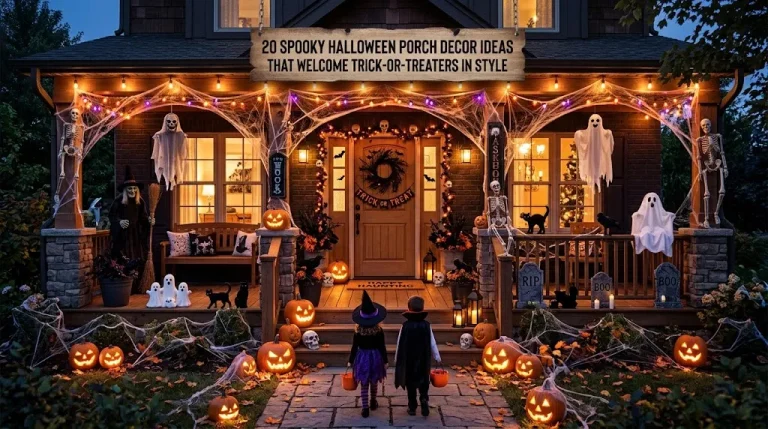
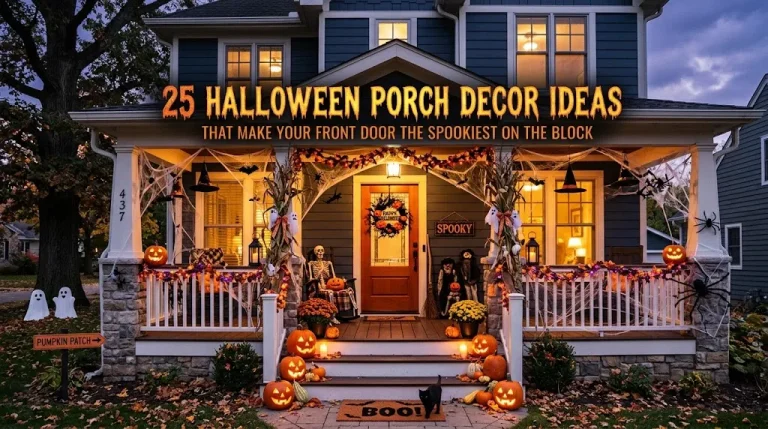
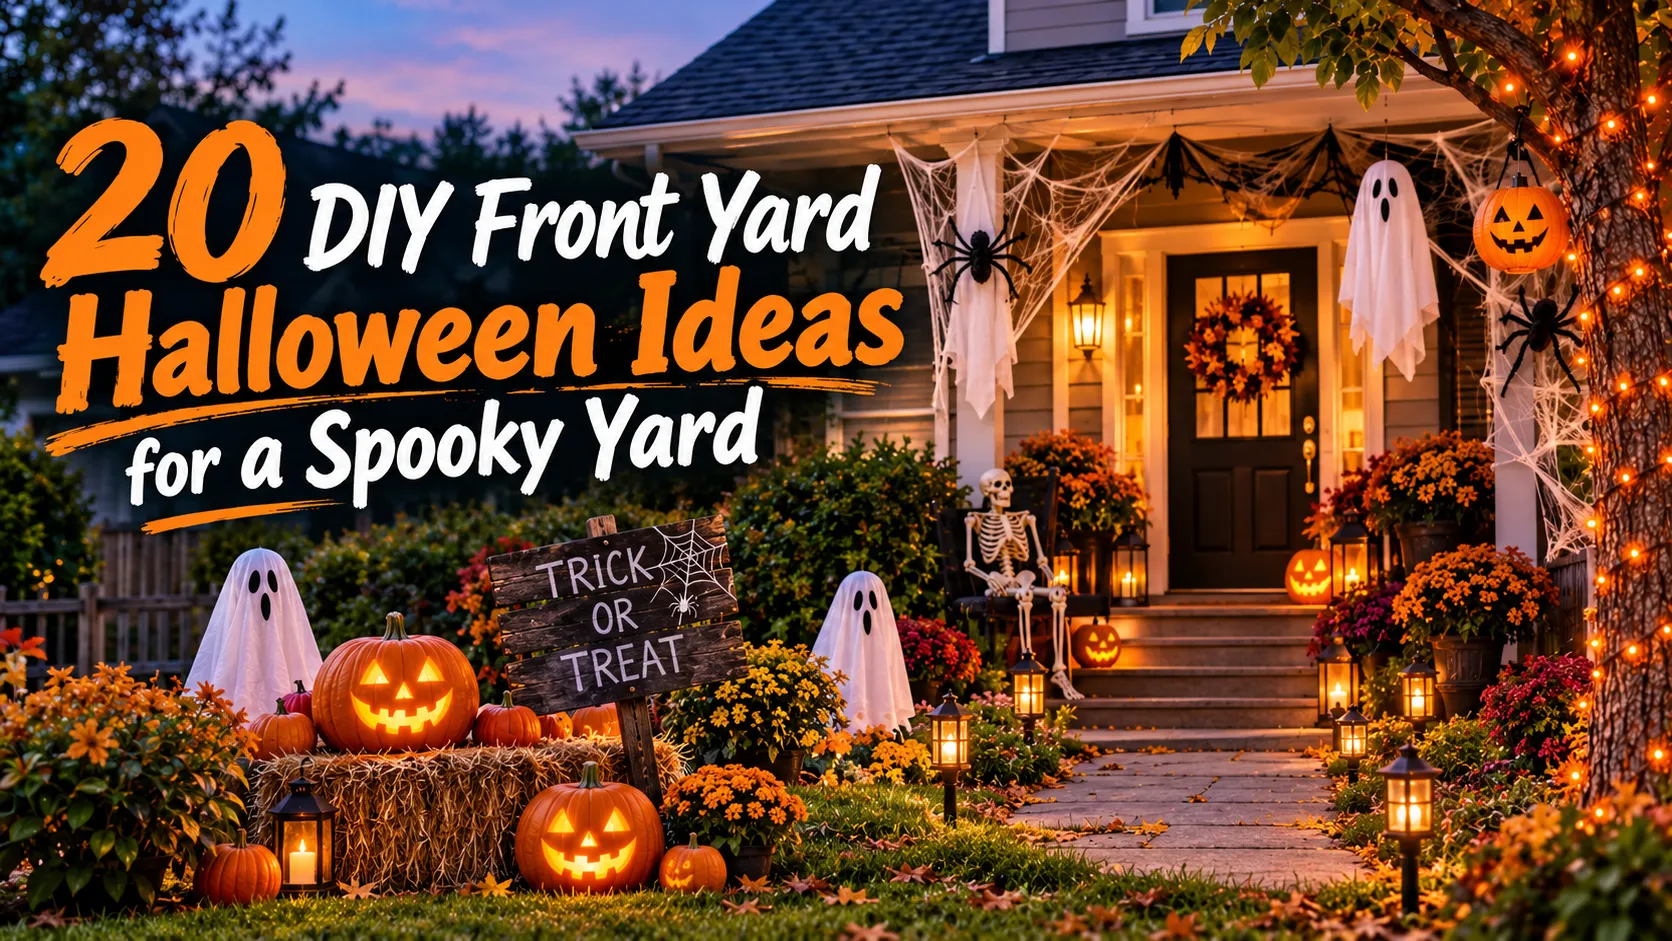
A front yard is the first thing trick-or-treaters see, which makes it the best place to spend a weekend and a modest budget. The most memorable displays rarely rely on one expensive prop. They layer a few well-placed pieces, a clear focal point, and lighting that makes the whole scene read from the curb. The 20 front yard Halloween ideas below range from five-minute fixes using materials you may already own to larger builds that reward a little carpentry. Some are friendly, some are properly eerie, and a few lean modern and restrained. Each one explains what to build, what it looks like when it works, and where DIY projects tend to go wrong, so you can pick two or three that suit your yard, your skill level, and your neighbors.
1. Cheesecloth Ghosts Hanging From a Tree Branch
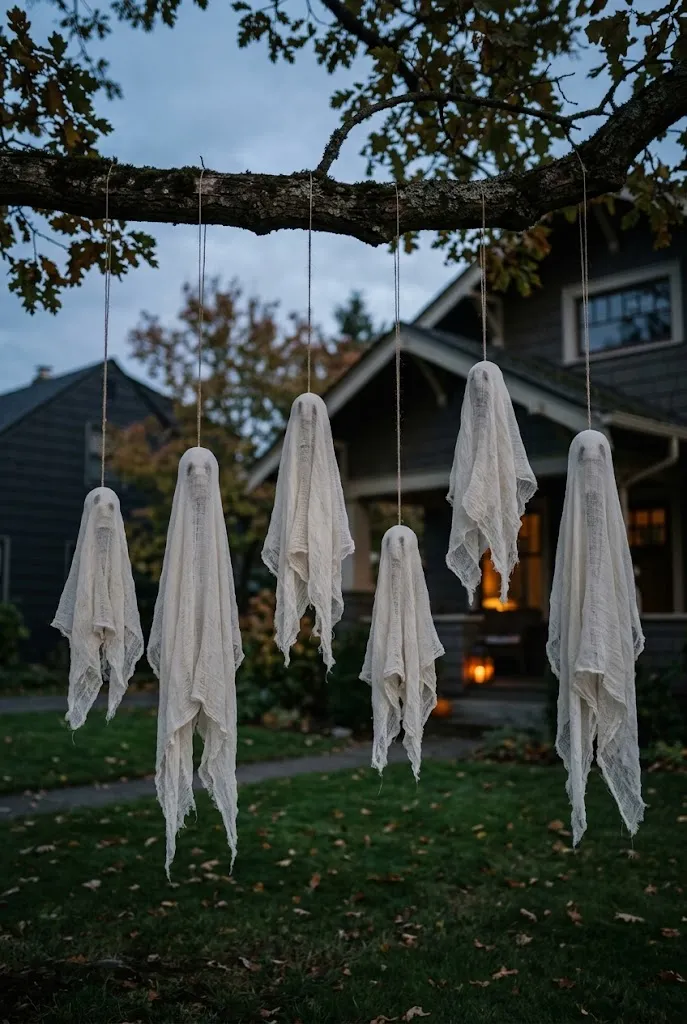
Soaked in liquid starch and draped over a form, cheesecloth dries into a stiff, translucent shroud that sways like fabric caught mid-float. Hung at different heights from a bare or leafy branch, a cluster of five or six reads as a drifting group rather than a single decoration.
- Build a form from a balloon or foam ball on top of a small plastic bottle or crumpled-paper torso.
- Dip several layers of cheesecloth in liquid starch and drape them over the form, letting the ends hang long and uneven.
- Let it dry fully, then remove the form and tie each ghost to a branch with clear fishing line or thin black cord.
Quick Tip: Vary the lengths from about two to five feet. Uniform ghosts look like a store display; uneven ones look haunted.
2. A Pumpkin-Lined Walkway With Mixed Heights
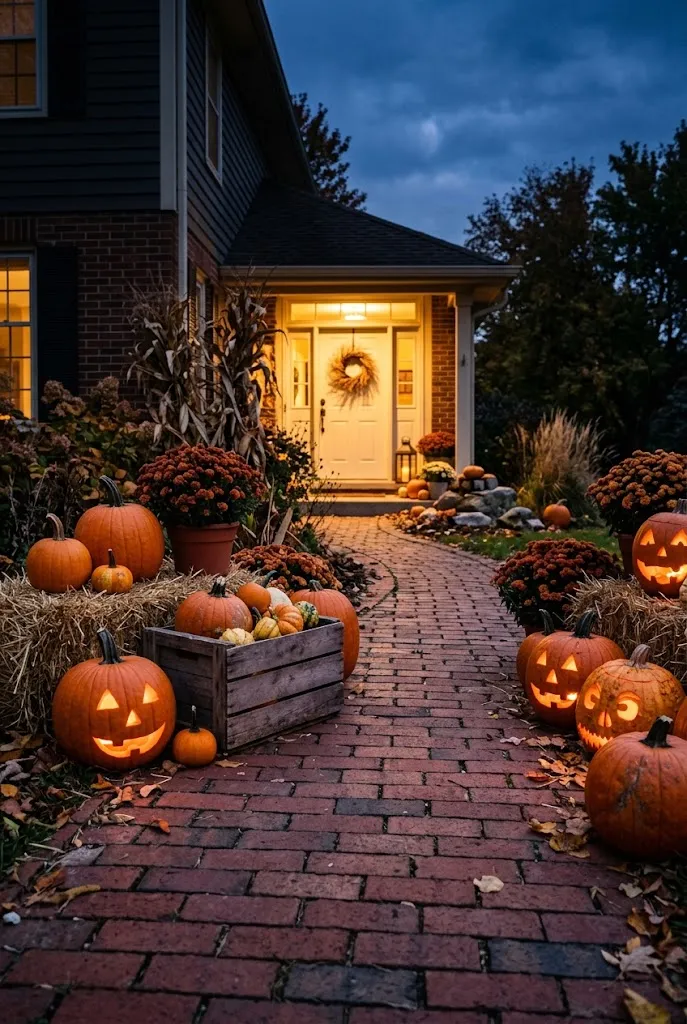
The walkway is the one part of your yard every visitor actually uses, so it earns your best lighting. Instead of one tidy row, group pumpkins in staggered clusters and raise some of them on hay bales, overturned crates, or stacked logs.
- Combine three sizes: a few large pumpkins, several medium, and a scatter of mini ones.
- Mix carved faces with plain pumpkins so the eye has places to rest.
- Use flameless LED candles or battery-powered string lights inside carved pumpkins.
- Add a few dried cornstalks or mums behind the clusters for depth.
Carved pumpkins generally begin to soften within several days, so carve closer to Halloween, or use whole pumpkins early and carve in the final days. Leave at least a clear three-foot path, especially if children in costumes will be walking it after dark.
3. A Foam Tombstone Graveyard
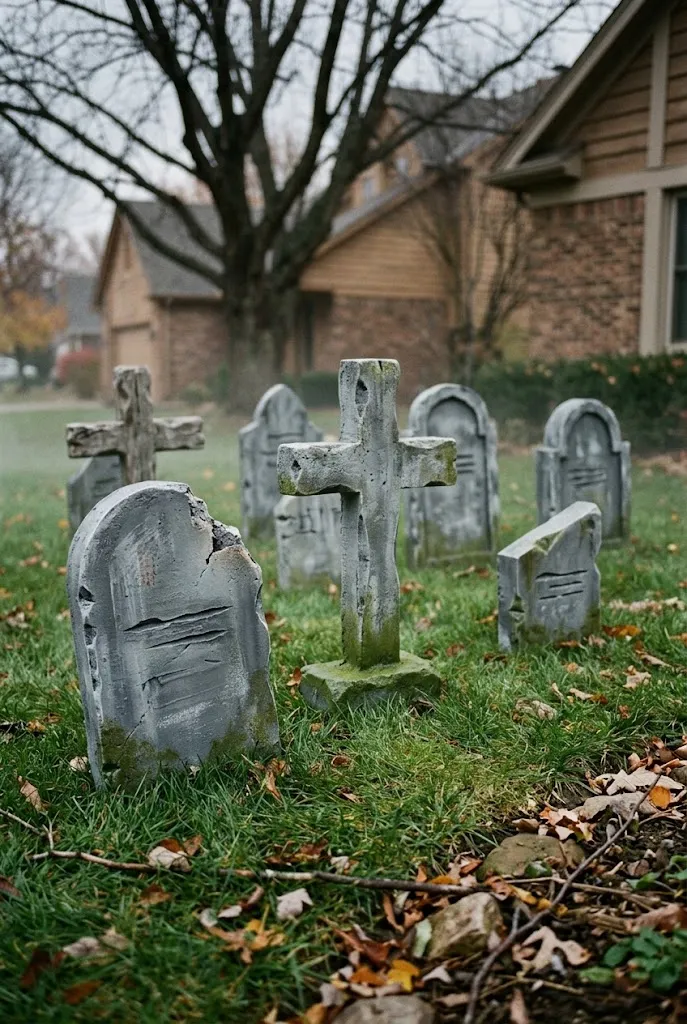
Tombstones are the backbone of most yard haunts, and rigid insulation foam makes them cheap, light, and easy to shape. The trick to a convincing graveyard is variety in silhouette: rounded tops, cross shapes, tilted slabs, and a couple of broken corners.
| Material | Effect / Advantage | Best Fit |
|---|---|---|
| Insulation foam board | Carves cleanly, takes spray paint and texture well | Most realistic look for the effort |
| Corrugated cardboard | Nearly free, but absorbs moisture | Dry weather and quick one-night displays |
| Scrap wood | Sturdy and wind-resistant | Larger headstones that need to last |
Paint the foam with a base of dark gray, then dry-brush lighter gray and a little green or moss tones near the base for age. Foam-safe paint matters here, since some spray paints dissolve foam. Anchor each piece with wooden stakes or rebar behind it, because foam catches wind.
4. A Rope Spider Web Across the Shrubs
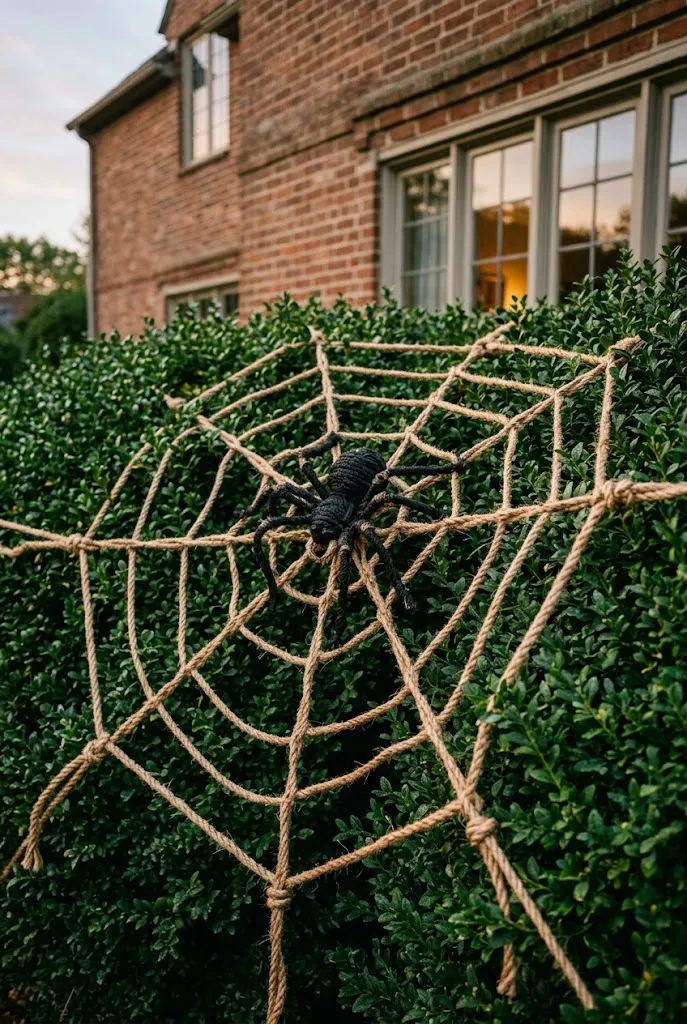
A giant web turns an ordinary hedge into a creature’s lair. Sisal or jute rope reads far better than store-bought stretch webbing at a distance, because it has real thickness and holds a defined geometric shape.
Anchor several long strands from a fixed point on the shrub outward to stakes in the ground, like the spokes of a wheel. Then work in a spiral, tying short lengths between spokes with a simple knot. Keep spacing slightly irregular; perfect symmetry looks manufactured.
A large spider made from black pipe cleaners, a foam ball body, or even cut cardboard sits best near the center or partway down one strand, as though it’s traveling.
Editor’s Note: Choose a dry, still day to build this. Wind pulls a half-finished web out of shape, and damp rope sags.
5. Skeletons Lounging in Lawn Chairs
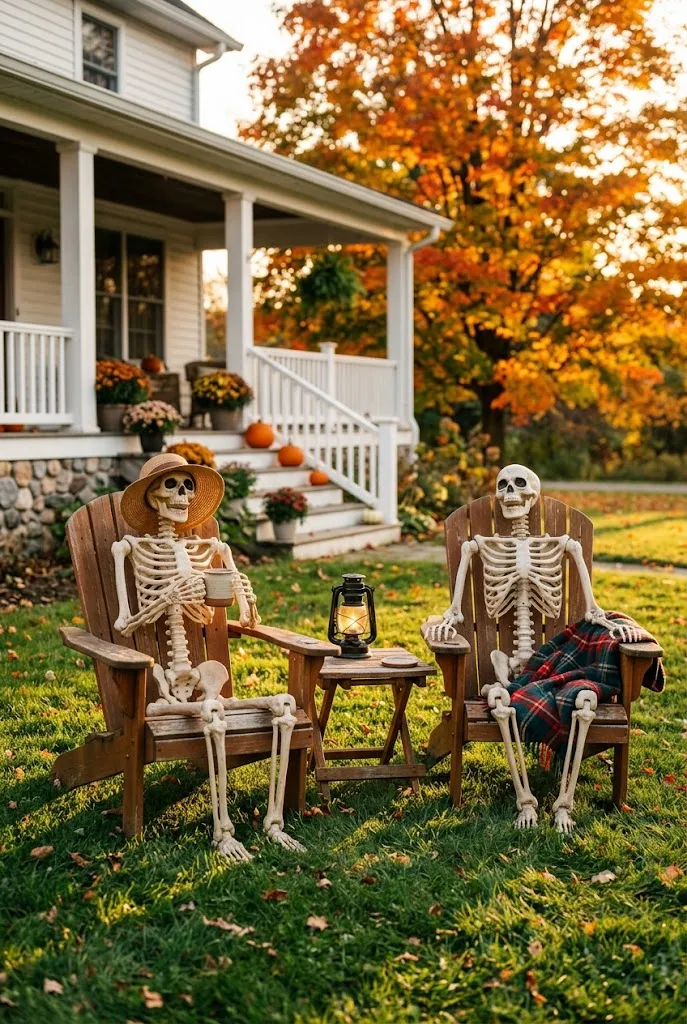
Few ideas get a bigger reaction for less effort than a skeleton settled into a chair as though it forgot to leave the party. The humor comes from staging: a drink in hand, a hat, a blanket over the knees, a book, or a pair of sunglasses.
Do:
- Wire the joints with zip ties or floral wire so the skeleton stays seated in wind.
- Put chairs at a slight angle toward each other, like a conversation.
- Add small props, such as a mug or a newspaper, that suggest what they were doing.
Don’t:
- Leave lightweight plastic skeletons unsecured; they topple or blow across the yard.
- Crowd the scene with too many props, which hides the joke.
A pair of skeletons with a small side table and a lantern makes a tidy vignette that works near the porch steps.
6. A Glowing Cauldron Centerpiece
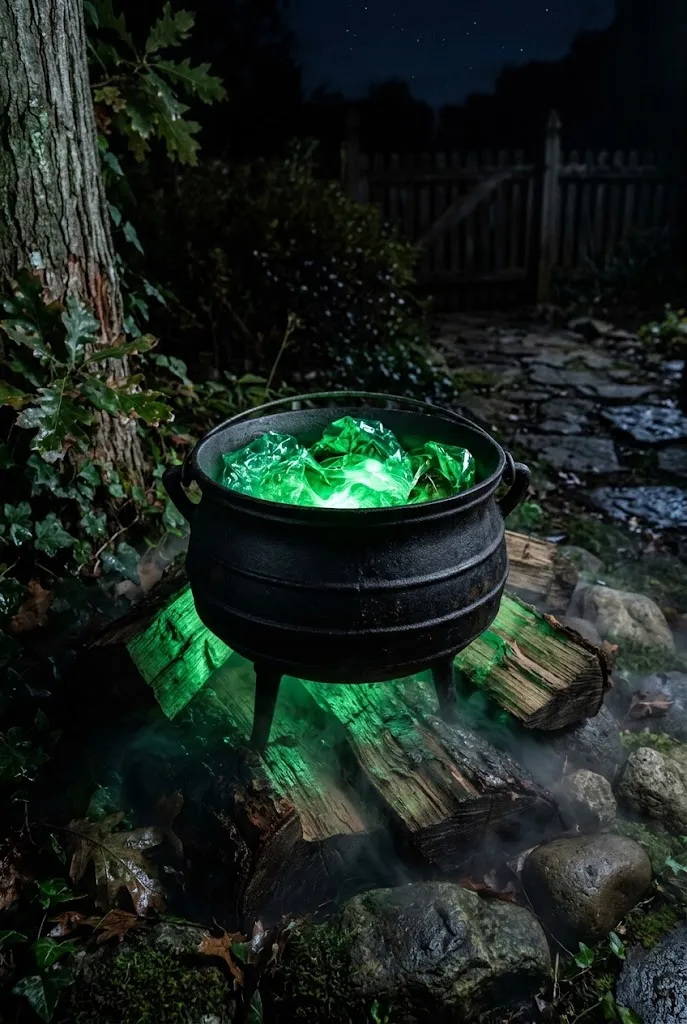
A black cauldron on a bed of logs or stones gives the yard a clear focal point, especially when it appears to glow from within. Set a battery-powered LED, preferably green or orange, in the bottom, then fill the top with crumpled cellophane, plastic wrap, or green fiber-fill to suggest bubbling liquid.
- Spray a plastic planter or bucket matte black for a budget-friendly cauldron.
- Light it with a battery LED rather than candles or open flame.
- Add a few skulls or branches poking over the rim.
- Surround it with real logs, stones, or dried leaves.
If you want fog, use an outdoor-appropriate fog machine placed safely away from the walkway, and avoid dry ice where children may reach it, since it can cause burns and needs careful handling.
7. Milk Jug Ghost Lanterns Along the Fence
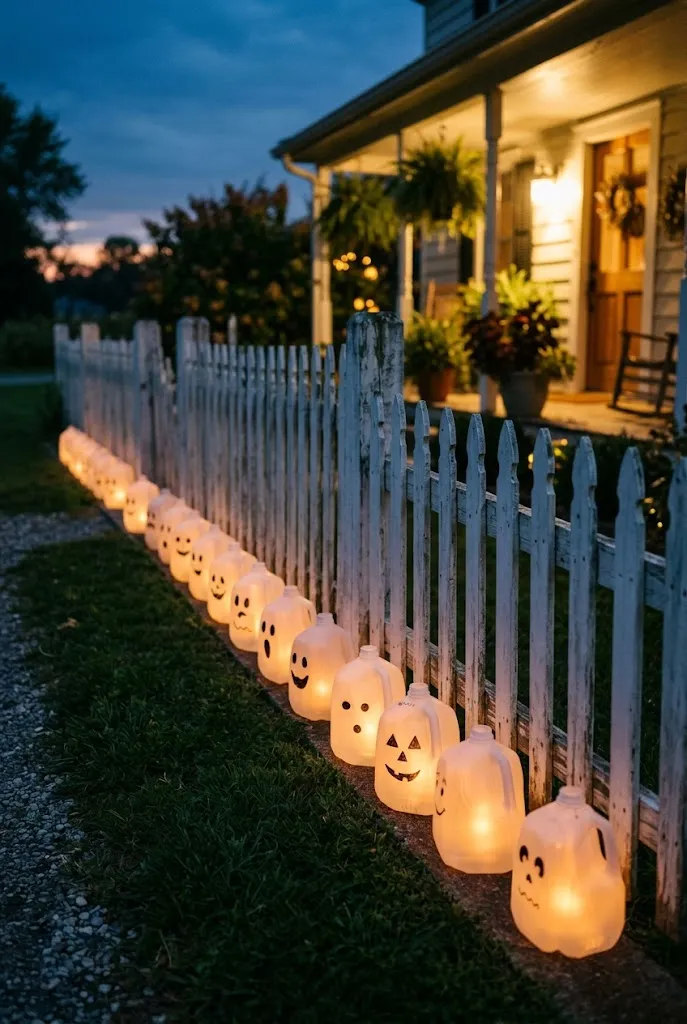
Empty gallon jugs, rinsed and dried, become soft, glowing ghosts when a face is drawn on with a black permanent marker and a battery light or string lights are placed inside. Their strength is repetition: a dozen along a fence line or driveway edge create a rhythm that carries the eye toward the house.
- Clean and dry the jugs, leaving the caps on or removing them to feed in a string of lights.
- Draw simple faces, varying expression and size so no two match.
- Light them from inside and set them along the fence or on short stakes.
Because the jugs are lightweight, add a few handfuls of sand or small stones in the bottom to keep them upright. They’re one of the more accessible ideas on this list, and one of the best for getting kids involved.
8. Crows Perched on Fence Posts and Branches
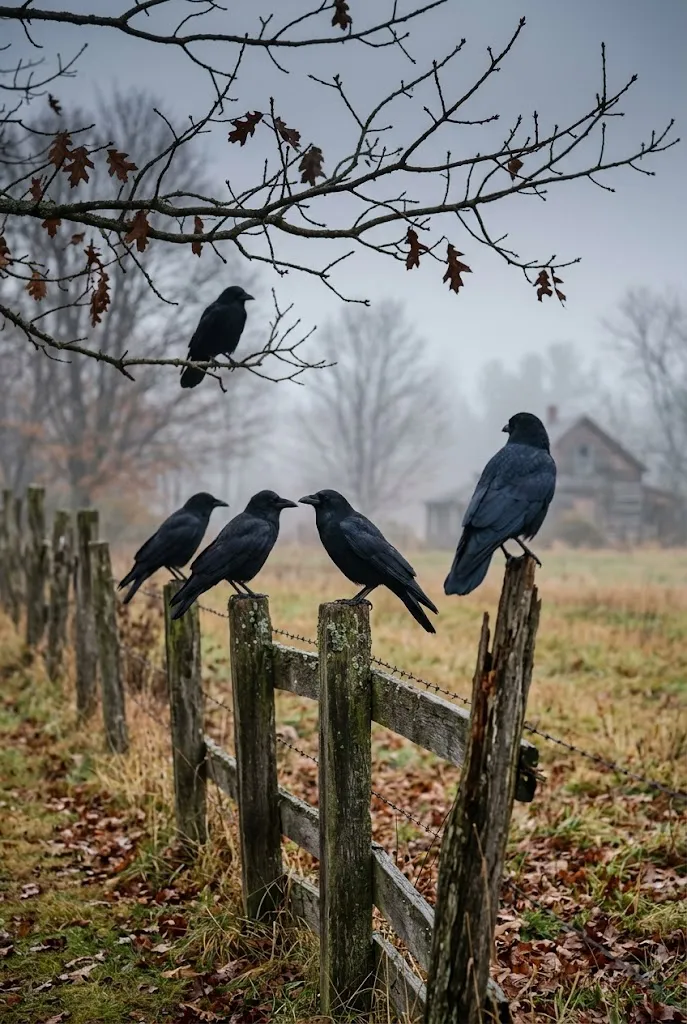
Black crows are one of the simplest ways to add atmosphere without adding clutter. Craft-store crows run inexpensively, and a small flock perched on the top of fence posts, the edge of a mailbox, a roof corner, and a bare branch reads as a single ominous presence.
Odd numbers work best. Place three on one fence run and two in a nearby tree, with one crow turned away from the rest. Secure each with hot glue, wire, or a screw into an appropriate surface so they stay put in wind. Rubbing a little matte gray paint or dry-brush into the feathers takes the plastic shine off.
Quick Tip: Skip the crows in a bright-colored garden border. They land best against bare wood, black iron, or leafless branches.
9. Mummy-Wrapped Shrubs and Porch Columns
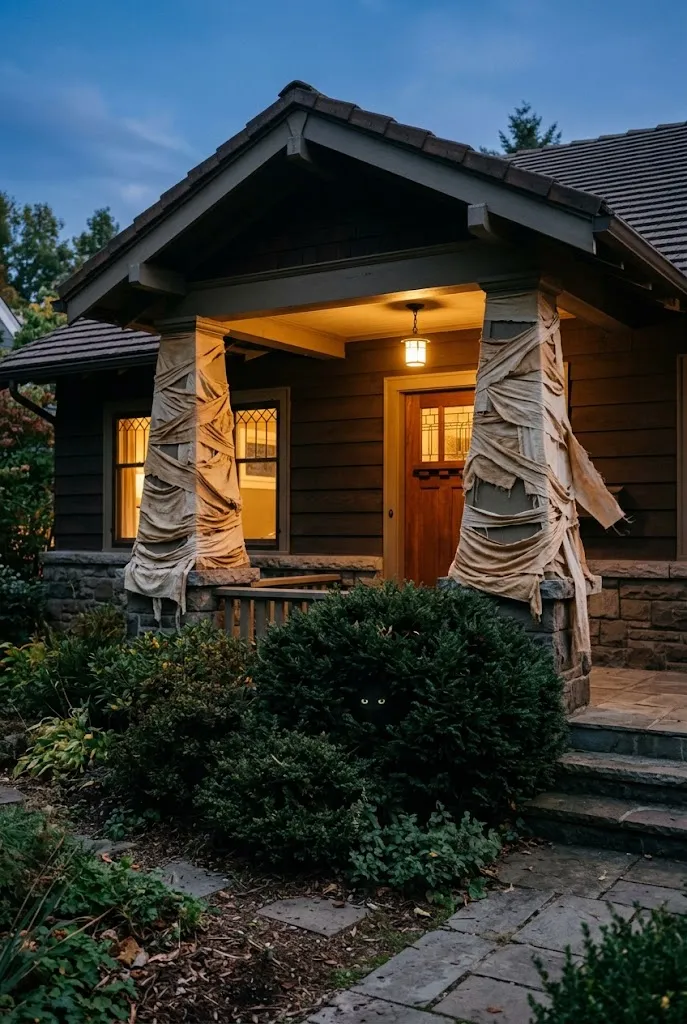
Wrapping something you already own in gauze or strips of torn white fabric costs very little and produces a surprisingly dramatic result. Foundation shrubs, porch posts, a bench, and even a mailbox post all work.
Tear old white sheets or cheap muslin into two- to three-inch strips and wrap loosely at angles, overlapping unevenly. Leave a gap near the top of a shrub or post and tuck in two reflective eyes or small glowing circles, so something appears to be peering out.
Stain the strips lightly in cold tea or diluted brown paint first, and they’ll look aged rather than bright white. Avoid wrapping tightly around living shrubs for more than a couple of weeks; remove the strips afterward so branches can breathe.
10. A Black-Painted Picket Fence Lit From Below
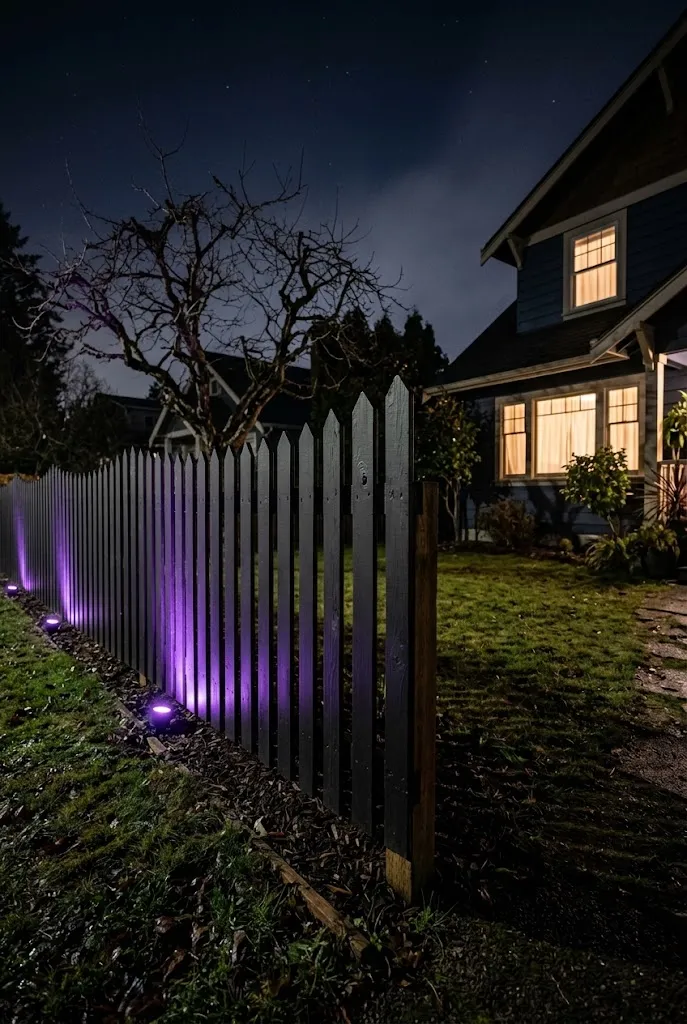
Painting an existing fence or a short temporary fence section black is one of the more dramatic mid-range changes you can make. Against a green lawn, black pickets look sharp and a little sinister, and they give you a natural place to anchor other props.
Use exterior-rated matte black paint on a fence you own, and consider a removable approach, such as clip-on picket panels or painted lattice, if you rent. Then place low outdoor-rated uplights at the base, in purple or deep red, aimed upward so the shadows of the pickets stretch across the lawn.
| Light Color | Mood | Pairs Well With |
|---|---|---|
| Purple | Mysterious, classic haunted look | Fog, bare branches, black crows |
| Green | Eerie, witch-themed | Cauldrons, spider webs |
| Warm orange | Friendly, harvest-leaning | Pumpkins, hay bales |
11. A Wooden Coffin Prop Half-Open in the Grass
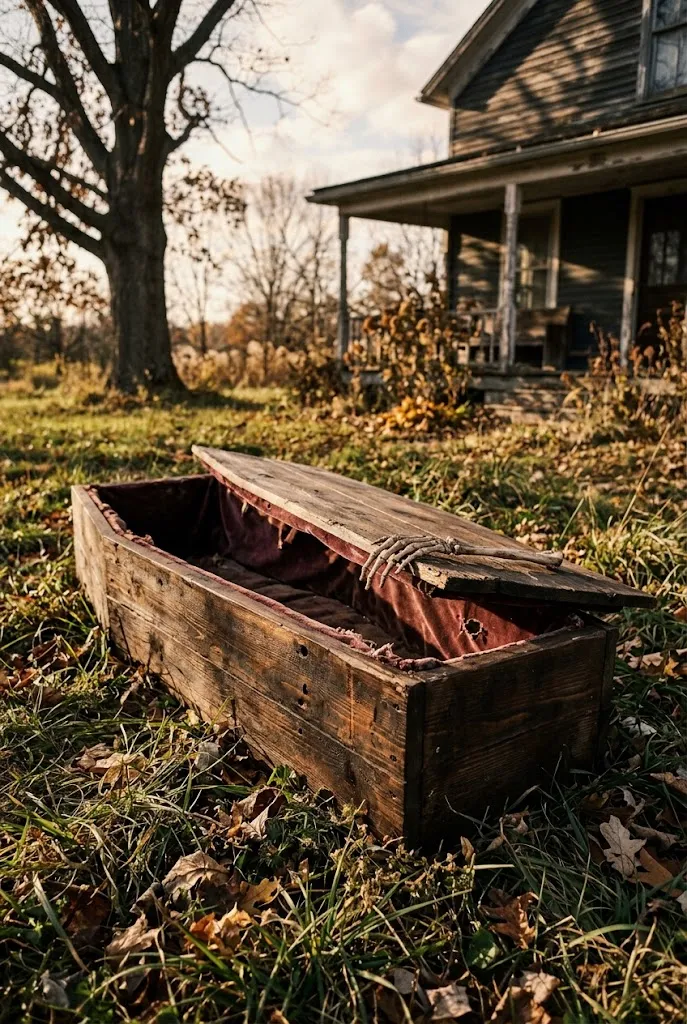
A coffin looks like a major build, but a simple one is basic carpentry: a long, tapered box with six sides, built from inexpensive lumber or plywood, stained dark or painted black. Prop the lid slightly open with a hand or a sleeve of old fabric reaching out.
- Cut six panels in a tapered hexagon shape, wider at the shoulder and narrower at the foot.
- Screw or nail the sides to a base, then add a loose lid that rests on top.
- Stain with dark walnut, then dry-brush with a lighter brown for age.
- Line the inside with torn fabric.
Common Mistake: Leaving the coffin lid loose near a walkway. Better Approach: Secure it with hinges or wire so children and wind can’t shift it. A stable lid is easy to forget and matters for safety.
12. A Floating Lantern Tree
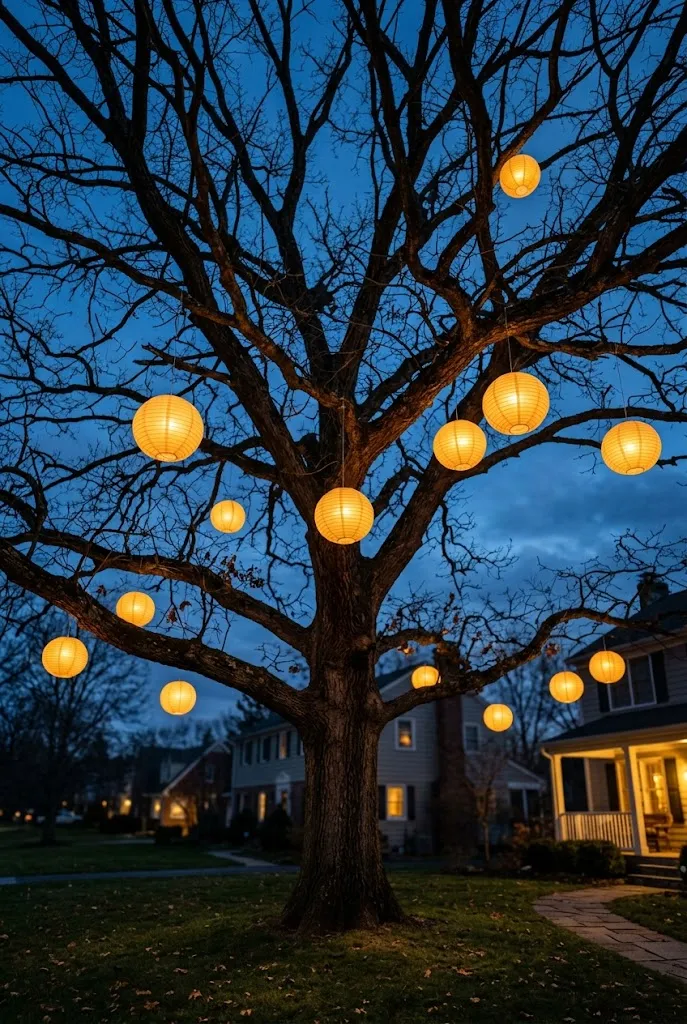
Hanging lanterns from a tree at varied heights creates the feel of floating light with very little effort. Use inexpensive paper lanterns or battery-powered lanterns, and hang them with clear fishing line from different branches so they appear to hover.
Use lanterns in a restrained palette, such as warm white, amber, or deep orange, rather than every color at once. Cluster some close together and leave other gaps, which lets the tree’s silhouette show. Use outdoor-rated or battery-powered lights only, and avoid open flames anywhere near paper or branches.
An older, bare tree works especially well, since its structure shows off the lantern spacing. For a leafy tree, hang lanterns slightly lower so they aren’t buried in foliage.
13. A Scarecrow With a Bit of a Twist
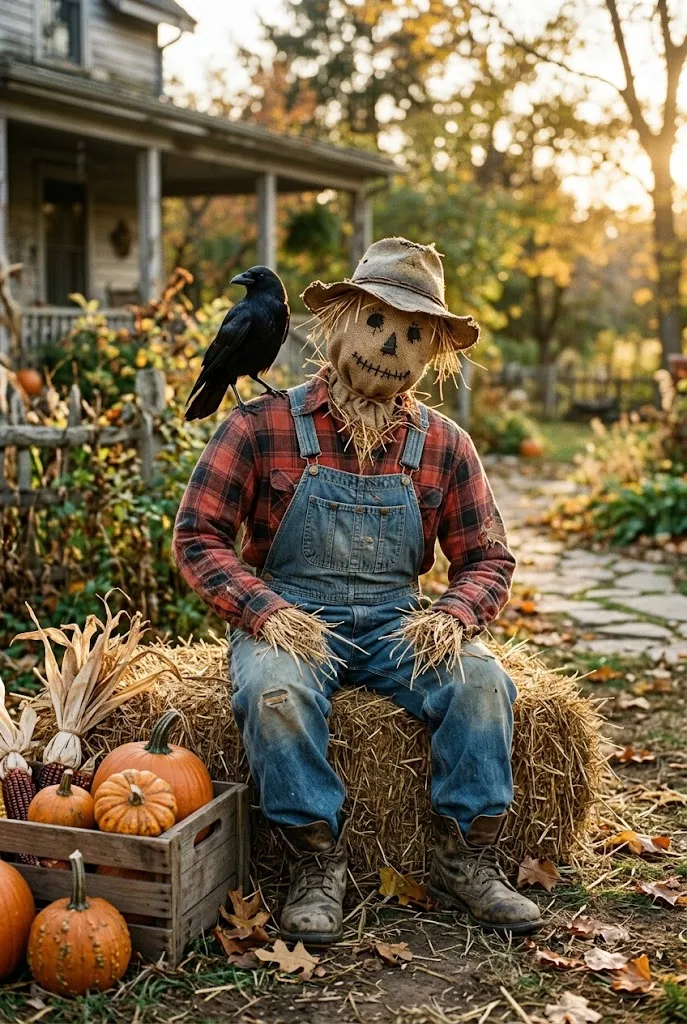
A scarecrow is a seasonal classic that works from late September through Thanksgiving, which makes it a good investment if you’d rather not take everything down on November 1. Build one from a wooden cross frame or sturdy stake, stuffed old clothes, and a burlap or pillowcase head.
- Build a T-shaped frame from two lengths of lumber, secured with screws.
- Dress it in old flannel and jeans, stuffing with straw, leaves, or crumpled newspaper.
- Add a burlap head and a hat, and then give it a twist: crooked posture, glowing eyes, or a crow on its shoulder.
Seat it on hay bales with a few cornstalks and pumpkins at its feet, and it reads as a deliberate harvest display that tips slightly spooky.
14. A Modern No-Carve Pumpkin Vignette
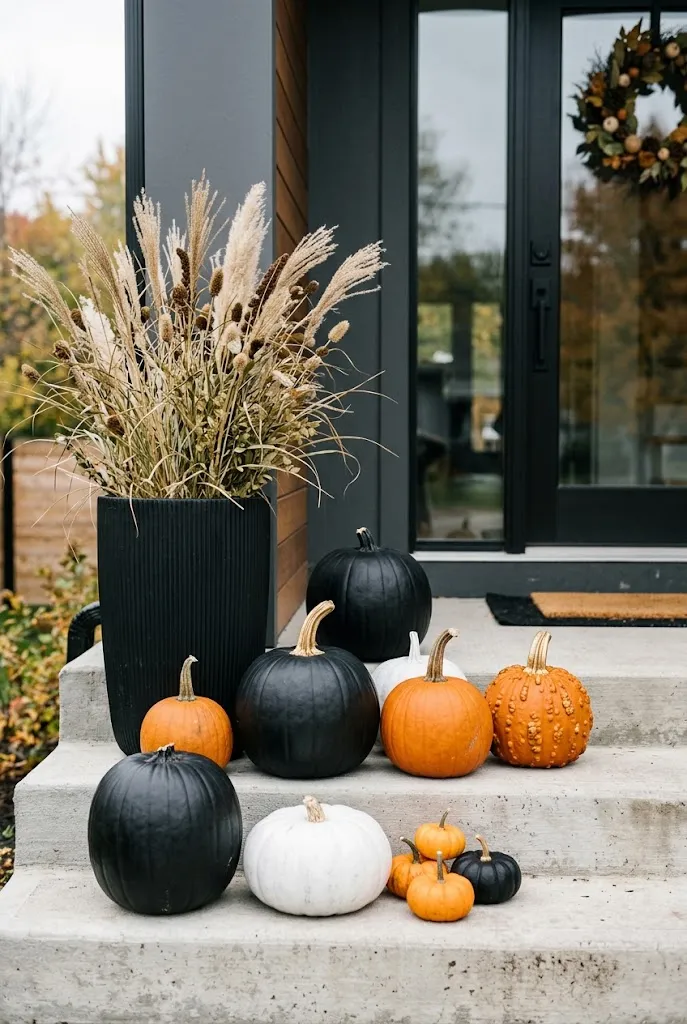
Not every yard needs to look like a haunted house. A restrained palette of white, black, and one metallic accent gives a modern, almost gallery-like version of Halloween that suits clean-lined homes.
- Paint pumpkins in matte black and chalky white, leaving some natural orange for contrast.
- Add a few gold-painted stems or a gold-leafed pumpkin.
- Group them on a low wood bench or wide front steps with grasses or dried branches.
- Add simple line patterns with paint pens or masking tape instead of carved faces.
No-carve pumpkins last far longer than carved ones, so they’re a practical choice if you decorate early. They also work well for renters and apartments, where space is limited to a stoop or entry steps.
15. Skeletal Hands Rising From the Lawn
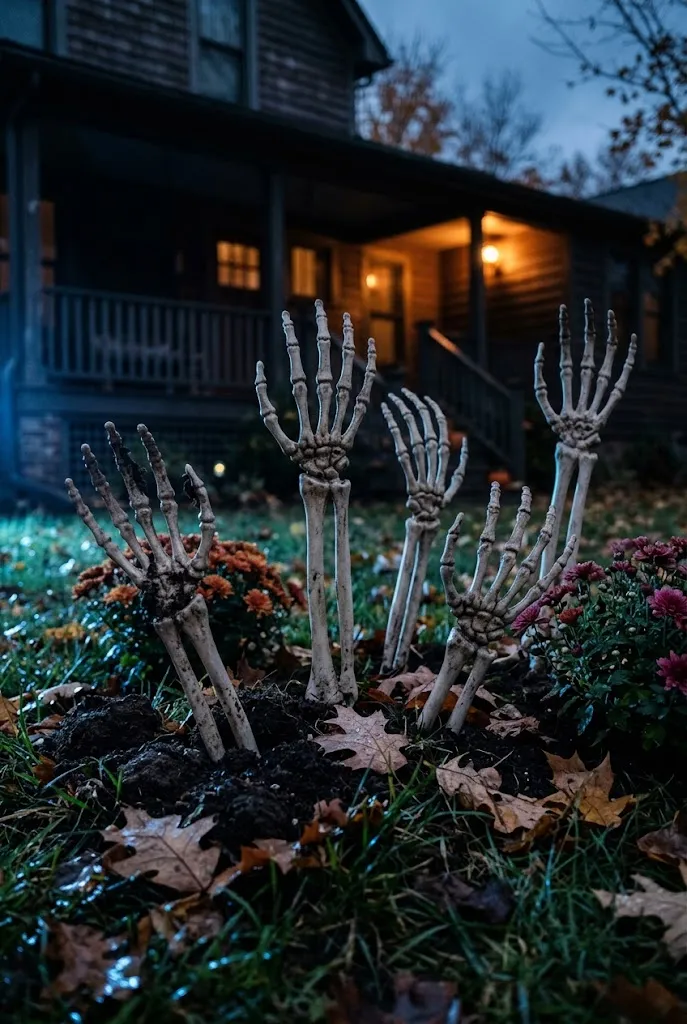
A group of skeleton hands emerging from the grass is one of the simplest ways to suggest something underground. Make them from PVC pipe stakes with foam or plastic hands attached, or buy a pack of plastic skeleton hands and mount them on dowels.
Cluster four to six hands in a loose patch, varying the heights and angles. Add a little mulch, soil, or dry leaves at the base to hide the stakes.
Quick Facts Best For: Small lawns, beds, and areas near the walkway Investment: Accessible Visual Effect: Subtle, creepy, works in daylight and at night
Editor’s Note: Before pushing stakes into the ground, check for buried utility lines. In the U.S., calling 811 before digging is the standard way to have them marked, and shallow stakes are usually fine, but deep stakes and heavy anchors should wait for that call.
16. Glowing Eyes Watching From the Hedge
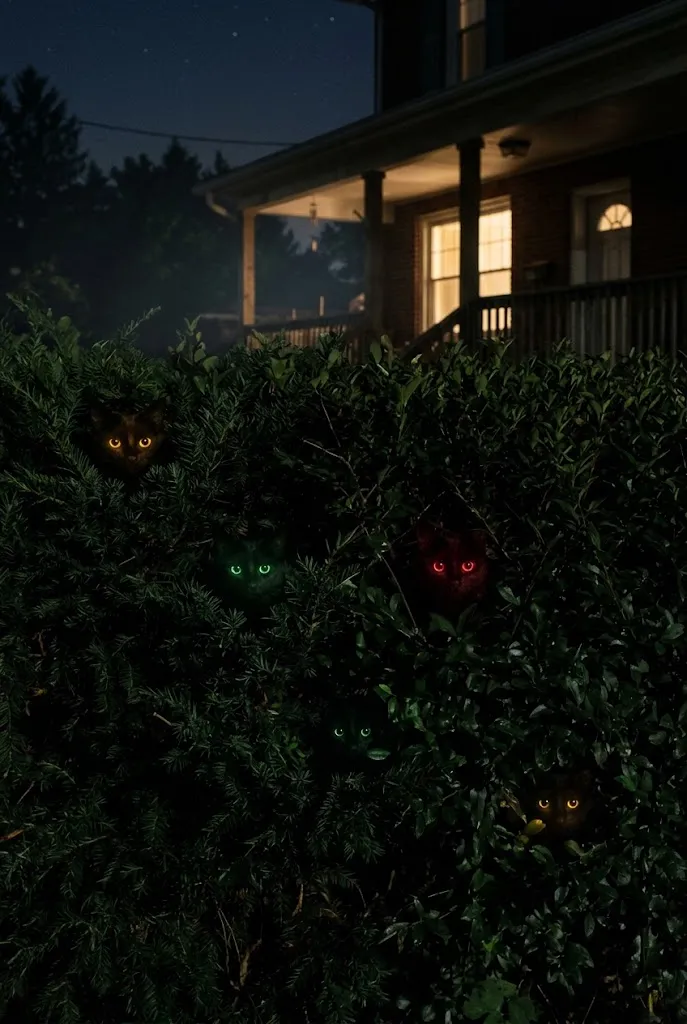
Few things draw attention for so little effort. Cut pairs of eye shapes from cardboard or use ping pong balls and place a small battery light behind each, then tuck them deep into a hedge or shrub so only the glow shows.
Vary the sizes and colors: a couple of small yellow pairs, one large green pair, maybe a single red pair near the bottom. Keep them low and irregular. They look best at night, so use them as a small surprise rather than a main feature.
Check that the hedge is dense enough to hide the battery pack, and use timers or switches so you aren’t replacing batteries every other night.
17. A Swarm of Black Bats Over the Porch
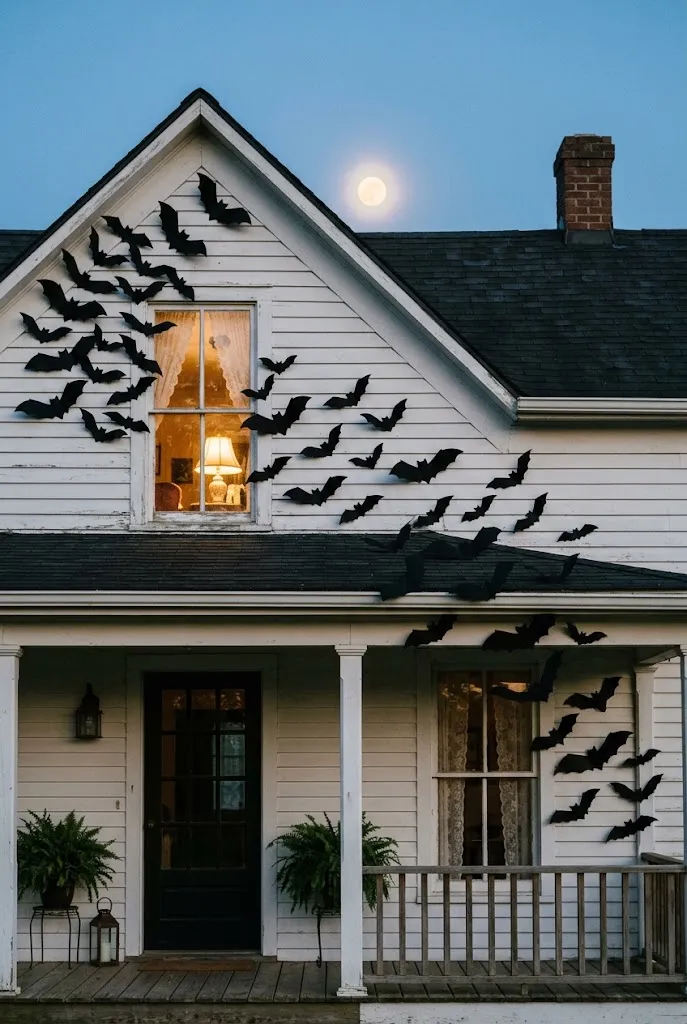
Bats cut from black cardstock, craft foam, or felt look best in groups of twenty to fifty. Cluster them thickly near one side of a window or porch roofline, then let them thin out as they spread across the facade, as though a swarm has just launched.
- Cut in several sizes from about three to ten inches.
- Fold the wings slightly to add dimension.
- Attach with removable adhesive putty on siding, or hang on fishing line from the porch ceiling.
- Use matte black material so light doesn’t reflect as plastic shine.
The effect depends on density in the middle and scatter at the edges. A uniform grid looks like wallpaper. A handful scattered evenly looks like an afterthought.
18. A Plywood Haunted House Facade
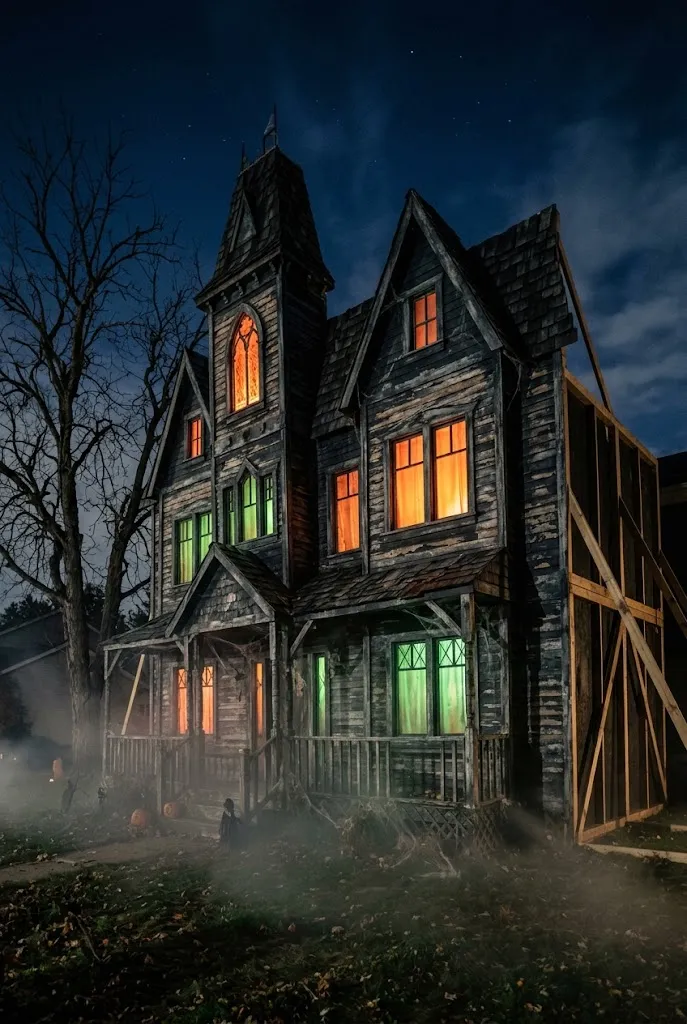
This one takes the most time, and it’s the most memorable. A flat facade made from plywood panels, cut into the silhouette of a crooked mansion with turrets, a sagging porch, and a pitched roof, can stand in the yard as a backdrop or even cover a garage door.
- Sketch the silhouette on a grid, then enlarge it to full scale on plywood or lightweight panels.
- Cut windows and doors, then back them with colored translucent film or tissue.
- Paint the facade in matte black and charcoal, with weathered highlights.
- Place a light behind each window, and brace the facade securely from behind.
Editor’s Note: Large panels act like sails. Brace and stake them thoroughly, and take them down if high winds are forecast.
19. A Potion Apothecary Trick-or-Treat Station
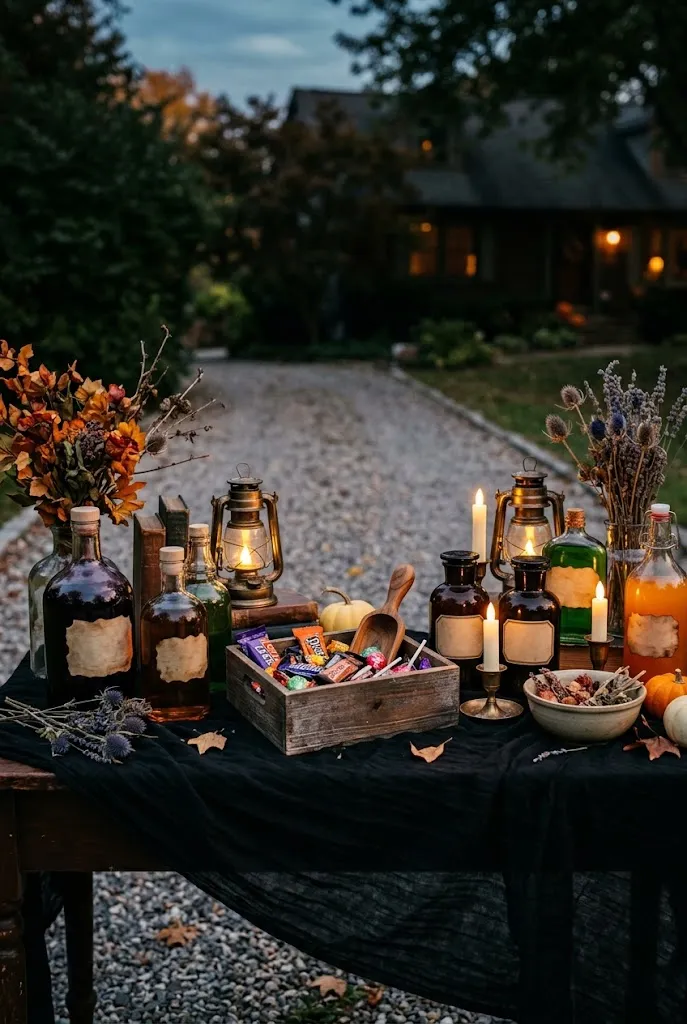
A decorated candy table at the end of your driveway keeps foot traffic away from your steps and gives the whole display a purpose. Dress a simple folding table or old console in a black cloth, then fill it with apothecary-style bottles, jars, and candles.
- Recycle glass bottles and jars, then fill them with colored water, dyed rice, or craft glitter.
- Print or hand-write labels in a handwritten style.
- Use flameless candles, a few dried flowers, and an old book or two as props.
- Set the candy in a cauldron or wooden crate at the front.
Keep the walkway wide enough to avoid a crowd bottleneck, and light the table well. Good lighting matters more here than almost anywhere else in the yard, since visitors will be reaching for candy in the dark.
20. A Gothic Entrance Arch With Hanging Lanterns
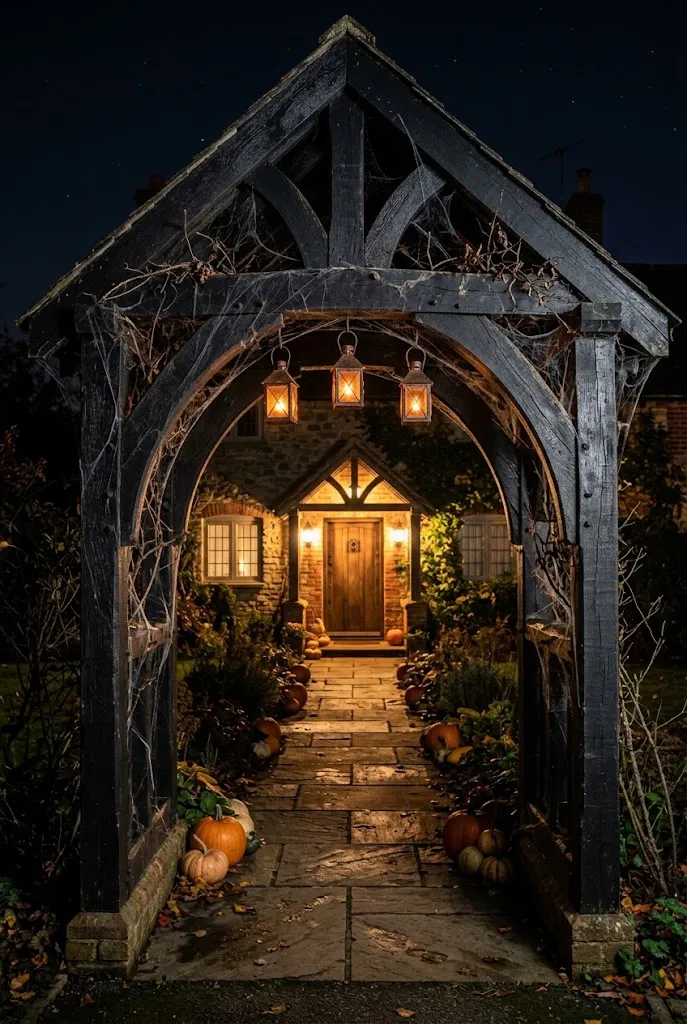
An arch at the start of your path, built from lumber, PVC pipe, or salvaged metal, turns an ordinary walkway into a threshold. Build two vertical posts with a curved or peaked top, paint them black, then drape the structure with cobwebs, dried branches, and a few hanging lanterns.
For a sturdier version, use pressure-treated posts set in the ground or in weighted planters, and a top beam built from two-by-fours. For a lighter, more temporary version, use bent PVC pipe over rebar stakes.
This is the piece guests will pass under, so keep the clearance generous, at least seven feet, and secure everything firmly. It also makes a strong photo spot, which tends to get shared.
Safety Checklist for Any Yard Haunt
A few habits keep a spooky yard from becoming a hazard:
- Use outdoor-rated extension cords and lights, and keep connections off wet ground.
- Choose battery or LED lights over open flames anywhere near paper, fabric, or foliage.
- Keep the main walkway clear and well lit, with no trip hazards from cords or stakes.
- Check for buried utilities before driving deep stakes, and call 811 where required.
- Secure large props against wind, and take them down if storms are forecast.
- Keep flashing lights and sudden sound effects modest, so the display stays enjoyable for neighbors and young visitors.
Where to Start
You don’t need all twenty. For a first-time display, pick one focal point, such as the graveyard, the haunted facade, or the entrance arch, and add two supporting layers: lighting, and one or two small details like crows or glowing eyes. Work from the curb back toward the house, checking from the sidewalk at dusk to see what actually reads from a distance. Then add more over the following weekends, so the yard builds toward Halloween night instead of being finished in a rush.