
20 Dining Room Ideas to Refresh Your Space Without a Full Renovation
Introduction
Most dining rooms don’t need to be gutted. They need a better light fixture, a rug that actually fits the table, or walls that stop disappearing into the background. The room usually has good bones; it’s the layers on top that feel tired, mismatched, or half finished.
These 20 dining room ideas are built around changes you can make without tearing out floors, moving walls, or hiring a full design team. Some take an afternoon and a gallon of paint. Some are renter-friendly. A few involve a moderate investment or a bit of carpentry, and a handful lean aspirational for anyone ready to commit to a more custom look. Pick the ones that fit your space, your budget, and how your household really uses the table, which, in many American homes, is for homework, bills, and takeout as often as holiday dinners.
1. Color-Drench the Room in Warm Clay
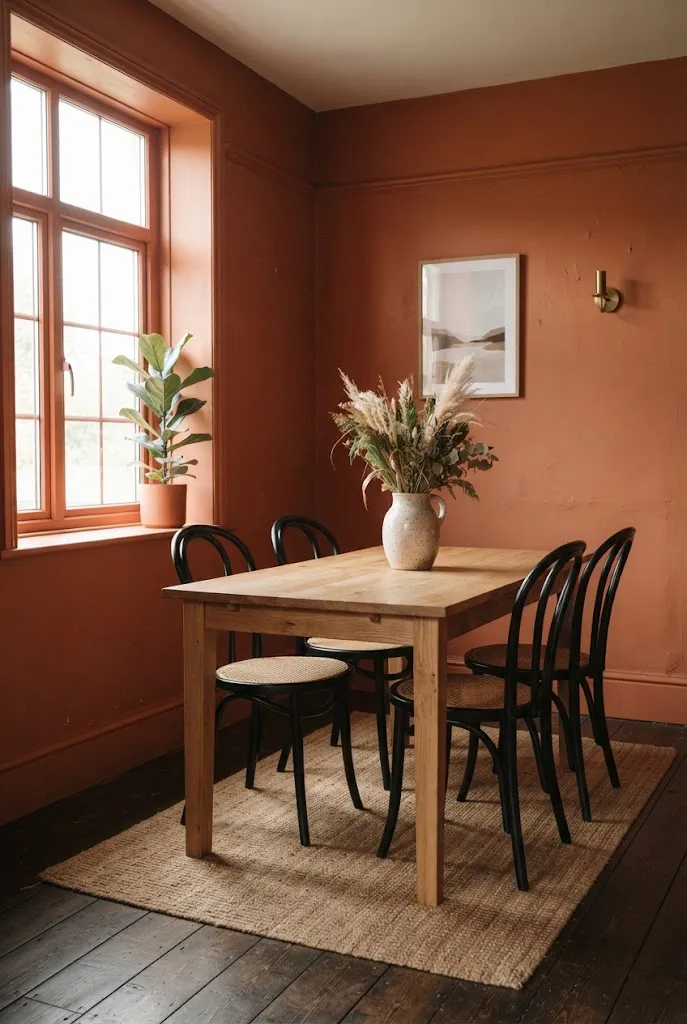
Painting the walls, trim, and even the baseboards in one warm, earthy shade makes a dining room feel deliberate rather than patched together. Clay, terracotta, and soft rust tones work especially well in rooms that get strong afternoon light, because the color glows instead of going flat.
Because everything is the same hue, small imperfections in older trim and walls recede. That’s a quiet advantage in older American homes where the woodwork has seen decades of repainting.
Quick Facts Best For: Rooms with decent natural light and plain, flat walls Investment: Accessible Visual Effect: A cocooning, enveloping backdrop that makes furniture stand out
Use a matte or eggshell finish on the walls and a slightly higher sheen on trim so the details still read. Test large swatches on at least two walls and look at them in morning and evening light before committing.
2. Hang an Oversized Linear Pendant Over the Table
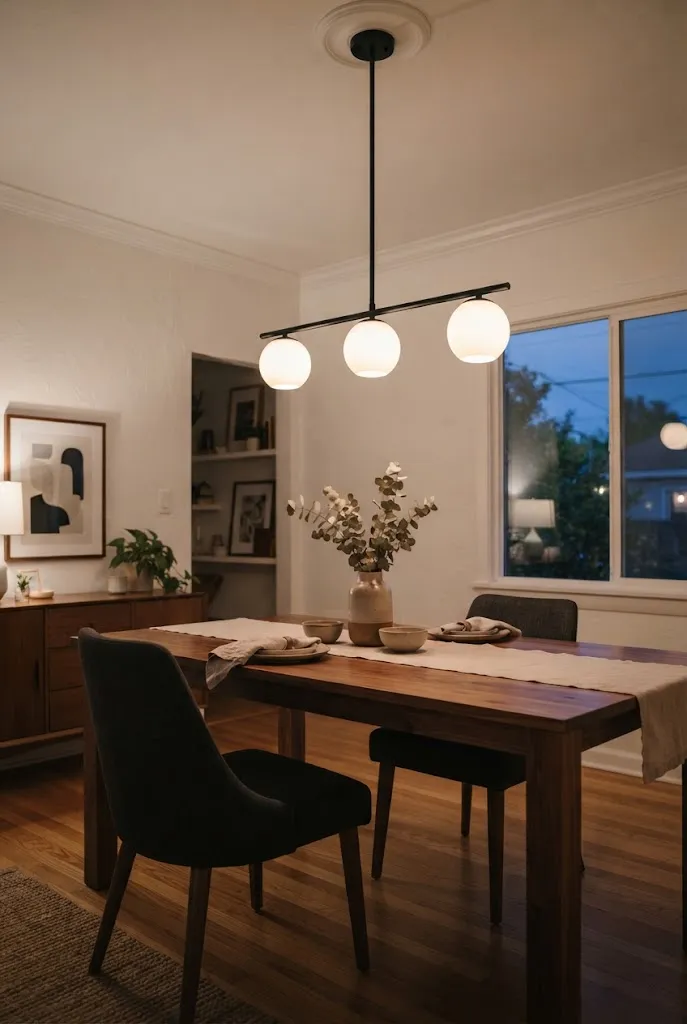
A fixture that’s too small is one of the most common reasons a dining room feels unfinished. A long linear pendant, or a cluster of three, visually anchors a rectangular table and gives the room a clear center.
A widely used guideline is to hang the bottom of the fixture roughly 30 to 36 inches above the tabletop, then adjust for ceiling height and sightlines. The width should generally be noticeably narrower than the table so people at the ends can still lean in comfortably without bumping their heads.
- Matte black or aged brass frames suit most paint colors.
- Woven or rattan shades soften harder, more modern rooms.
- Frosted glass diffuses light without glare for evening meals.
- A dimmer switch matters more than the fixture itself for mood.
If your current fixture is hardwired, a licensed electrician can swap it quickly. If you rent, a plug-in swag fixture hung from a ceiling hook is a more reversible option.
3. Add Picture-Frame Molding at Chair-Rail Height
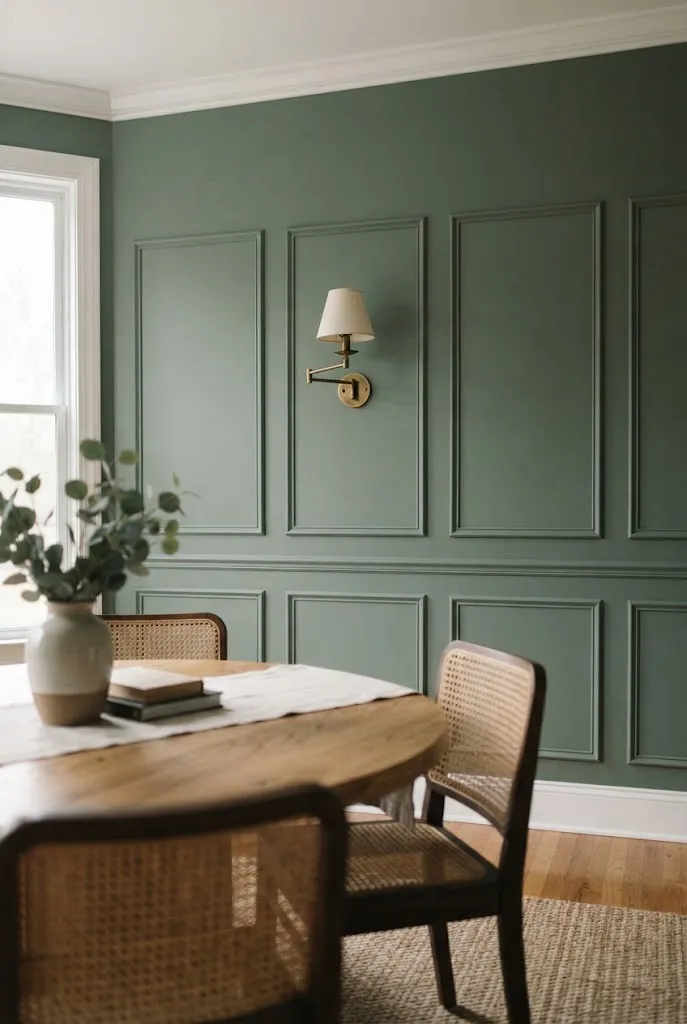
Applied molding is a way to give a flat wall the look of architectural paneling without touching drywall. Thin wood strips are nailed or glued to the wall in a grid of rectangles, then everything is painted one color, caulking the seams so it looks built-in.
It’s a moderate-effort project. It rewards careful measuring more than advanced skill, since spacing has to look even from every angle in the room.
- Mark a consistent height for the top rail with a level, so it’s straight even if the floor slopes.
- Space the vertical stiles evenly, leaving matching gaps at corners and doorways.
- Attach the molding with construction adhesive and a finish nailer or small brad nails.
- Fill nail holes, caulk every seam, and paint the whole wall in a semi-gloss or satin.
Common Mistake: Installing the pieces before checking how they land around outlets and window casings. Better Approach: Lay the whole pattern out with painter’s tape first, adjust around obstructions, then cut and install.
4. Use Peel-and-Stick Wallpaper Behind the Sideboard
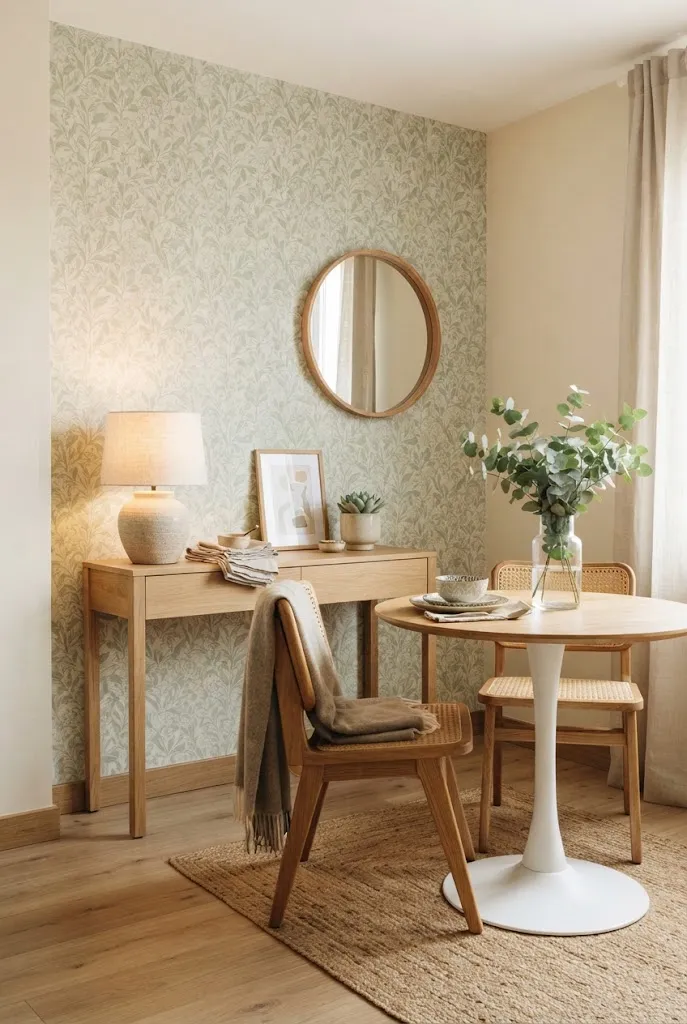
Renters and anyone cautious about permanent changes can still get a bold wall. A single wallpapered section behind a buffet or console tends to look intentional because the furniture frames it.
Botanical prints, grasscloth textures, and soft geometric patterns tend to hold up well in dining rooms, and they don’t fight with a busy table setting the way a loud pattern might. Pick a pattern with a scale that suits the size of the wall: very small prints can look busy from across a room, while very large ones may overwhelm a short wall.
Smooth walls give the best result. Textured or freshly painted walls can cause adhesion problems, so it’s worth testing a small hidden piece first and checking the manufacturer’s removal guidance.
Editor’s Note: A pattern with a clear vertical repeat helps the eye travel upward, which can make a standard 8-foot ceiling feel a bit taller.
5. Mix Chair Styles Around One Table
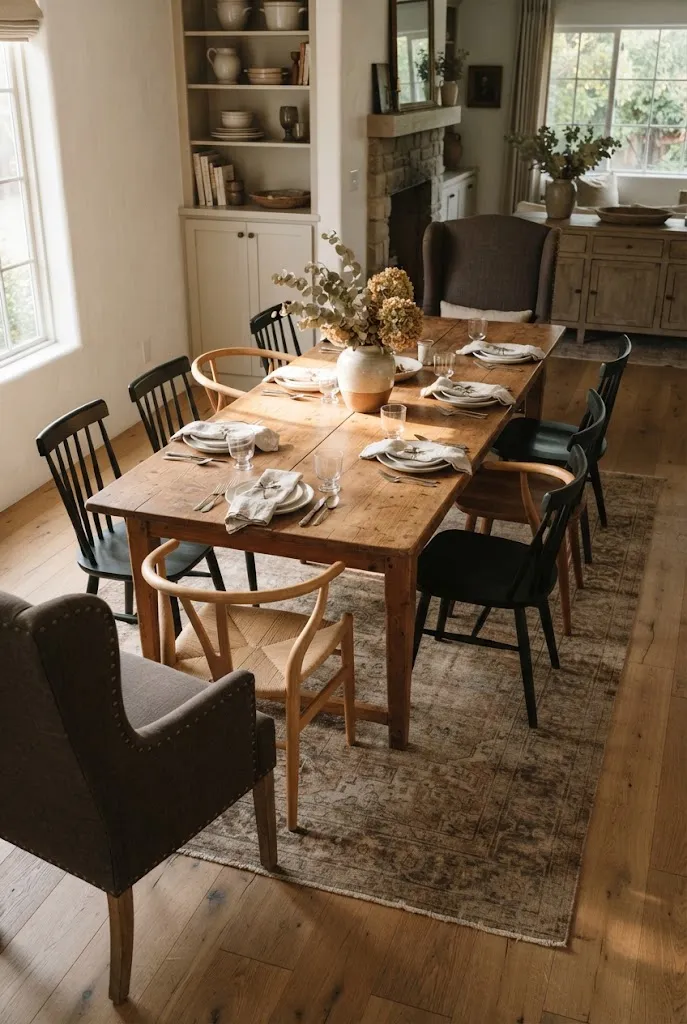
Matching sets are fine, but a deliberately mismatched table often looks more collected and personal. The trick is to keep one thing consistent, such as color, leg material, or overall height, while letting the shapes differ.
A common approach is to put sturdier armchairs at the head and foot, and lighter side chairs along the long sides. You might unify everything in black, or keep the wood tones close but vary the silhouettes.
| Approach | Effect | Best Fit |
|---|---|---|
| Same color, different shapes | Cohesive but relaxed | Modern or transitional rooms |
| Same shape, different colors | Playful, graphic | Casual family spaces |
| Two styles, alternating | Structured variety | Larger rectangular tables |
Thrift stores, estate sales, and online marketplaces are good sources, and a coat of paint can bring odd finds into line.
6. Anchor the Table With a Right-Sized Flat-Weave Rug
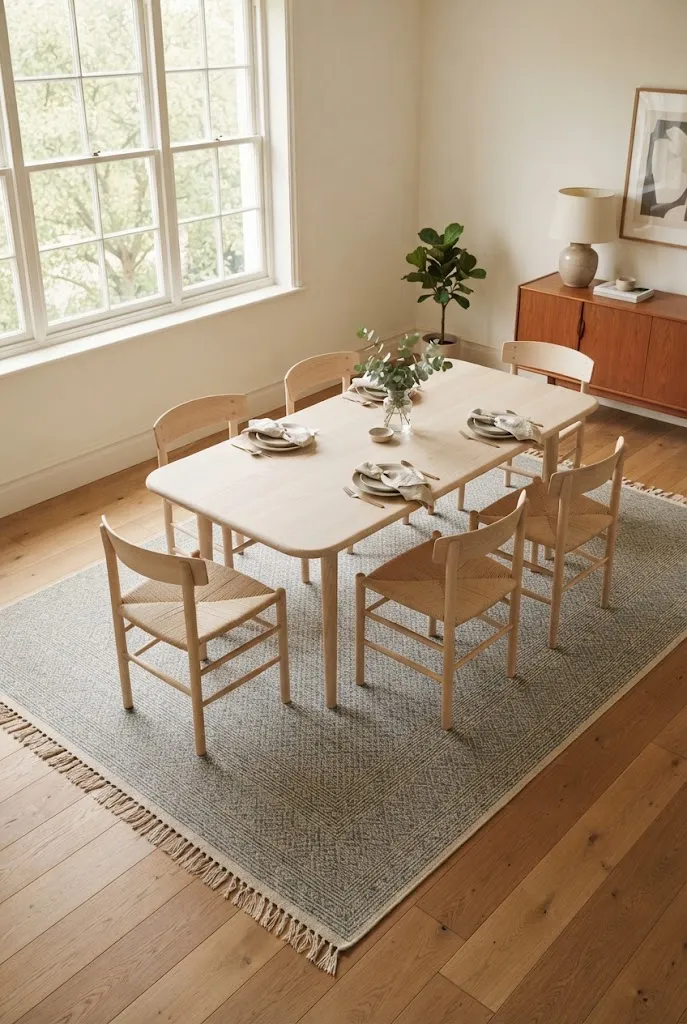
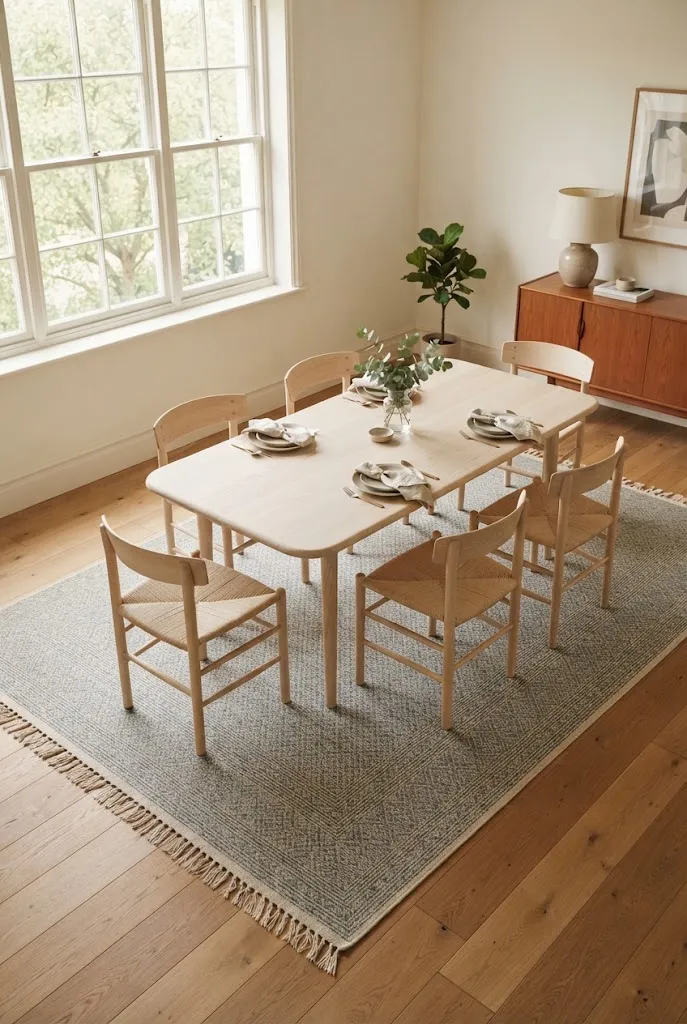
A rug that’s too small is one of the more noticeable mistakes in dining rooms. When someone pulls out a chair, the back legs shouldn’t catch on the edge.
A practical rule is to let the rug extend about two feet beyond the table on every side so chairs stay on it even when pulled back. Flat-weave and low-pile styles slide more easily under chairs and are easier to clean after spills than shaggy ones. Wool and wool blends tend to be more forgiving than delicate natural fibers, while polypropylene options handle heavy family use well.
Do: Add a rug pad so the rug stays flat and doesn’t bunch. Don’t: Choose a thick, plush rug that chair legs will constantly snag on.
Patterned or slightly tonal rugs hide crumbs better than solid light ones, which is a point worth weighing if you have kids or pets.
7. Build a Gallery Wall Above the Buffet
A wall of mixed art over a sideboard adds personality without a big spend. Plan the arrangement on the floor first, or trace each frame on paper and tape the templates to the wall so you can adjust before drilling.
Mix sizes and orientations, but keep a connecting thread. That could be a consistent frame color, a shared tonal range, or a recurring subject, like landscapes or vintage botanicals. Leave about two to three inches between frames for a tidy look.
- Vintage thrifted prints in matching black frames
- A few personal photographs printed in black and white
- A woven basket or small textile for dimension
- One oversized piece to anchor the cluster
Keep the lowest frames roughly six to eight inches above the sideboard so the grouping reads as one furnished unit rather than floating art.
8. Refinish a Tired Table in a Natural Matte Finish
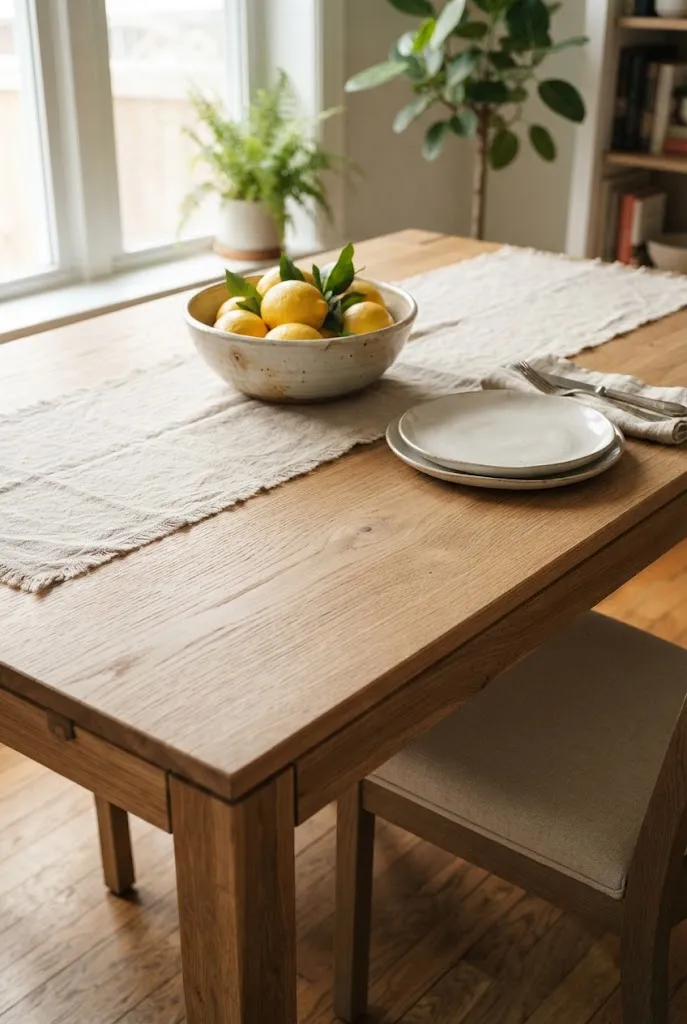
Scratched, glossy, or orange-toned wood tables can look like furniture from another decade. Refinishing is a project with real payoff, but it needs patience and proper ventilation.
- Check whether the top is solid wood or thin veneer. Sanding through veneer can’t be undone.
- Strip or sand the old finish, wearing a respirator rated for the products you use, and work in a well-ventilated space.
- Wipe the surface clean and apply a stain or a clear finish in thin, even coats.
- Let each coat dry fully, lightly sand between coats, and cure the finish before regular use.
A matte or satin water-based finish tends to look more current than a thick glossy one, and it’s easier to touch up. Test everything on the underside first.
Quick Tip: If the top is beyond saving, painting the base and leaving the top natural can refresh the piece with less labor.
9. Re-Cover Chair Seats in Performance Fabric
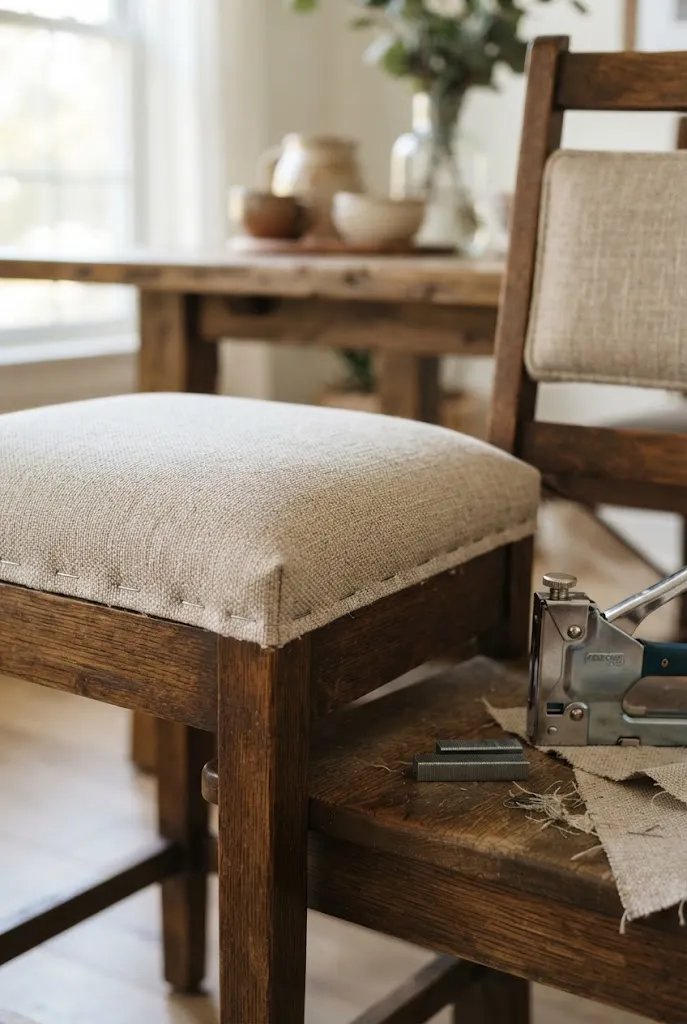
Stained or faded seat cushions can pull an otherwise good room down. Many dining chairs have drop-in seats that unscrew from the frame, so re-covering them is a manageable weekend project.
- Unscrew the seat from the chair frame.
- Remove the old fabric and staples, and check the foam for wear.
- Stretch new fabric tightly over the foam, stapling from the center outward.
- Trim excess fabric and reattach the seat.
Performance fabrics, such as tightly woven polyester blends or those labeled as stain-resistant, are practical for households with children. Check the product’s stated durability and cleaning instructions before buying.
Editor’s Note: Choose a pattern or texture that works with your rug. If the rug is busy, a solid or subtly textured seat usually looks calmer.
10. Hang Linen Drapes High and Wide
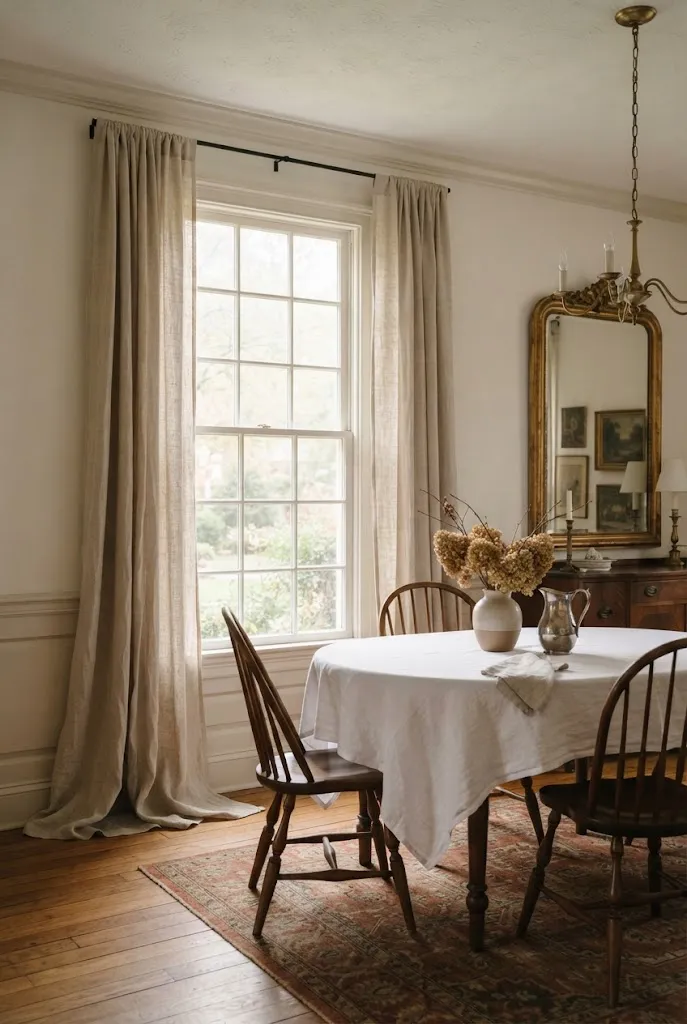
Window treatments are often the missing layer in a dining room. Hanging the rod a few inches below the ceiling, or at least well above the window frame, makes ceilings feel taller, and extending it beyond the casing on both sides lets the drapes frame the window rather than covering the glass.
Linen and linen-blend panels diffuse daylight softly and add a relaxed texture. If the room gets direct sun, a light lining helps protect furniture finishes and floors.
- Pick a length that just kisses the floor, or lightly breaks on it.
- Choose a color close to the wall for a quiet look, or a contrasting tone for definition.
- Use clip rings or a rod pocket depending on how you want the fabric to hang.
Be mindful of table placement. Heavy drapes right beside a chair can feel crowded, so keep fabric clear of the walking path.
11. Lean an Arched Floor Mirror Against the Wall
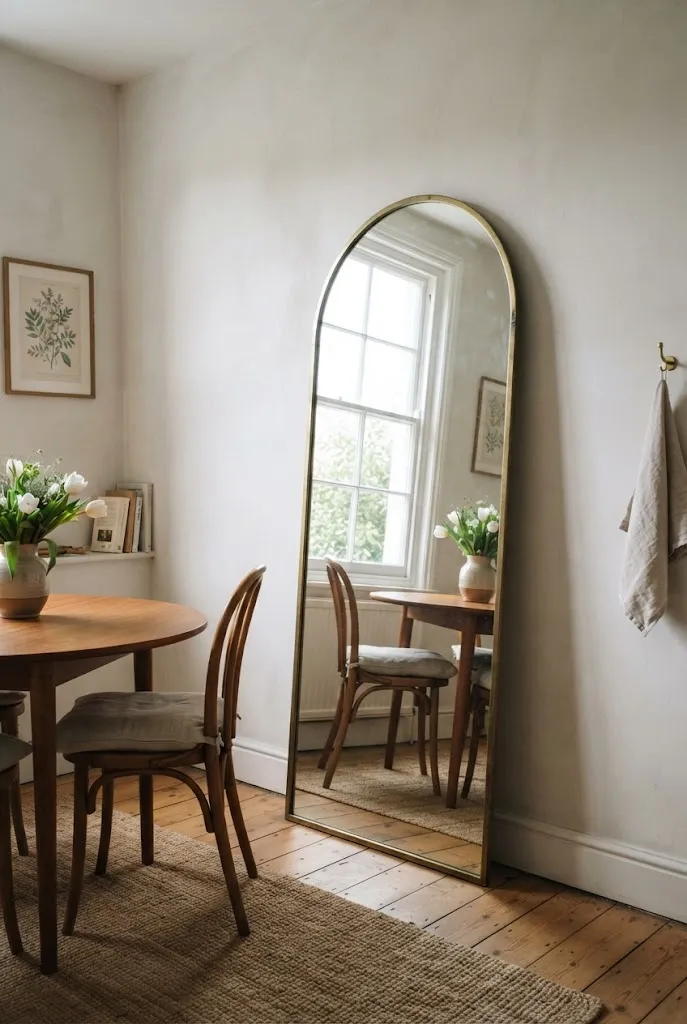
A large mirror bounces light around the room and visually extends narrow spaces. Leaning one against the wall is a simple way to add depth without drilling, and the arch shape adds a softer counterpoint to the straight lines of a table and chairs.
Place the mirror where it reflects something worth seeing, like a window, a pendant, or a pretty collection of objects, rather than a blank wall or clutter. Avoid positioning it directly across from a spot where you’d see a cluttered kitchen.
For safety, secure the mirror with an anti-tip strap or wall anchor if kids or pets are in the house, and make sure it sits on a stable, non-slip base.
Quick Facts Best For: Small or dim dining rooms Investment: Accessible to moderate Visual Effect: More light and a greater sense of depth
12. Tuck In a Built-Look Banquette
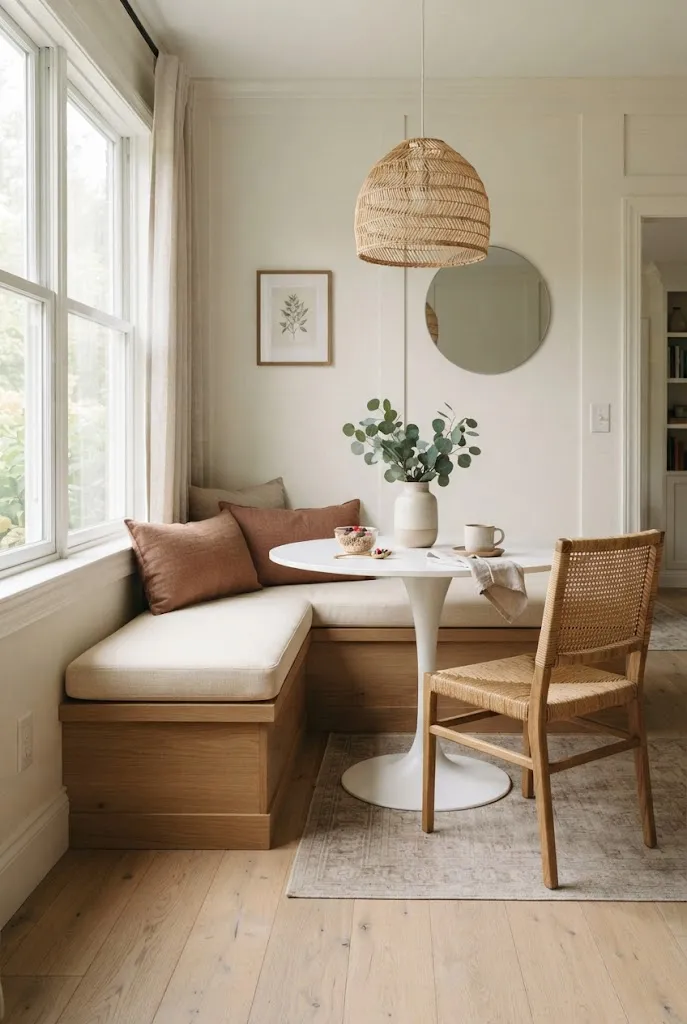
A banquette along one wall can seat more people in less space, because you don’t need clearance behind chairs on that side. It works especially well in smaller or oddly shaped dining rooms.
You can make one look custom by combining a low platform or storage bench with upholstered cushions and a few layered back pillows. The seat should be close in height to a standard dining chair, and a table with a pedestal base is easier to slide in and out of than one with corner legs.
This is a moderate-to-premium project depending on whether you build it yourself, use modular pieces, or hire a carpenter. Concealed storage under the seat adds real function for table linens and serveware.
Editor’s Note: Test cushion depth carefully. A seat that’s too deep can make upright dining uncomfortable, while one that’s too shallow won’t feel supportive.
13. Limewash the Walls for a Soft, Cloudy Texture
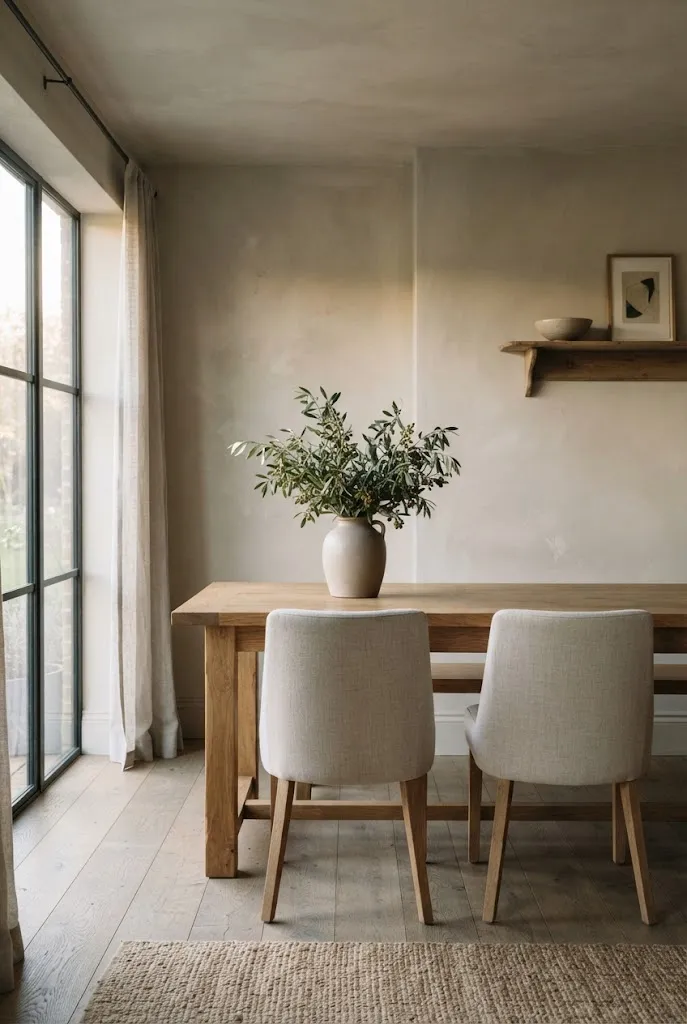
Limewash and limewash-style paints create a gently mottled, plaster-like surface that adds depth without any pattern. Walls look as though they’ve been aged slowly, with soft tonal shifts that change as the light moves through the day.
It’s usually a more involved paint job than standard latex: the application technique matters, and the look depends on visible brush strokes. Surface prep, primer, and manufacturer instructions all vary, so follow the specific product’s guidance.
| Option | Effect | Best Fit |
|---|---|---|
| Traditional limewash | Chalky, mineral depth | Homes where an aged look suits the style |
| Limewash-effect paint | Similar mottled look, easier to apply | DIY projects and rental-adjacent updates |
| Standard matte paint | Flat, even finish | Rooms where a simple look is preferred |
Warm whites, soft greiges, and muted clay shades tend to look especially natural in this finish.
14. Set Up a Corner Bar Cart Nook
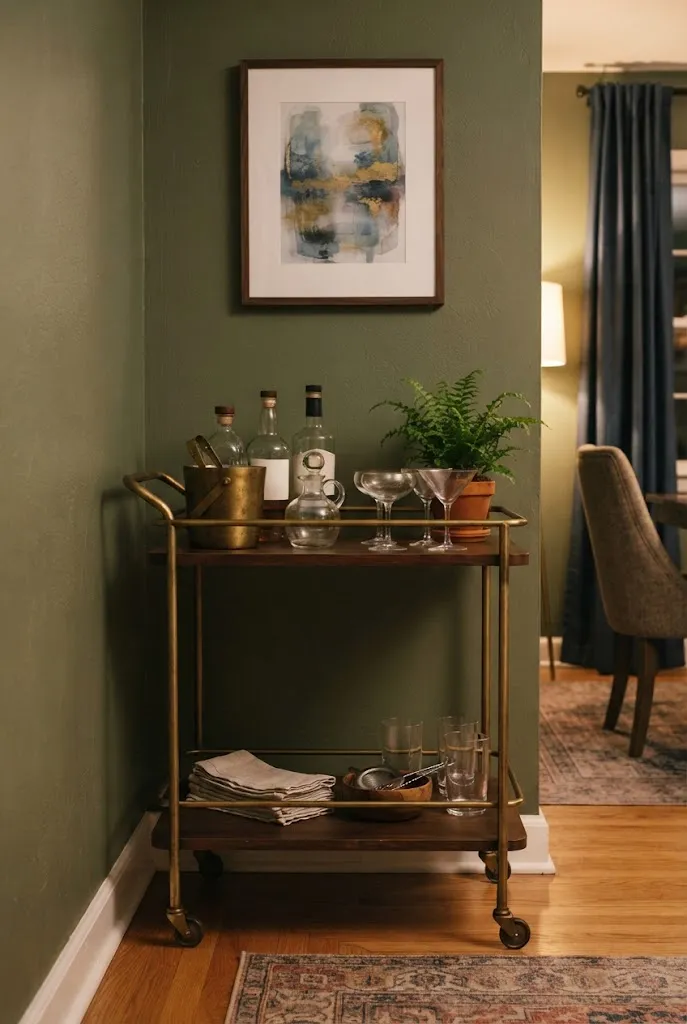
If your dining room has an awkward empty corner, a bar cart can turn it into a tiny entertaining station. It keeps glassware, a few bottles, ice buckets, and serving trays within reach so hosting feels less like a scramble.
Keep the setup edited. Three or four spirits or mixers, two kinds of glasses, a small tray, and one plant or a small lamp is generally enough. Anything more can look cluttered, and the cart still needs to roll out when guests arrive.
- A cart with two tiers gives you more surface without taking more floor space.
- Hang a small framed print or mirror behind it to complete the nook.
- Use a non-alcoholic option too, like sparkling water and citrus, so it works for everyone.
15. Style the Table With a Low, Layered Centerpiece
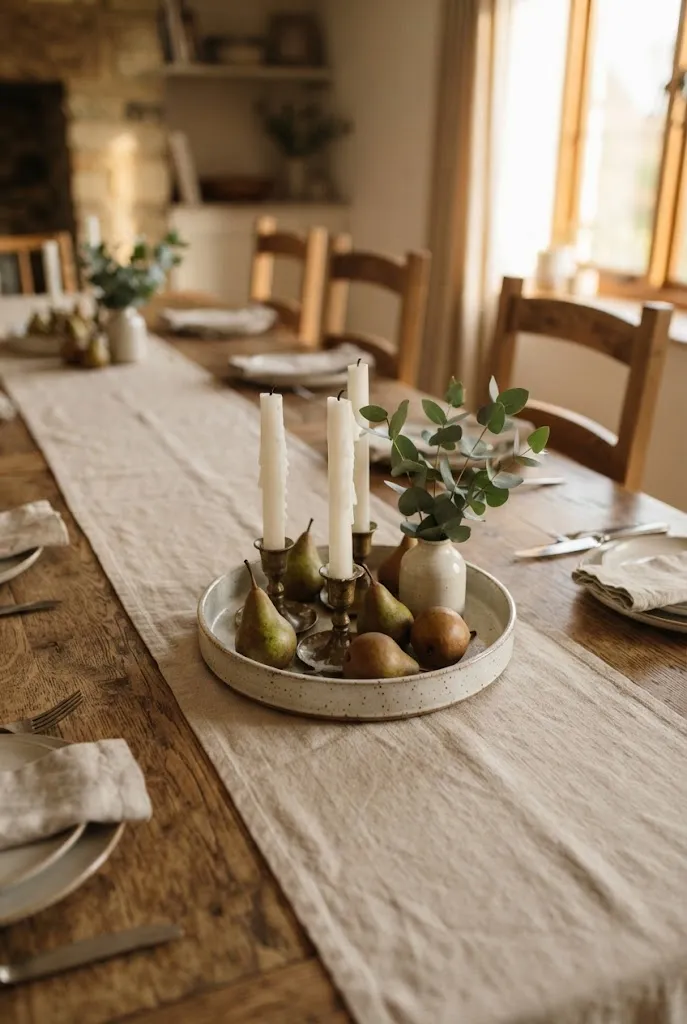
A centerpiece should never block conversation. Keep arrangements low enough to see across, or tall and slim enough to see around, such as a few tapered candles in short holders.
Layering gives the table a finished look even on a weeknight. Start with a runner or placemats, add a long tray or shallow bowl, then finish with a few objects of varying heights.
Do: Mix textures like ceramic, glass, wood, and linen for visual interest. Don’t: Use heavily scented candles at the table, since they compete with the food.
Seasonal tweaks make the setup easy to refresh: fresh greenery in spring, small gourds or pears in fall, and evergreen sprigs in winter. A few branches in a bud vase cost very little and still look intentional.
16. Bring In an Olive Tree or Branch Arrangement
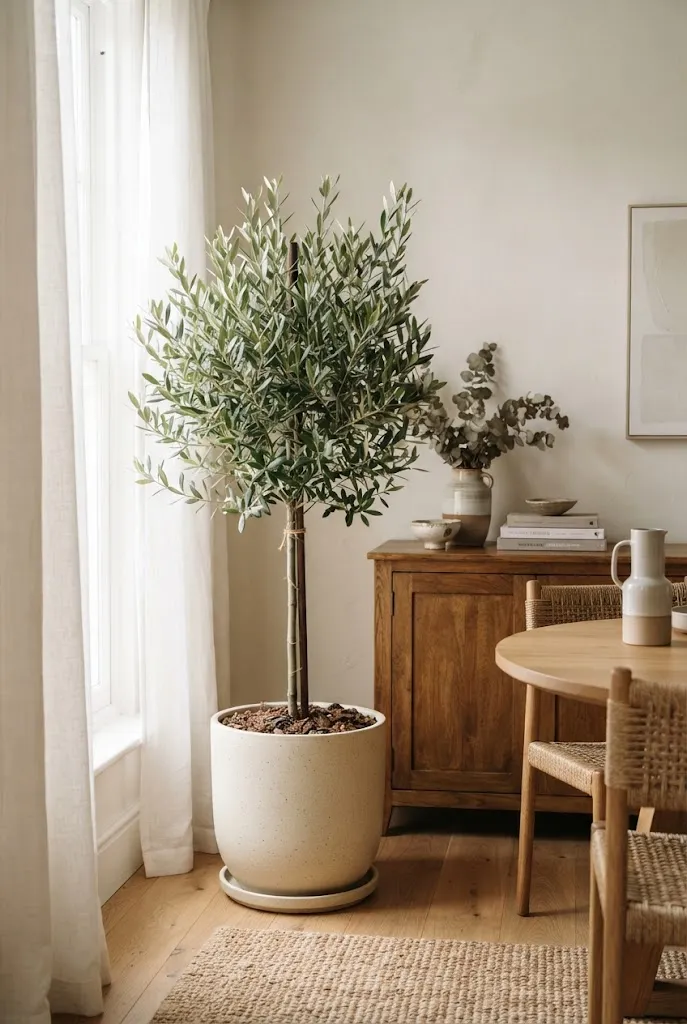
Greenery softens the hard edges of tables and chairs, and a single large plant often works better than lots of small ones. A potted olive tree, fiddle-leaf fig, or tall faux stem arrangement can fill a corner or flank a sideboard.
Real plants need the right conditions, so match the plant to your light before buying. Many indoor trees want bright light, and dining rooms with limited windows may suit a more tolerant plant or a high-quality faux option. Check plant care tags and a reliable plant database for watering and pet-safety details instead of assuming.
For a no-maintenance alternative, large branches like eucalyptus or dried olive in a tall floor vase add height and texture all year.
Quick Tip: Place the plant in a heavy, neutral planter so it reads as part of the decor rather than a nursery container.
17. Add Plug-In Wall Sconces
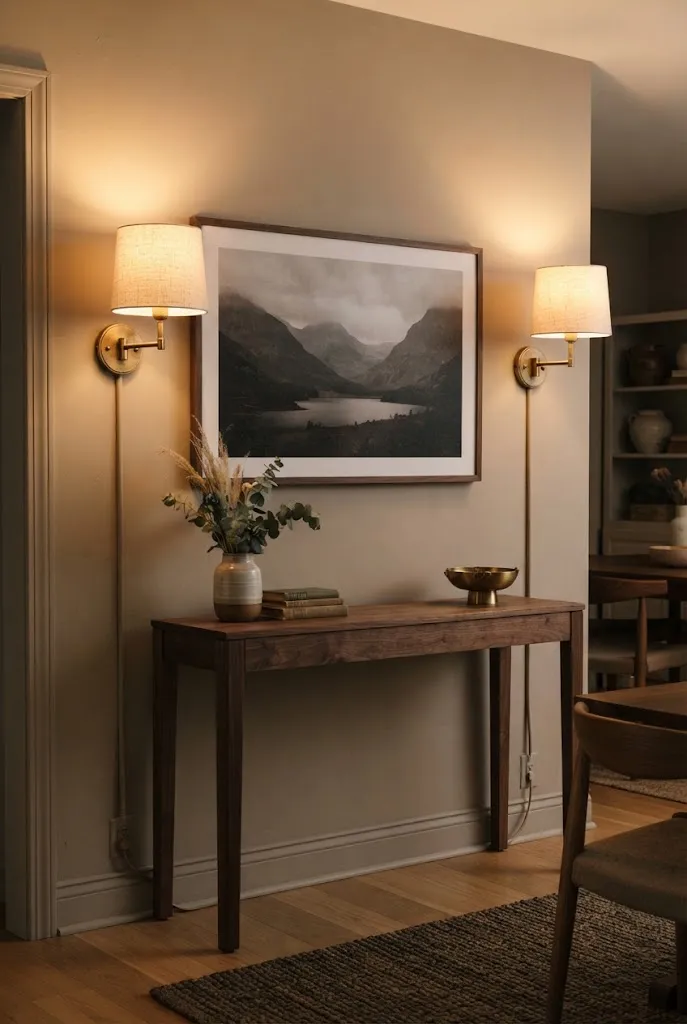
Sconces add layered, flattering light and help the room feel less dependent on a single overhead fixture. Plug-in styles with a cord cover or a cord channel can work without any electrical work, which makes them useful for renters and anyone avoiding wiring.
Hang them roughly at eye level when seated or standing nearby, and place them symmetrically on either side of a mirror, artwork, or sideboard. Use warm-toned bulbs, usually described as soft white, to keep the room cozy rather than clinical.
- Choose fixtures with a switch on the cord for easy use.
- Use a paintable cord cover to blend the cable into the wall.
- Pair with a dimmer plug if you want adjustable mood lighting.
Hardwired sconces are a more permanent upgrade later if you decide to keep the look.
18. Paint the Ceiling a Shade Deeper
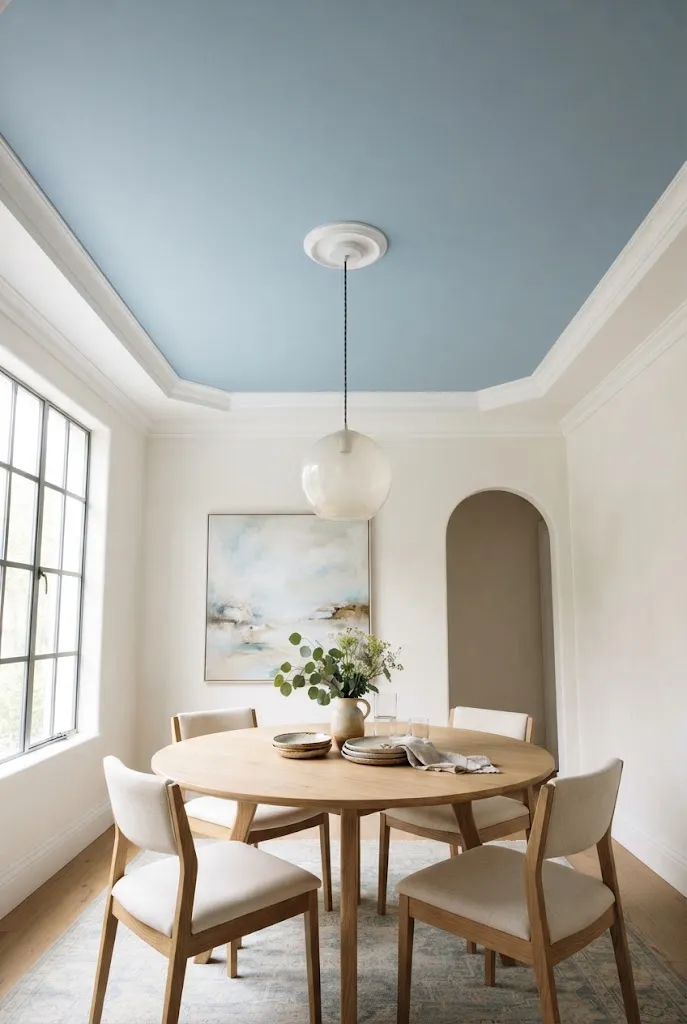
Ceilings are often left builder white by default, but a tinted ceiling can make a dining room feel intentionally designed. A pale blue, soft blush, or warm cream ceiling can add subtle personality, while a deeper shade can feel cozy in a room used mostly in the evening.
Go lighter than the walls in a small room, so the ceiling doesn’t feel like it’s pressing down. In rooms with higher ceilings, a darker ceiling can bring the proportions into a more intimate scale.
Common Mistake: Painting a bold ceiling color without testing how it reads under artificial light. Better Approach: Brush swatches on foam boards and move them around the room at different times of day before committing.
Use a flat or matte finish for ceilings, because it hides surface imperfections and reduces glare from overhead fixtures.
19. Swap in a Round Table to Soften a Tight Room
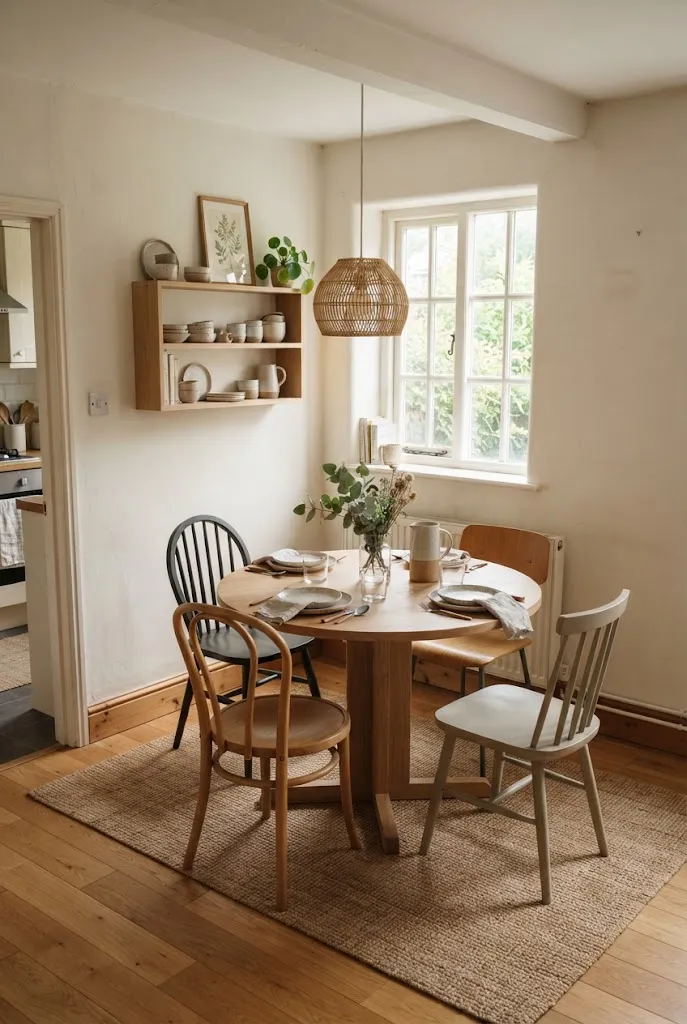
Rectangular tables can make small or square dining rooms feel cramped. A round or oval table removes sharp corners, improves traffic flow, and makes conversation easier since everyone can see each other.
As a rough guide, a round table around 42 to 48 inches across often works for four people, with a bit more width needed for six. Pedestal bases are especially helpful because there are no legs to bump into, and you can squeeze in an extra chair when guests come over.
Leave comfortable clearance between the table edge and walls or furniture so people can sit and stand without squeezing. If the room can’t accommodate a larger table, a drop-leaf or extendable style gives you flexibility.
Quick Facts Best For: Small, square, or awkwardly shaped rooms Investment: Accessible to moderate Visual Effect: Softer lines and better flow
20. Frame the Wall With a Custom-Look Built-In Hutch
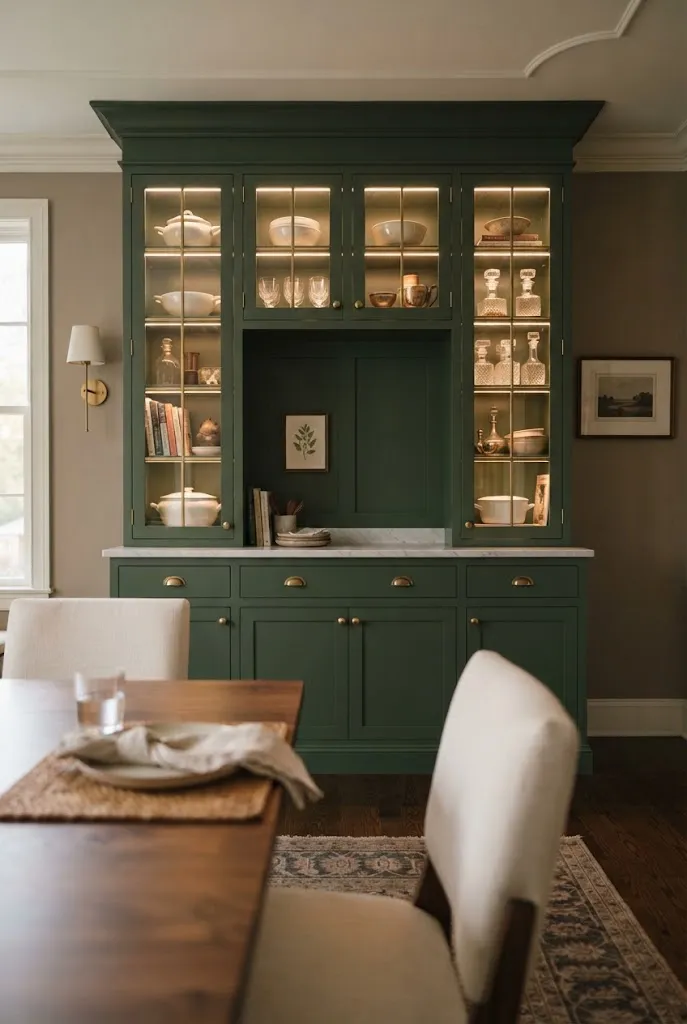
A built-in hutch or storage wall is one of the most striking upgrades a dining room can have. It adds display space, closed storage, and an architectural presence that makes the room feel finished.
You don’t need fully bespoke cabinetry to achieve the look. Many people combine modular base cabinets with trim, crown molding, and a custom paint color to create something that appears built-in. Fully custom millwork with integrated lighting is the premium route, and it’s usually a significant investment.
To translate the principle without the full price tag, use:
- Matching cabinets in one cohesive paint color
- Crown molding that extends to the ceiling
- Open glass-front uppers for display, with solid doors below
- Consistent hardware across every door and drawer
Editor’s Note: Measure twice for ceiling height and baseboards. Small gaps and mismatched trim are what separate a convincing built-in from a stack of furniture.
How to Pick Where to Start
If you’re not sure which of these 20 dining room ideas to tackle first, work from largest visual impact to smallest effort. Lighting, paint, and the rug usually change the room the most. Seating, styling, and plants then refine it.
A realistic order for many households is:
- Fix the light fixture and add a dimmer.
- Choose paint or a wall treatment.
- Right-size the rug.
- Refresh seating and window treatments.
- Finish with styling, plants, and layered lighting.
You can spread these across several weekends, and each step improves how the room feels without a full renovation.