
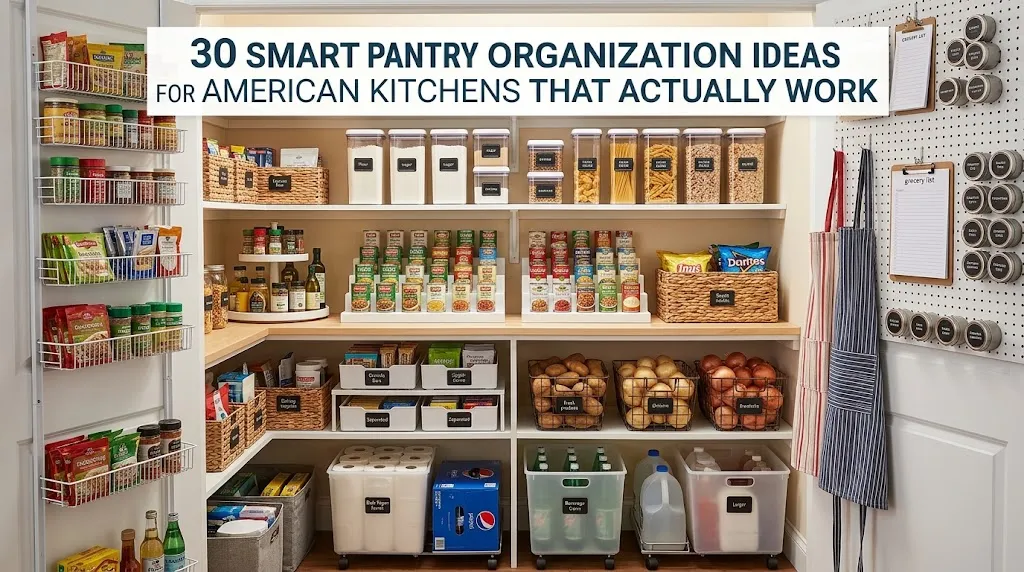
30 Smart Pantry Organization Ideas for American Kitchens That Actually Work
A pantry that works looks different in every home. In a townhouse galley kitchen, it might be a single cabinet with a door that barely closes. In a suburban house, it could be a full walk-in with room for a second refrigerator. Most of these spaces share the same frustration: a can of tomatoes hidden behind three bags of rice, two half-used bags of flour, and a jar of cinnamon nobody remembers buying. The ideas below are built around that reality. Some cost a few dollars and fit a rental kitchen without tools. Others are worth planning around during a remodel. Each one explains how the storage works, why it helps, and what to watch for so the result stays usable after the first week. You’ll find options for narrow cabinets, open shelving, and everything in between, along with practical advice on zones, labeling, and keeping overstock under control.
1. Walk-In Pantry With Open Floor-to-Ceiling Shelving
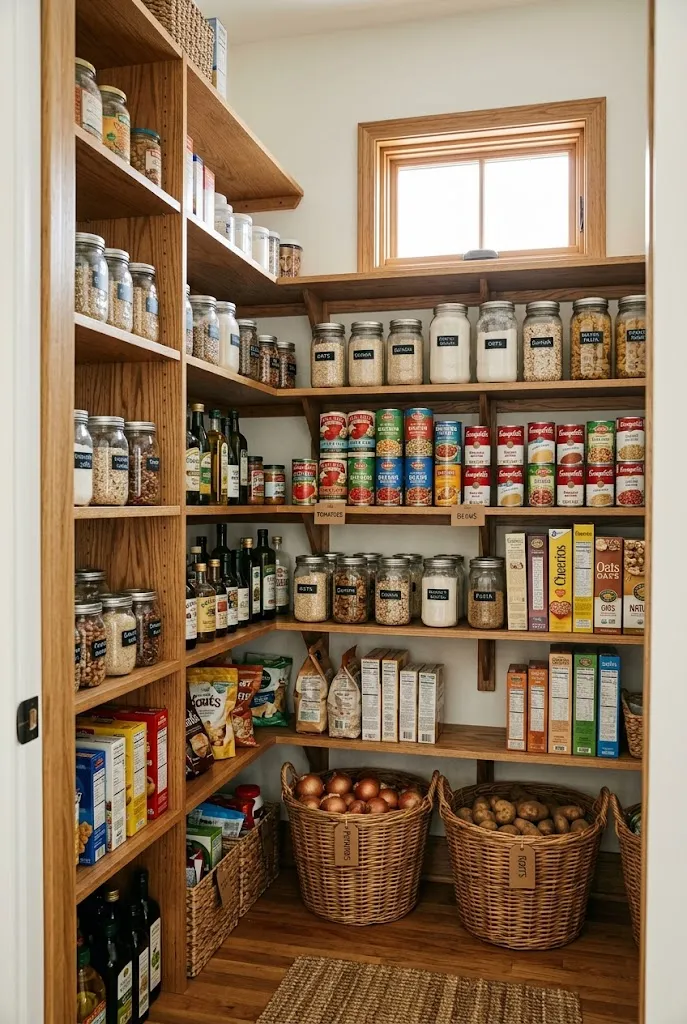
A walk-in pantry gives you room to organize by category instead of squeezing items into whatever gap is left. Open shelving from floor to ceiling works especially well because you can see everything at once. Reserve the top row for backstock you rarely use, and keep daily items at eye level. Plan shelf depth around what you store: about 12 inches suits most cans and packaged goods, while 16 to 18 inches works better for bulk bins and small appliances. Make the lowest shelf a little deeper for heavy items like flour and rice, and leave at least 36 inches of clear floor so the space doesn’t feel like a corridor. Warm oak brings character, while painted wood or laminate looks cleaner in a modern kitchen.
2. Clear Canisters for Everyday Dry Goods
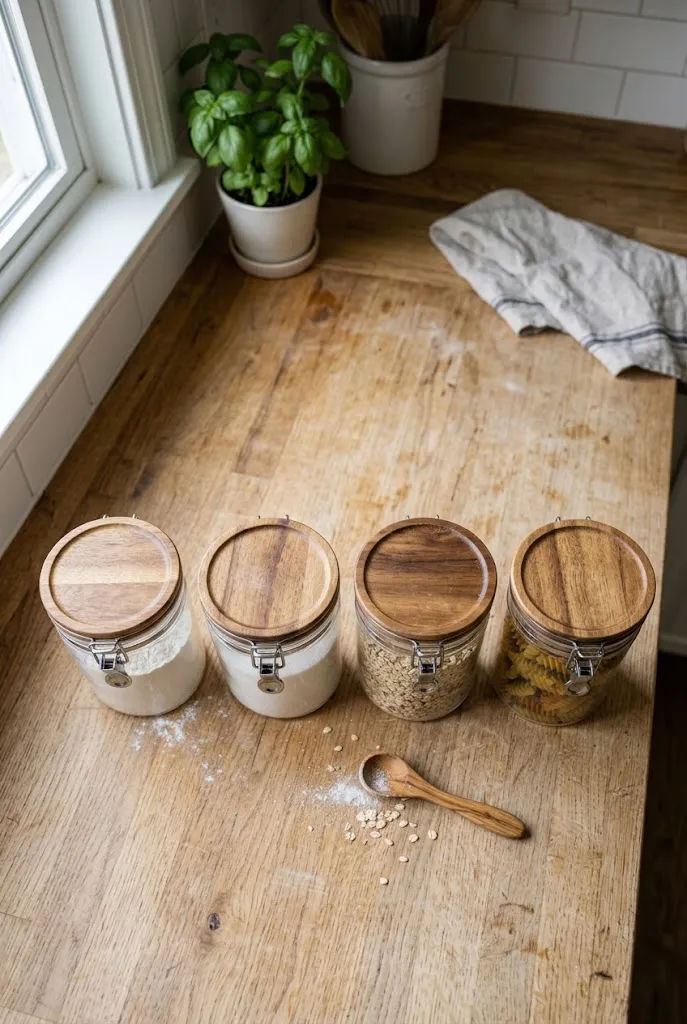
Clear canisters make the most common pantry staples easy to see, and they help keep pantry moths and humidity away from opened packages. The main decision is size. Choose larger containers for flour, sugar, and rice that you buy in bulk, and smaller ones for oats, pasta, or baking staples you use in smaller amounts. Airtight lids matter more than the material, so check that the seal closes properly before committing to a full set.
| Container | Best For | Tradeoff |
|---|---|---|
| Glass with airtight lid | Flour, sugar, oats | Heavier and more fragile |
| BPA-free plastic | Pasta, cereal, snacks | Can stain or scratch over time |
| Stainless steel with clear window | Coffee, tea, nuts | Less visibility than full glass |
Wipe down the containers before refilling, and keep the original package label inside if you buy in bulk, so you can check expiration dates later.
3. Full-Extension Pull-Out Drawers in a Pantry Cabinet
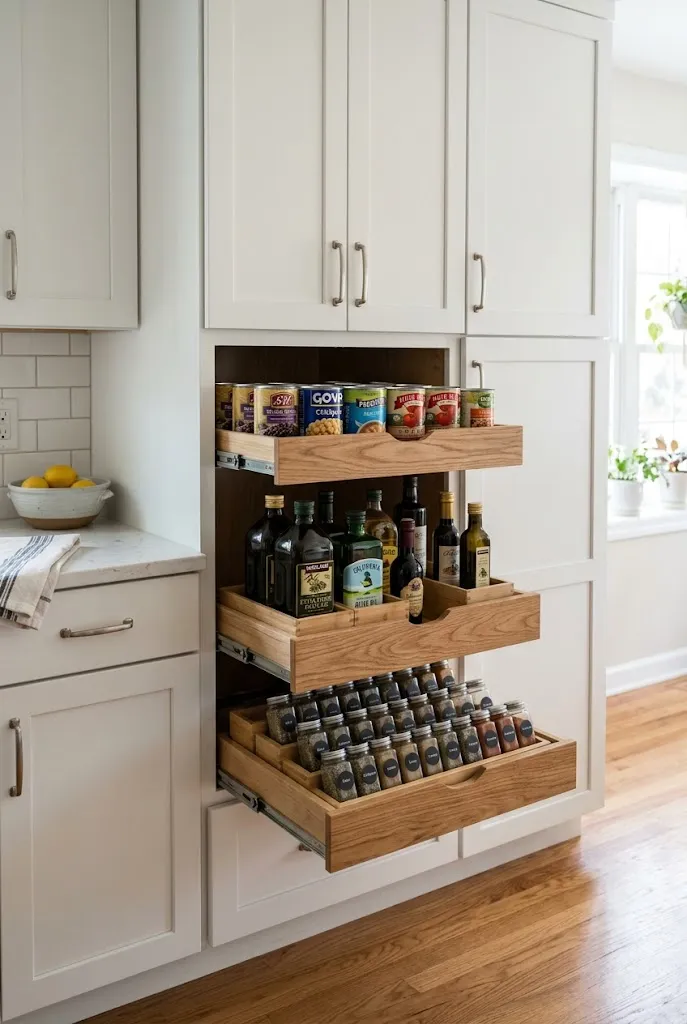
Fixed shelves in a standard cabinet often leave items stranded in the back corners. Full-extension pull-out drawers bring everything forward, so you can see and reach every can without digging. They work well in a cabinet that is 18 to 24 inches wide. Look for drawers with a soft-close mechanism and a weight rating that matches what you’ll store. Drawers that hold cans, oils, and small jars make the most sense near the top of the cabinet, while heavy pantry staples belong in the lower drawers.
4. Over-the-Door Rack for Small Spices and Packets
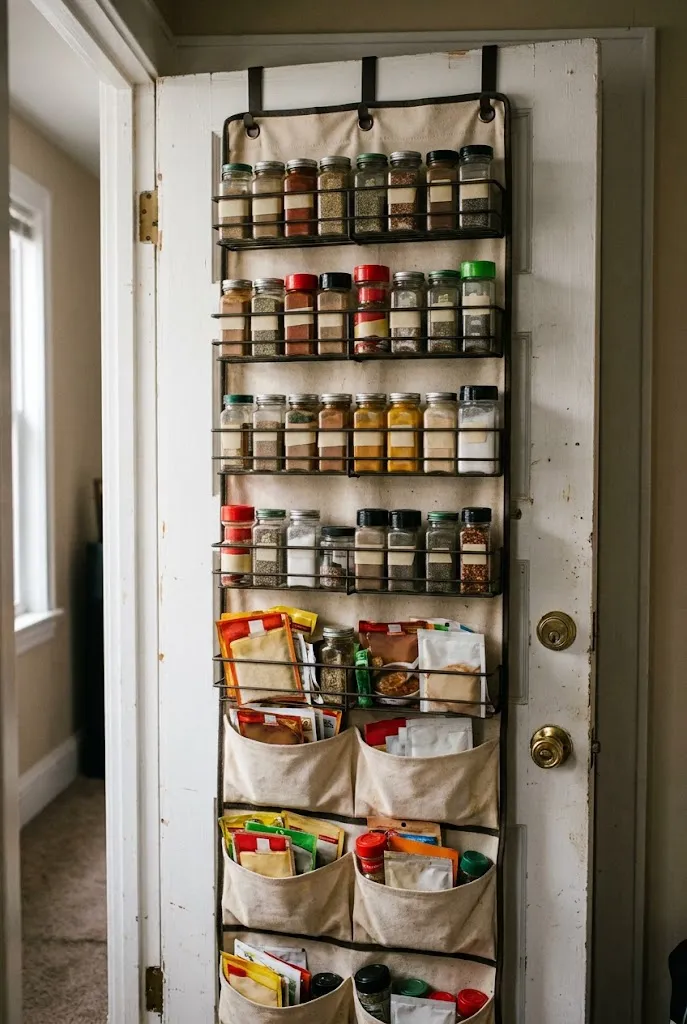
Renters and anyone on a limited budget can gain real storage from the back of a pantry door. An over-the-door rack holds small spice jars, seasoning packets, and snack pouches without drilling into the frame. Measure the door clearance first, since many pantry doors have less room than you’d expect at the bottom. Pockets about 1 to 2 inches deep keep jars upright and prevent them from sliding.
Quick Tip: Place the most-used spices in the pockets closest to eye level, and store less-used herbs higher up, where they’re easy to skip over when you’re cooking.
5. Corner Lazy Susan for Oils and Condiments
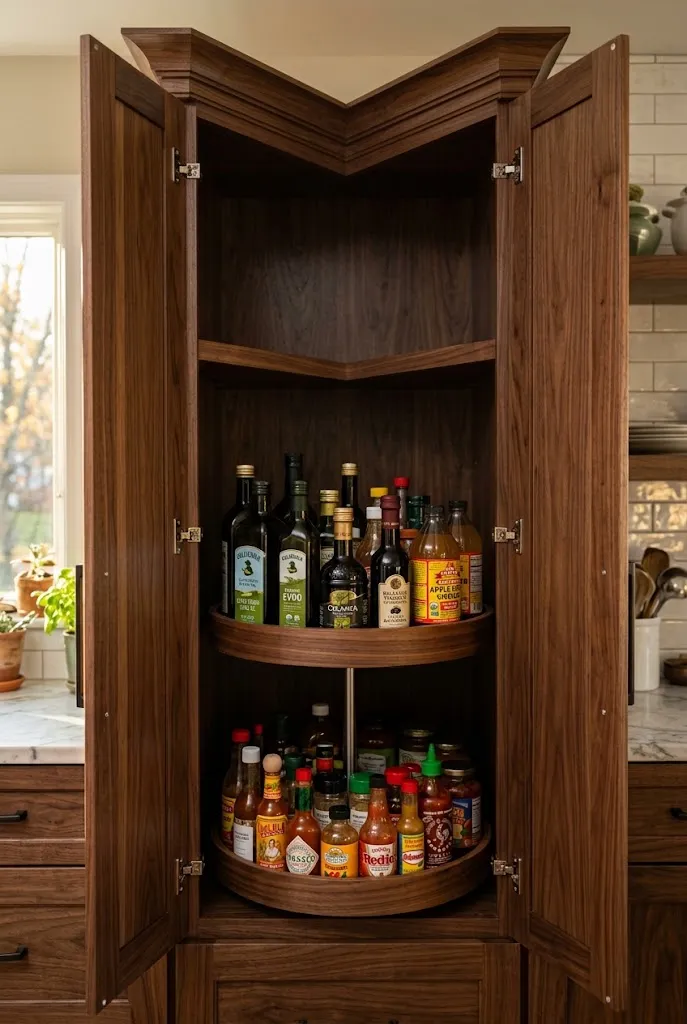
Corner cabinets are notorious for losing items to the back. A lazy Susan turns the entire shelf into a rotating carousel, so you can bring the back items forward without emptying the cabinet. Choose a unit with a raised rim so bottles don’t slide off when it spins. Keep oils, vinegars, and sauces on the turntable, and reserve the static shelves for heavier items.
6. Category Zones for Snacks, Baking, and Canned Goods
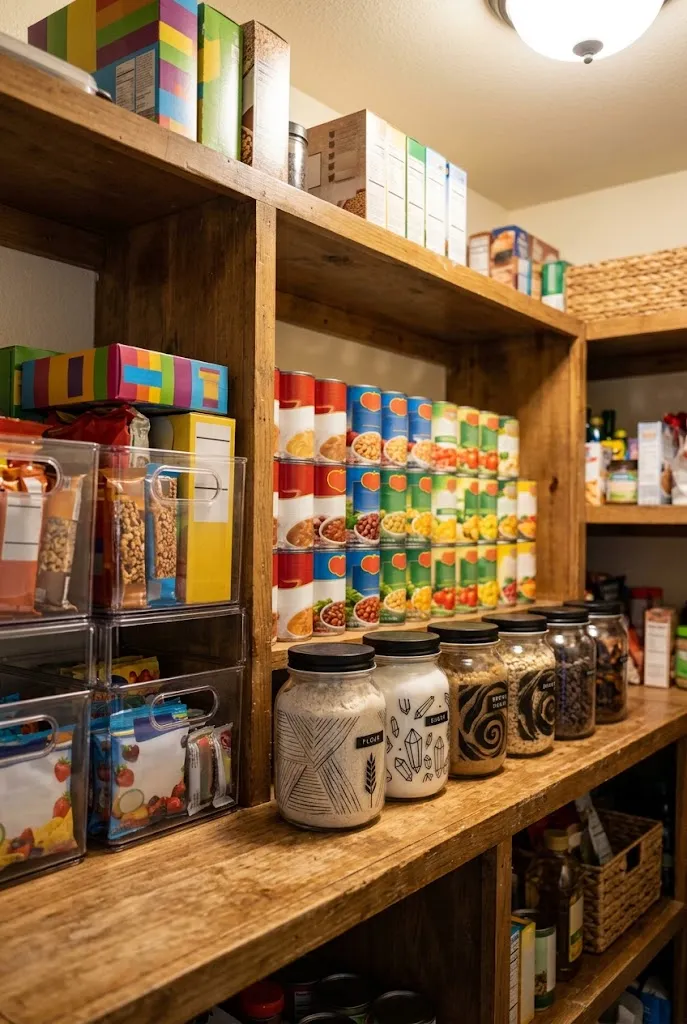
Zoning means grouping items by how you use them rather than by shape or size. A simple zone system makes it easier to put things away and find them later. Most families work well with four zones, though yours may look different depending on how often you bake or how many people eat dinner at home. Use shelf labels or bins to mark each zone, and keep the most frequently used items in the middle of the pantry, where they’re easiest to reach.
| Zone | Best Location | Typical Items |
|---|---|---|
| Snacks | Lower or eye-level shelf | Chips, granola bars, crackers |
| Baking | Shelf nearest the counter | Flour, sugar, chocolate chips, extracts |
| Canned goods | Middle shelves | Beans, tomatoes, broth, soup |
| Weeknight dinners | Upper shelves | Pasta, rice, sauces, cooking oil |
Adjust the zones to match your household. A family with young children may want the snack zone lower, where kids can reach it safely.
7. Tiered Risers for Canned Goods
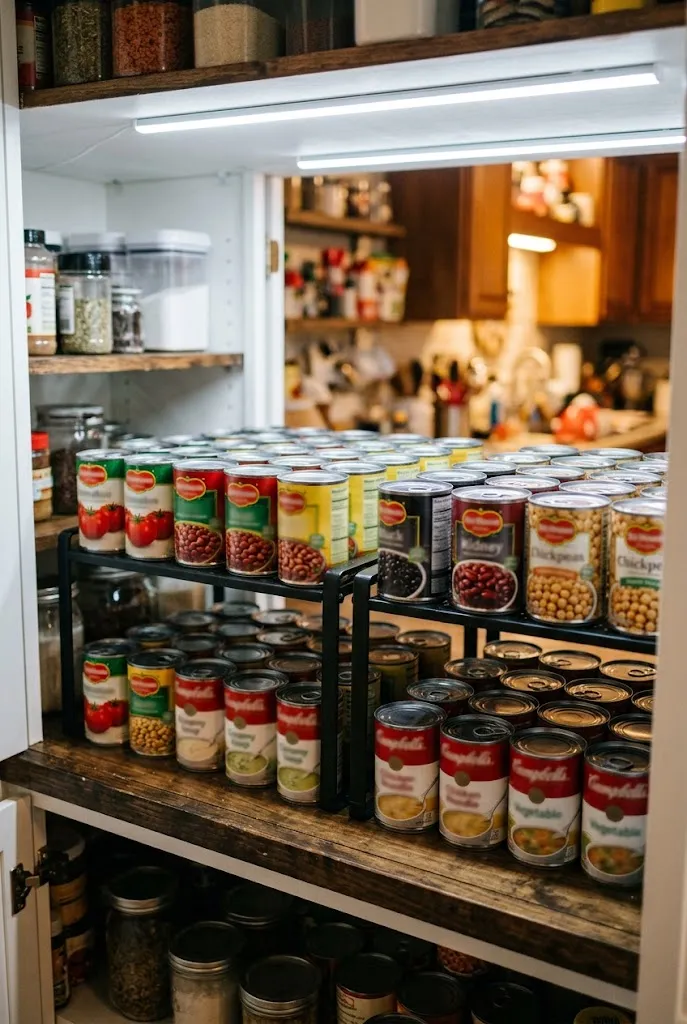
Canned goods tend to disappear in the back of a shelf unless you can see the second row. Tiered shelf risers raise the back row so every can is visible at a glance. They’re one of the least expensive upgrades available, and they work in cabinets, pantries, and freestanding shelving units alike. Choose metal or heavy plastic risers with a stable base, and avoid lightweight versions that tip when you pull a can from the front.
- Measure the shelf depth before buying so the riser fits without overhang.
- Group cans by type so the same kinds sit side by side.
- Rotate older cans to the front to prevent forgotten expirations.
8. Narrow Slide-Out Pantry Beside the Refrigerator
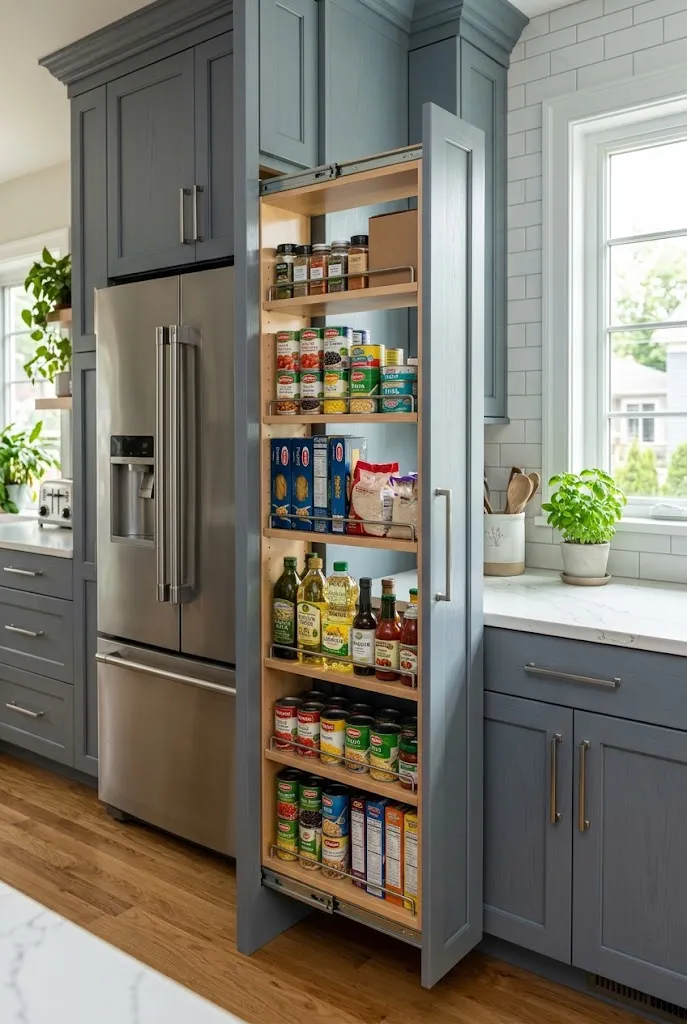
Many American kitchens have a gap of 6 to 12 inches between the refrigerator and the wall. A narrow slide-out pantry fills that space with tall, shallow shelves for oils, canned goods, and cereal boxes. Because the unit pulls out on rollers, you can access the entire depth without reaching blindly. Measure the gap carefully, and confirm that the unit will clear the refrigerator door handle before installing.
9. Magnetic Spice Tins on a Door-Mounted Panel
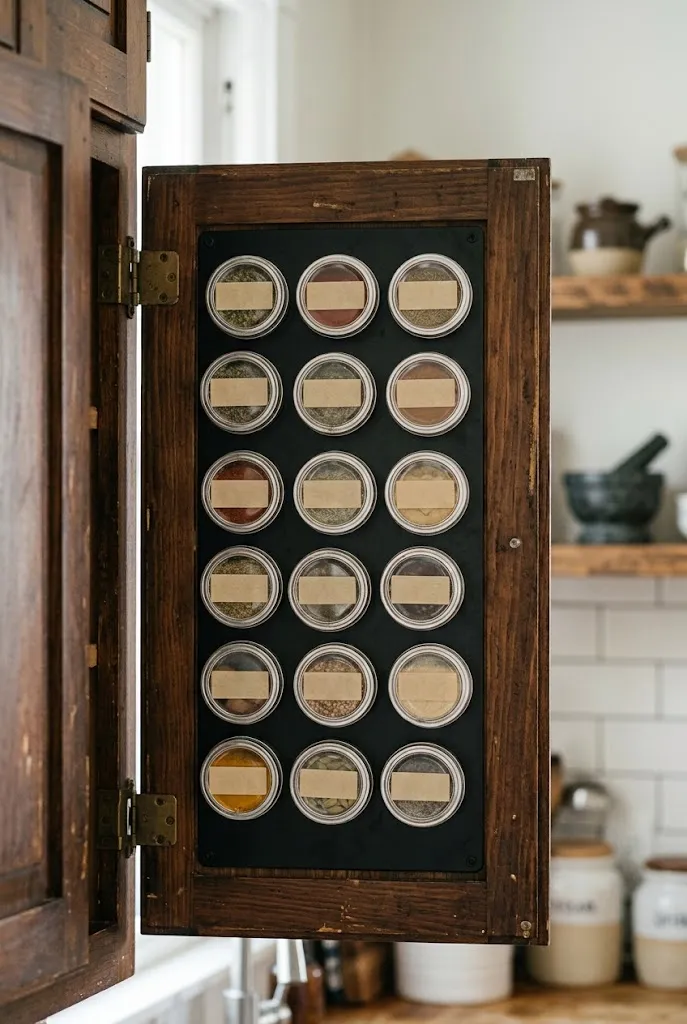
Spices are easy to lose when they’re stacked in a cabinet. A magnetic panel attached to the inside of a cabinet door puts every tin in view and frees up shelf space. This works best on steel doors or with a metal panel mounted to a wooden door. Choose tins with strong magnets, and make sure the panel is rated for the weight of the spices you plan to store. Keep the most common spices closest to the stove or prep area.
10. Under-Shelf Wire Racks for Doubling Your Space
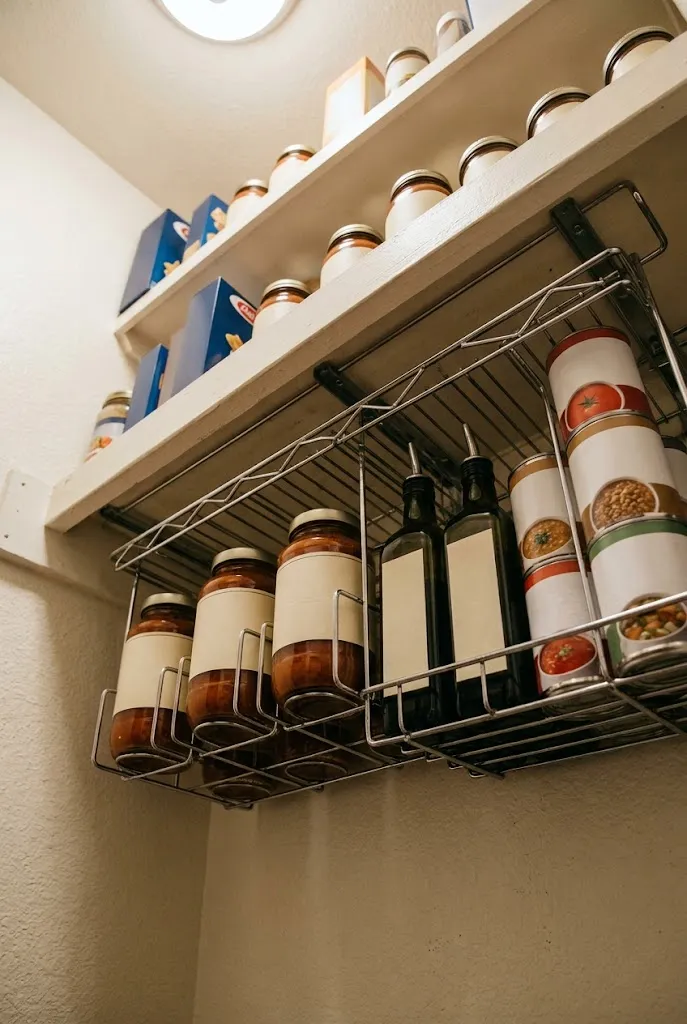
An under-shelf wire rack creates a second level above the existing shelf. Items sit on the rack without blocking anything below, which makes it useful for cans, condiments, and small containers. Install one under a shelf with at least 12 inches of vertical clearance, and pick a rack that is securely fastened so it doesn’t sag when loaded.
Quick Tip: Place items you use daily on the lower, pull-forward level, and store backstock on the rack above. You’ll stop losing things behind the front row.
11. Glass-Front Hutch-Style Pantry Cabinet
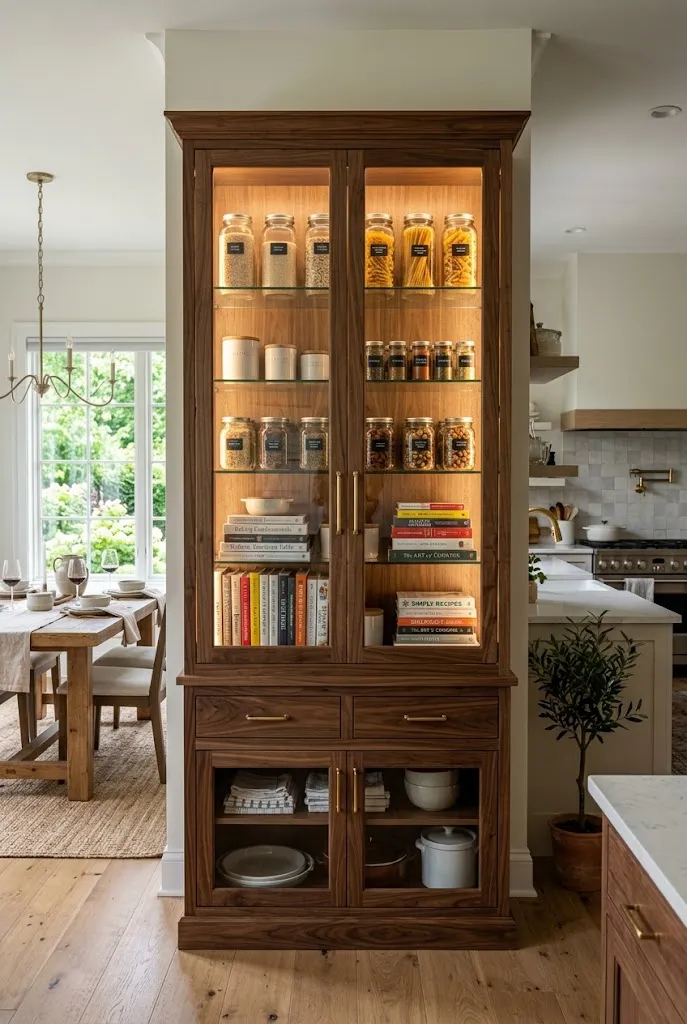
For a kitchen that doubles as a living space, a glass-front pantry cabinet looks more like a freestanding hutch than a storage unit. Glass doors reveal the contents without requiring labels, and they can be paired with interior lighting to create a display-quality look. This is a premium choice, so it works best in a larger kitchen or dining area where the cabinet becomes a visible design element.
Editor’s Note: Glass fronts show everything, which is great for matching containers and bad for clutter. Plan the interior with the same care you’d give a display shelf.
12. Rolling Utility Cart in a Galley Kitchen
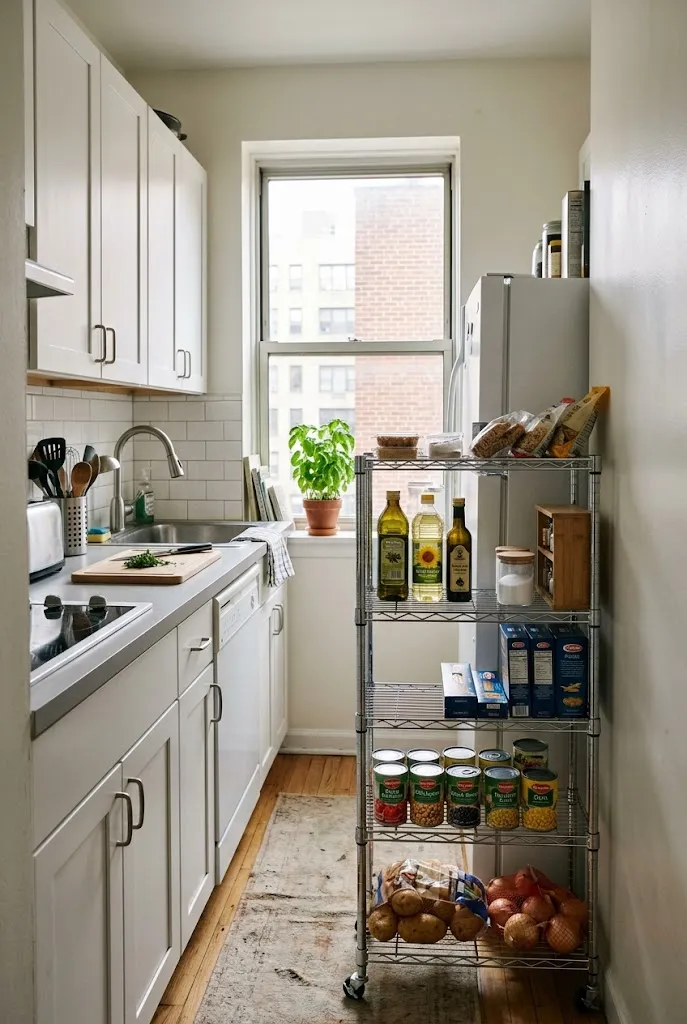
Galley kitchens rarely have space for a full pantry, but a narrow rolling cart can hold a surprising amount. Choose a cart about 12 to 16 inches wide with three or four shelves, and tuck it beside the refrigerator or at the end of the counter. When you need to reach something, you pull the cart out, and when you’re finished, it slides back out of the way.
- Store pantry staples on the lower shelves, where the weight sits lowest.
- Keep oils, vinegar, and cooking spray on the top shelf, away from direct heat.
- Use the side hooks for dish towels or grocery bags.
13. Dispensers for Flour, Sugar, and Cereal in One Row
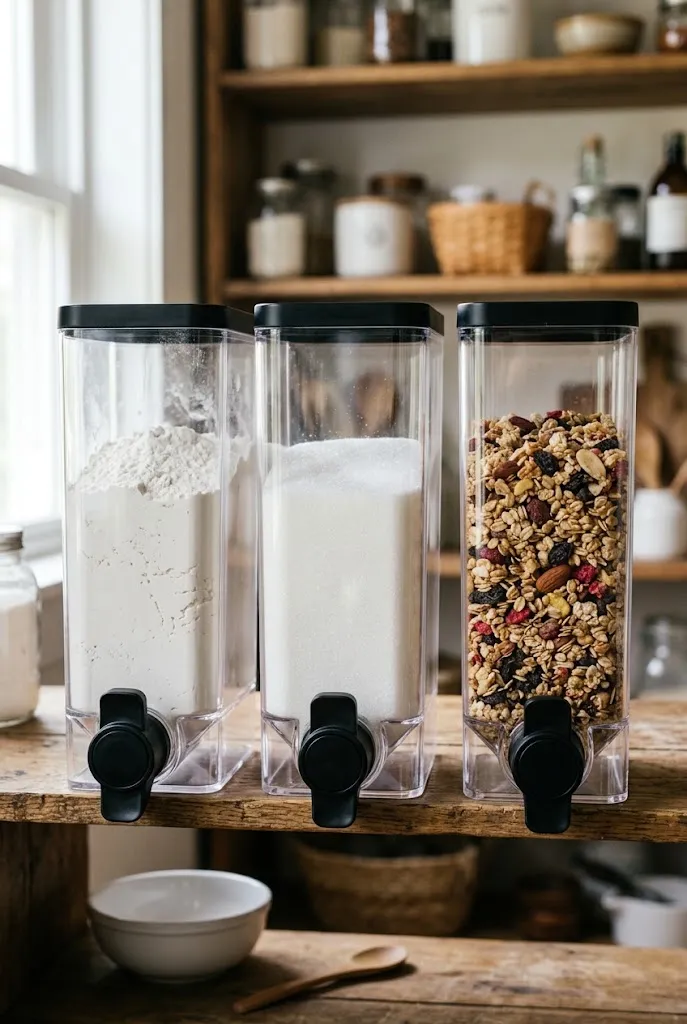
Gravity-fed dispensers keep bulk baking staples in a neat row while letting you pour without spilling. They’re especially useful for families who buy large bags and want the counter or pantry shelf to look orderly. Dispensers are sized for specific ingredients, so measure before purchasing.
Common Mistake: Filling a dispenser straight from a bulk bag and leaving the bag on the shelf beside it.
Better Approach: Keep the bulk bag in a lower pantry drawer or on the floor, and refill the dispenser weekly. The shelf stays clean, and the bag stays sealed.
14. Grab-and-Go Breakfast Bin on an Eye-Level Shelf
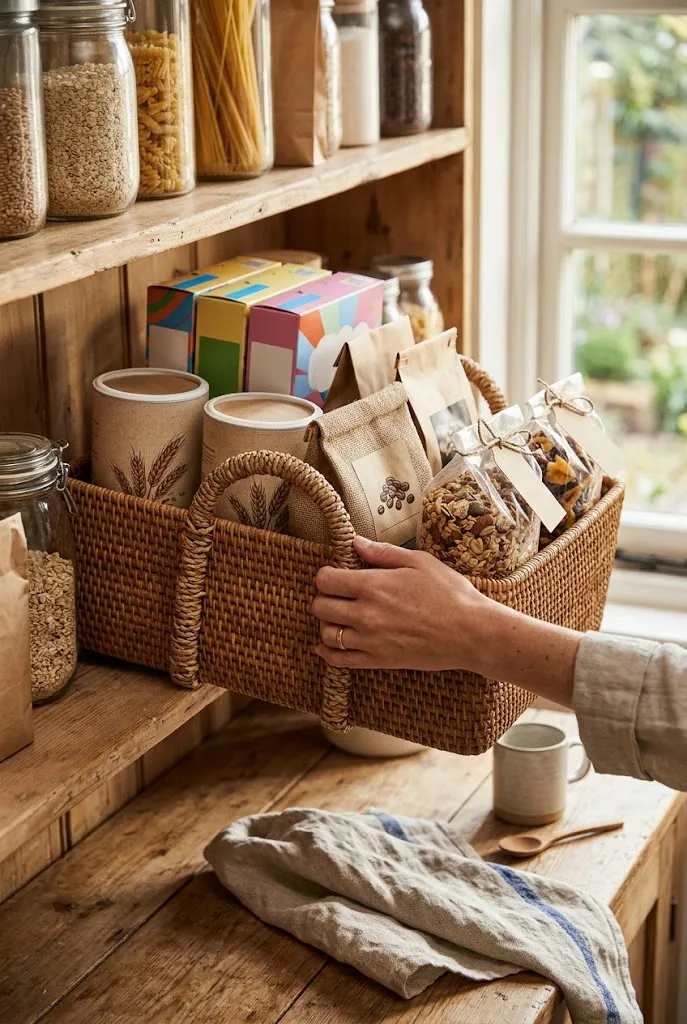
Busy mornings call for storage that can be reached in seconds. A dedicated breakfast bin on an eye-level shelf keeps oatmeal, granola, instant coffee, and shelf-stable milk in one place. Use a deep bin with handles so you can pull the whole thing out and bring it to the counter. This works well for households with school-age children, since everyone knows where to look.
15. Baking Corner With Mixers and Pans Stored Below
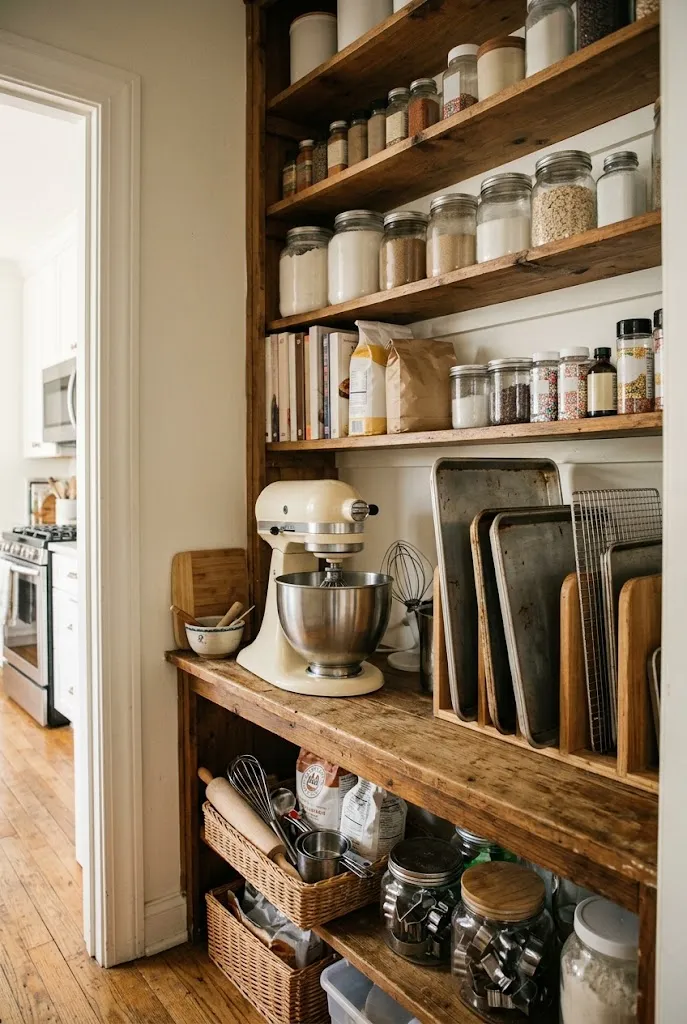
Home bakers often find that the countertop mixer and baking pans take over every available surface. A dedicated baking corner in the pantry organizes equipment and ingredients together. Keep the stand mixer on a low, sturdy shelf or a pull-out platform, and place pans in upright slots nearby. Heavier equipment belongs at lower heights for safe lifting.
- Store the stand mixer on a shelf with at least 14 inches of vertical clearance.
- Use vertical dividers for sheet pans and cutting boards.
- Keep frequently used baking ingredients in a bin within arm’s reach.
16. Pegboard Wall for Lids, Pans, and Utensils
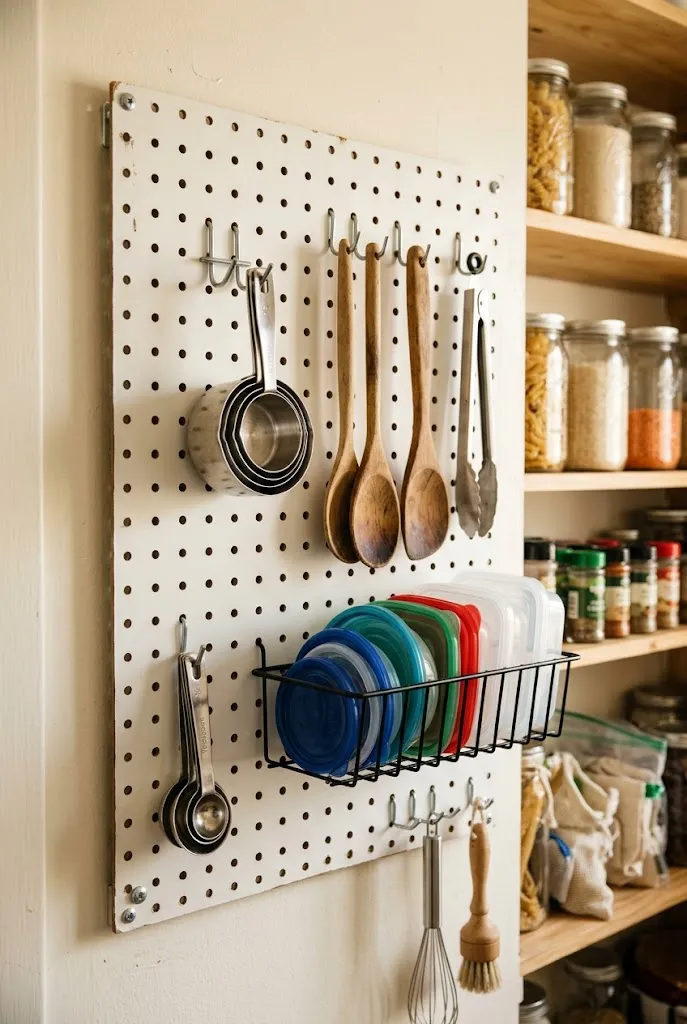
A pegboard on a pantry wall turns empty space into a flexible storage system. Hooks hold measuring cups, tongs, and grocery bags, while lids can be stacked on a small rack beside the board. Pegboard is inexpensive and easy to reconfigure as your needs change. Mount it on a backing board for sturdiness, and confirm that hooks are rated for the weight of what you’ll hang.
Do: Hang lightweight items like measuring spoons, bag clips, and small tools.
Don’t: Hang heavy cast-iron pans on hooks that aren’t rated for them, since they can pull loose over time.
17. Cool, Dark Basket Zone for Potatoes and Onions
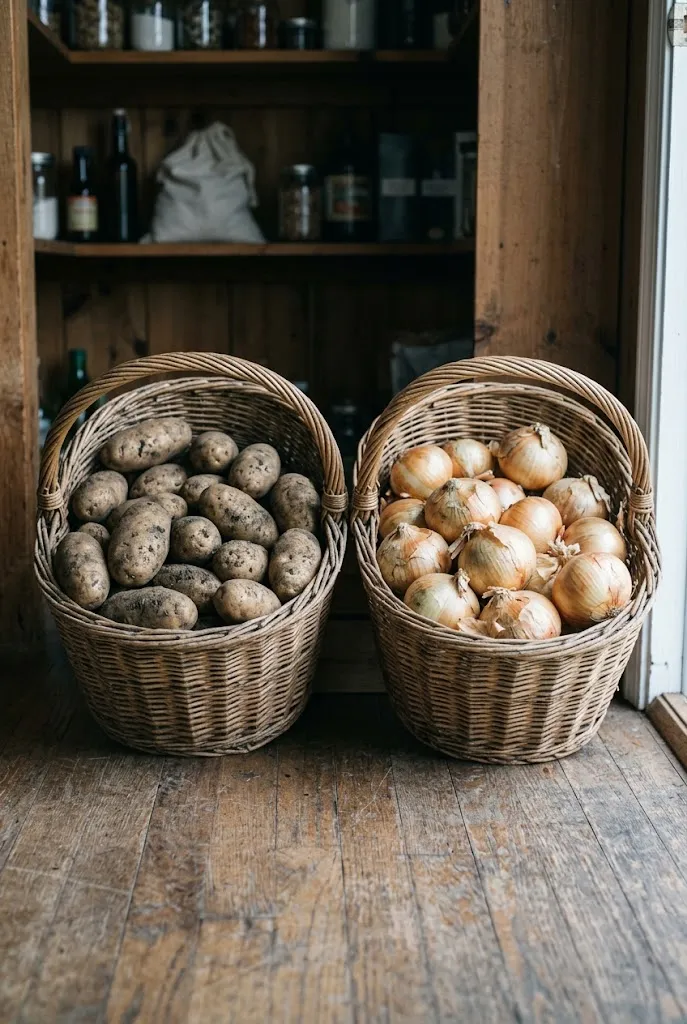
Some produce keeps better outside the refrigerator. Potatoes and onions do best in a cool, dark, well-ventilated space, and a basket zone on a lower shelf or the floor keeps them out of the light. Keep them apart, since onions can cause potatoes to sprout faster. Choose woven or wire baskets rather than sealed containers, so air can circulate.
Quick Tip: Check the basket every week and remove any produce that feels soft or shows signs of spoilage before it affects the rest.
18. Dry-Erase Inventory Board on the Inside of the Door
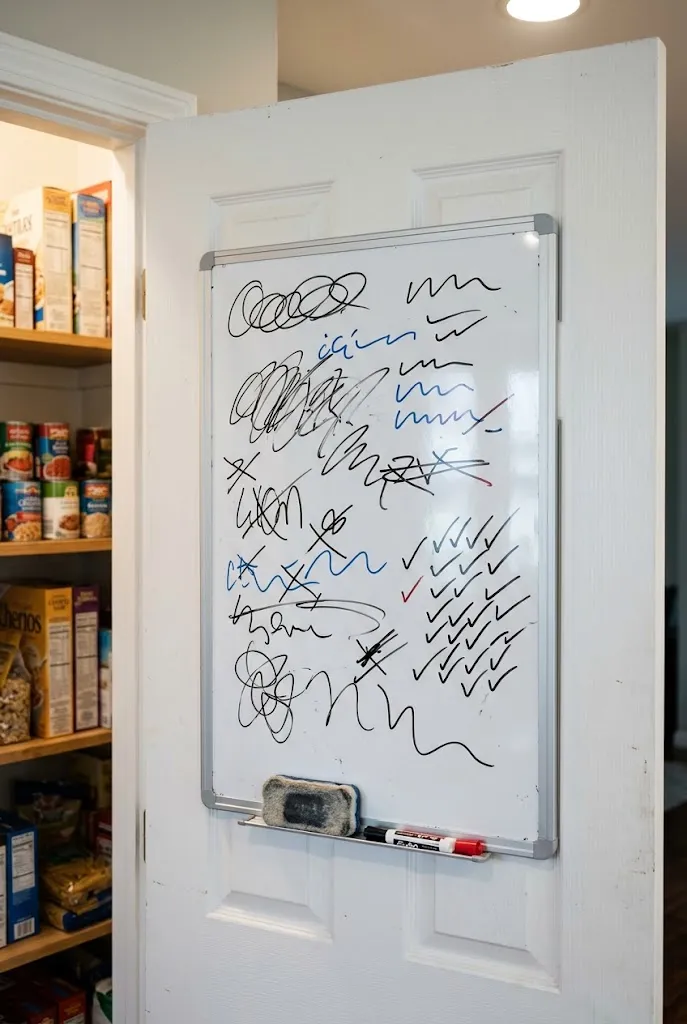
A dry-erase board attached to the pantry door helps you track what’s running low before you go to the store. It replaces the shopping list you keep forgetting, and it works well for households where more than one person shops. Mount it at eye level and write in categories rather than individual items. Use a board with a magnetic back if you want to attach notes.
19. Tension-Rod Dividers in a Deep Cabinet
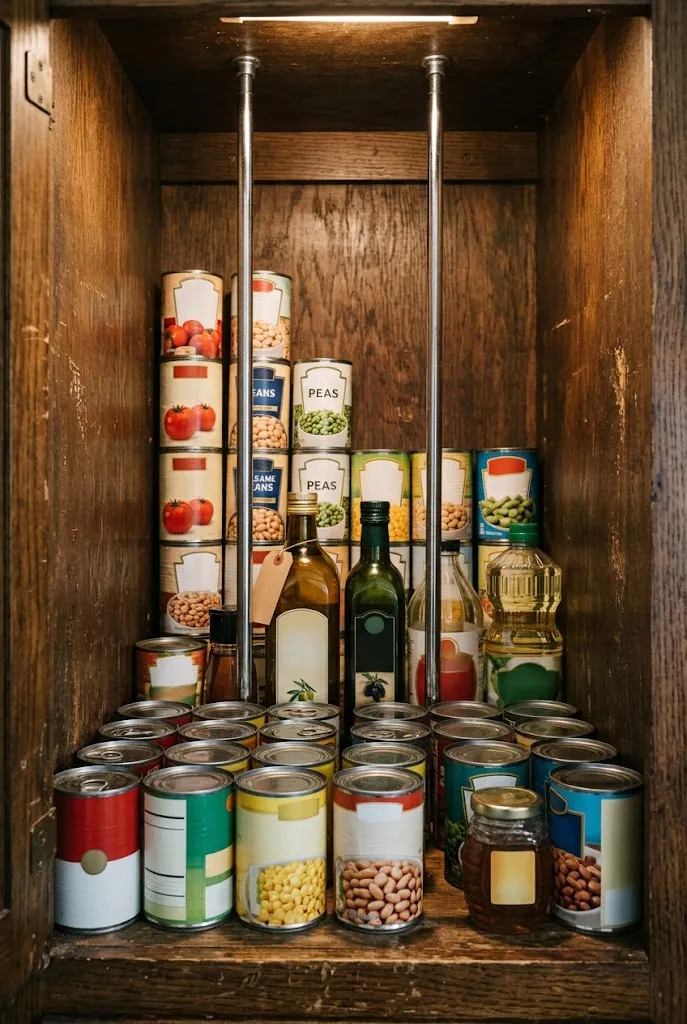
Deep cabinets are hard to organize because items disappear toward the back. Tension rods placed between the sides of the cabinet create adjustable dividers that keep cans and bottles upright and separated. This is a low-cost fix that works well for renters, since it requires no drilling. Choose rods that fit the cabinet width snugly, and check that they hold weight without sagging.
- Place one rod every 8 to 10 inches for cans or bottles.
- Use the rods to separate boxed goods from jarred goods.
- Adjust the spacing as your collection changes.
20. Built-In Coffee and Tea Station
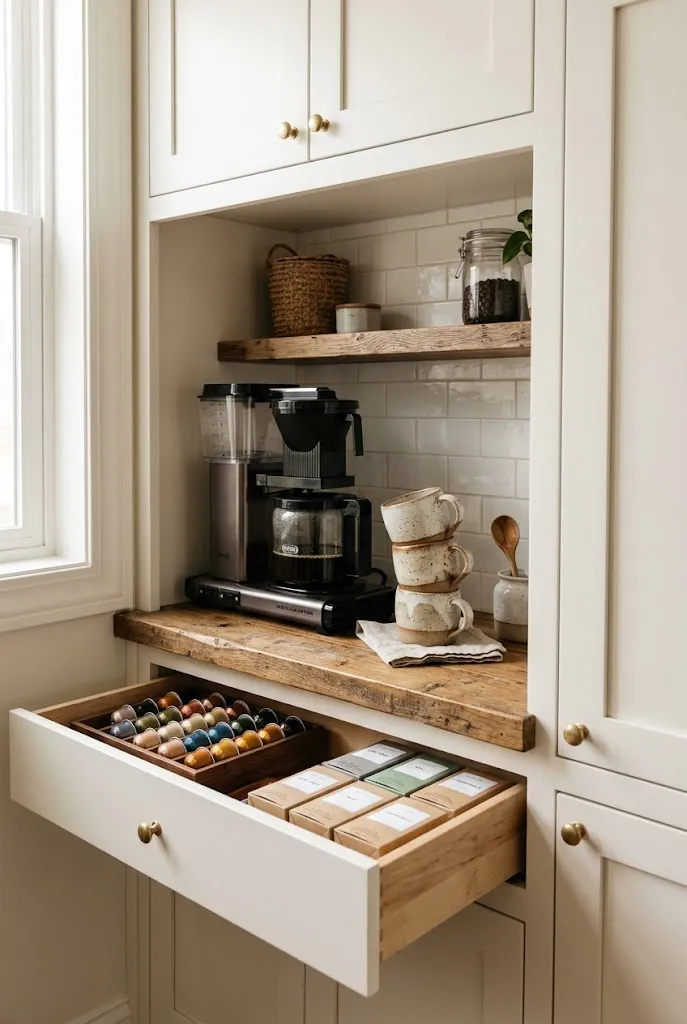
A coffee and tea station gives morning routines a dedicated home, and it keeps countertop clutter out of sight. Build it into a pantry or cabinet with a shelf for the coffee maker, a drawer for pods or tea bags, and a small bin for mugs and sweeteners. Plan for outlet access and ventilation if the coffee maker stays plugged in, and place the station away from the sink so spills don’t cause problems.
21. Wine and Bottle Rack Integrated Into Pantry Shelving
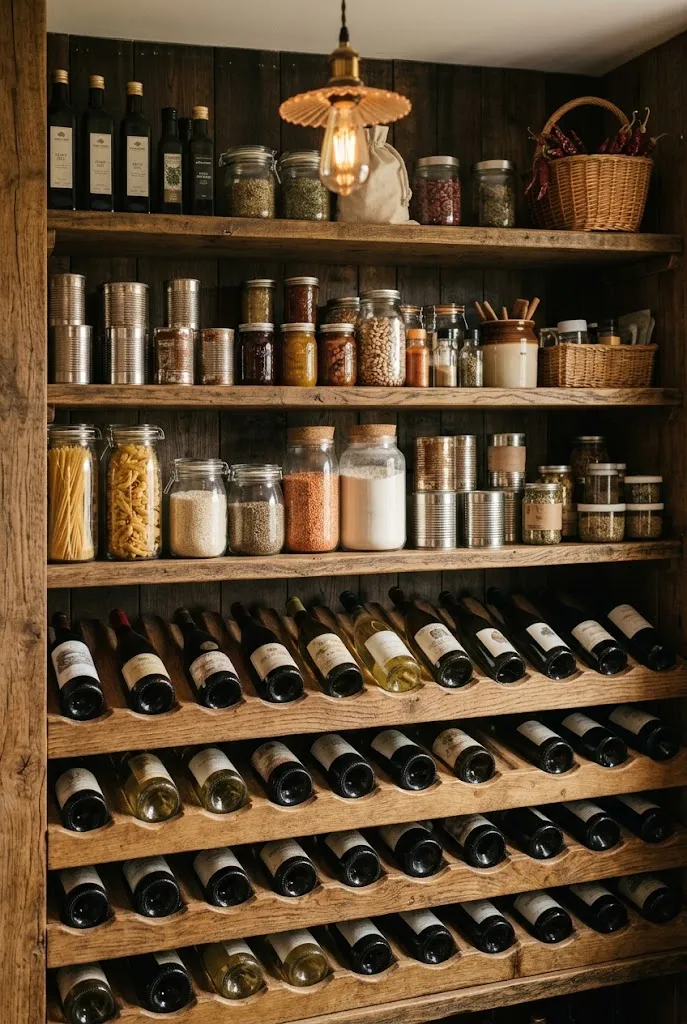
Wine and bottled beverages don’t have to live in a separate rack. A section of pantry shelving with angled bottle cradles keeps bottles on their sides and at a stable height. Choose a depth of at least 12 inches so bottles don’t wobble. Keep the racks away from heat sources, since temperature swings can affect wine over time.
22. Adjustable Shelf Pins for Changing Needs
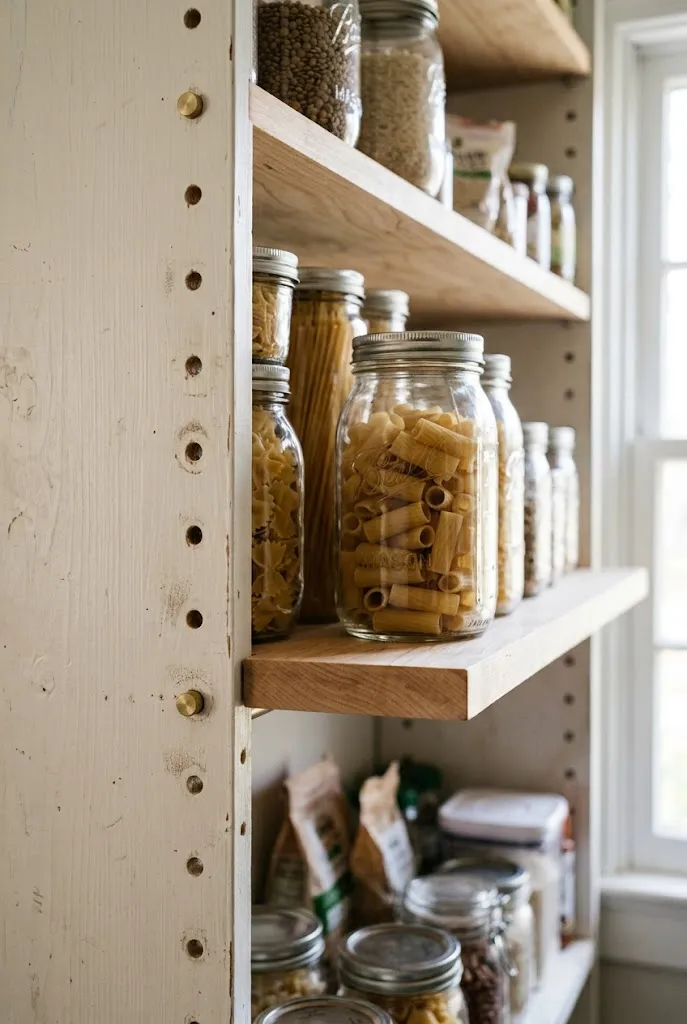
Households change over time. A shelf that held cereal boxes last year may need to hold larger containers next season. Adjustable shelf pins let you move shelves up or down without drilling new holes. This is an easy way to customize a pantry as your family grows or your buying habits shift. Pins are inexpensive, but check that shelves are supported across the full width to prevent sagging.
23. First-In, First-Out Shelving With Sloped Bins
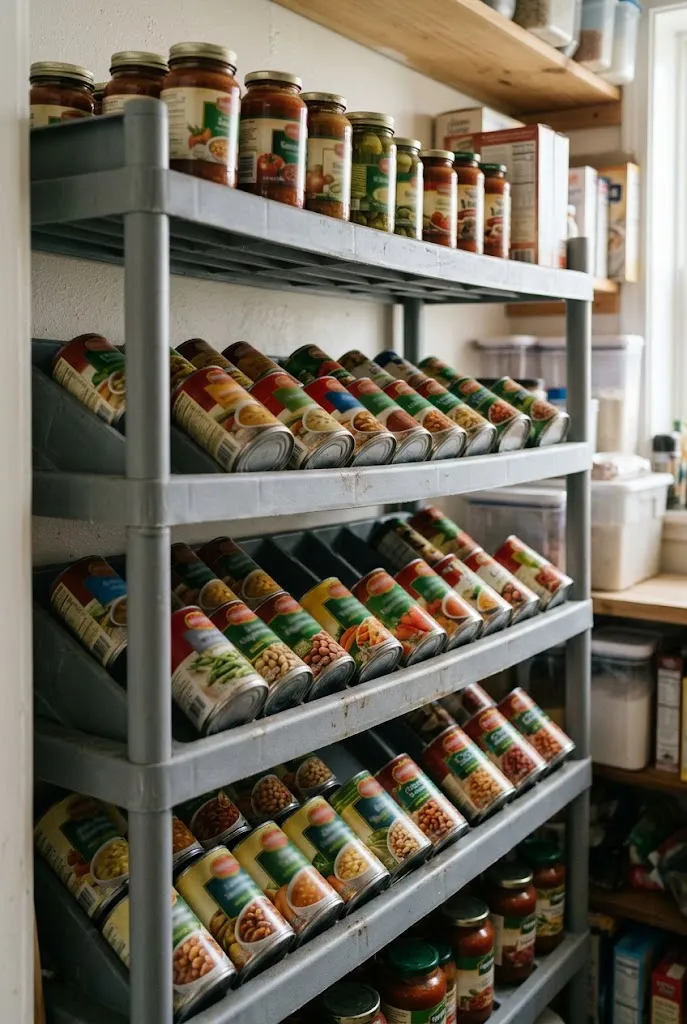
Keeping older items in front is the basis of good pantry rotation. Sloped shelving makes this automatic. Items placed at the top of a slope roll forward as you remove the front item, so the oldest product always comes first.
- Load new items at the back of the slope, where they’re hardest to reach.
- Let gravity bring older items forward as the front supply is used.
- Check dates when you restock, and move any items nearing expiration to the front.
This approach works especially well for canned goods and bottled sauces, which tend to get pushed to the back and forgotten.
24. Overstock Corner for Bulk Buys on the Lowest Shelf
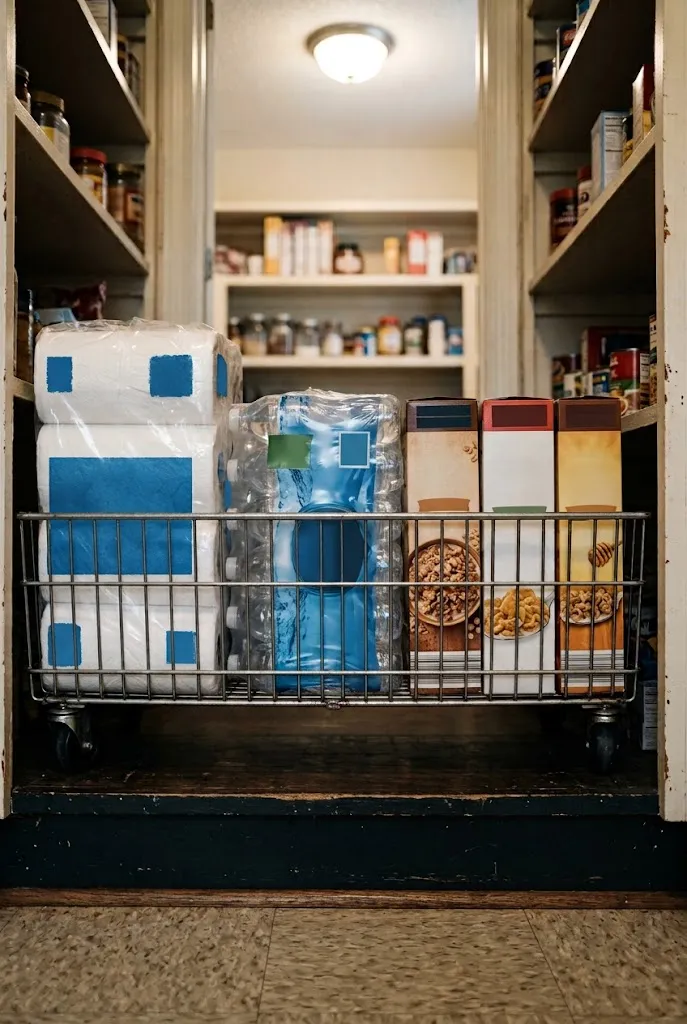
Bulk shopping saves money, but it can overwhelm a pantry if you don’t have a plan for the extras. Reserve the lowest shelf or a dedicated corner for overstock, and store items by category so you know exactly what you have. A shallow bin or sturdy cart keeps everything contained.
Editor’s Note: Overstock is easy to forget. Set a limit, such as one or two backup units of each item, and move extras to a separate storage space if the pantry starts to feel crowded.
25. Tall Freestanding Wire Shelving Unit in a Laundry-Adjacent Pantry
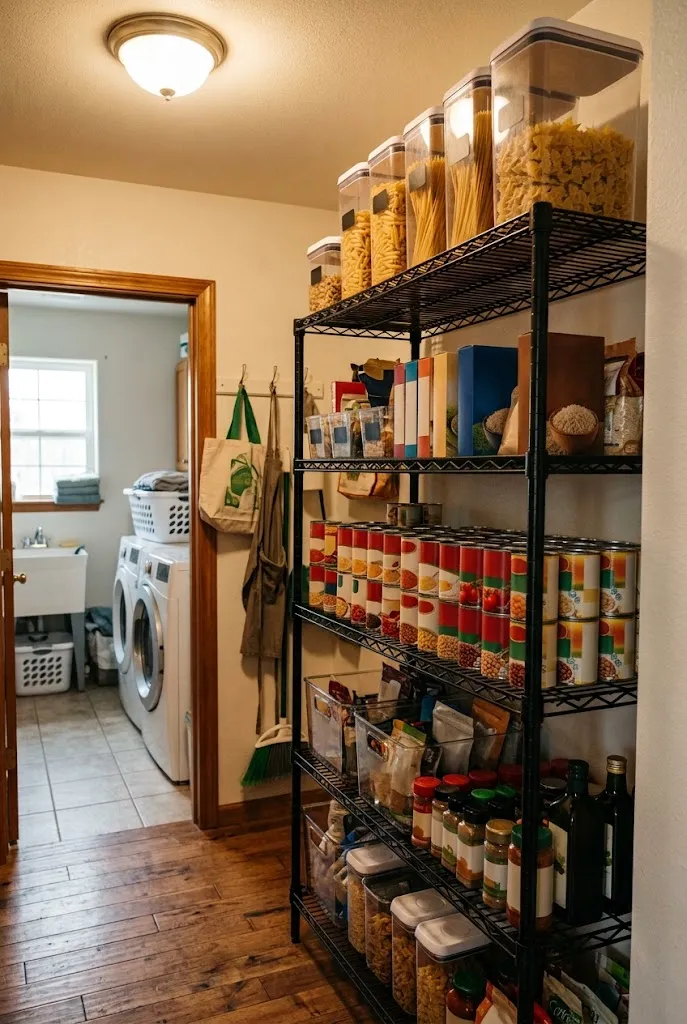
A tall wire shelving unit is one of the most affordable ways to add pantry storage, and it’s easy to move if you rent or change homes. Choose a unit with at least five shelves and a sturdy frame, and place it along the wall where it won’t block doors or outlets. Use liners or shelf bins to keep small items from falling through the wire.
- Choose a finish that matches your other hardware, such as black, chrome, or white.
- Add shelf liners to keep small items from slipping through.
- Anchor the unit to the wall if you have young children.
26. Warm LED Strip Lighting Under Each Shelf
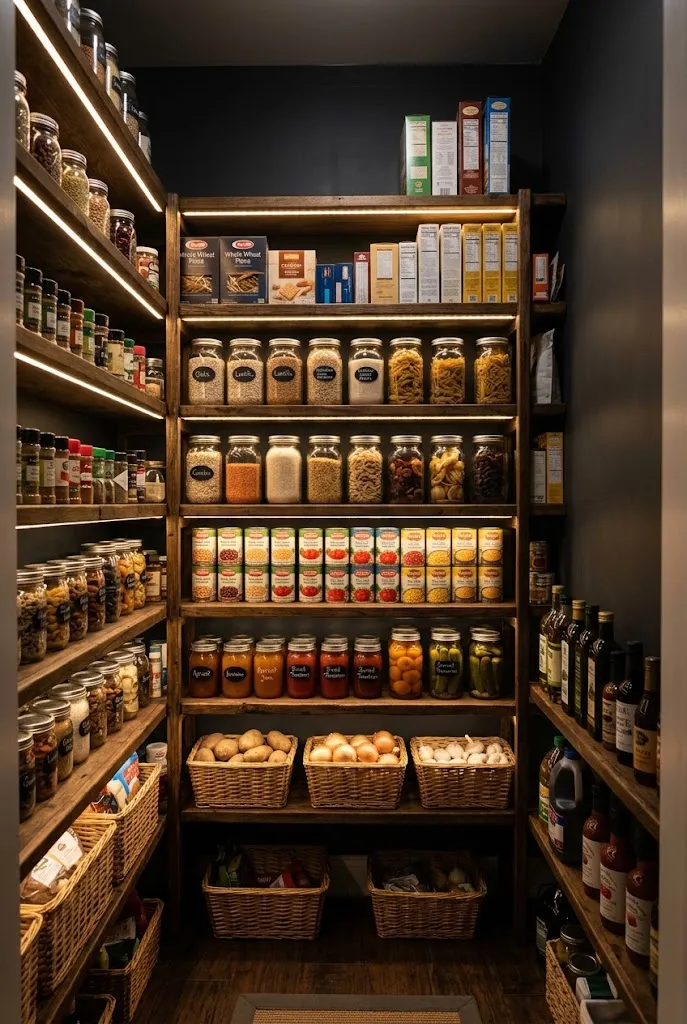
Pantries are often poorly lit, which makes it hard to find what you need. Warm LED strip lighting mounted under each shelf eliminates shadows and makes the entire space easier to scan. Choose a soft white color temperature around 3000K so the room looks inviting, and install strips with a plug-in or battery-powered option if wiring isn’t practical. A motion-activated switch adds convenience.
27. Painted Shaker-Style Pantry Doors With Built-In Shelving
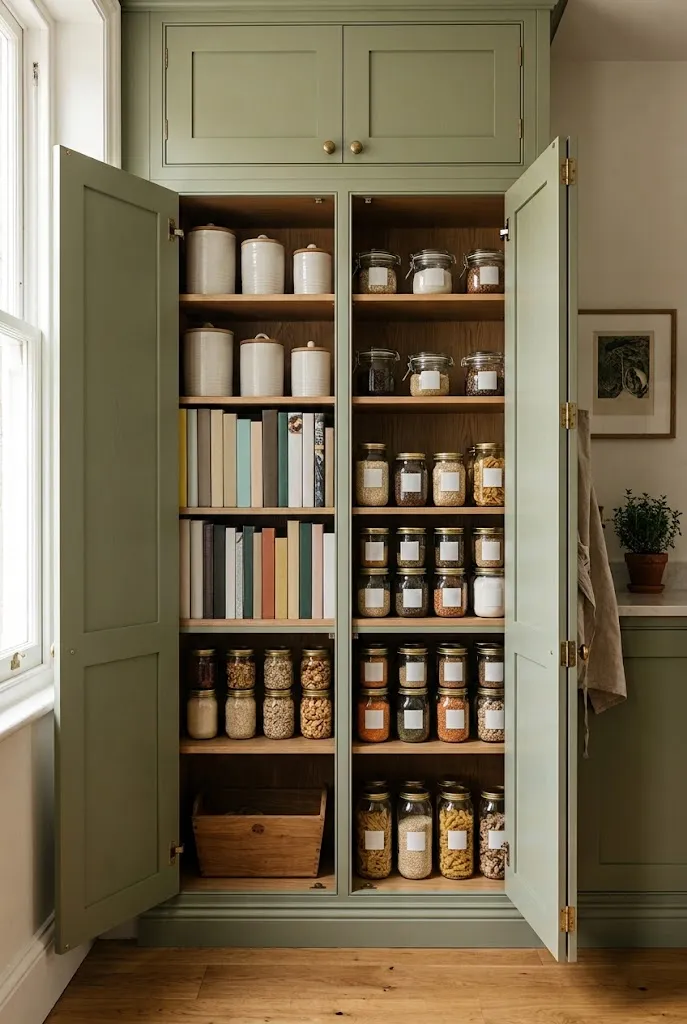
For a custom look, a built-in pantry with painted shaker-style doors blends into the rest of the kitchen. The doors hide the storage when you want a calm room, then open to reveal fitted shelves, pull-out drawers, and a spice rack. This is a premium option that typically requires a carpenter or experienced installer. Plan the interior layout before construction so the shelves match your actual items, and choose a durable paint finish that resists kitchen moisture.
28. Floating Wood Shelves Along an Open Pantry Wall
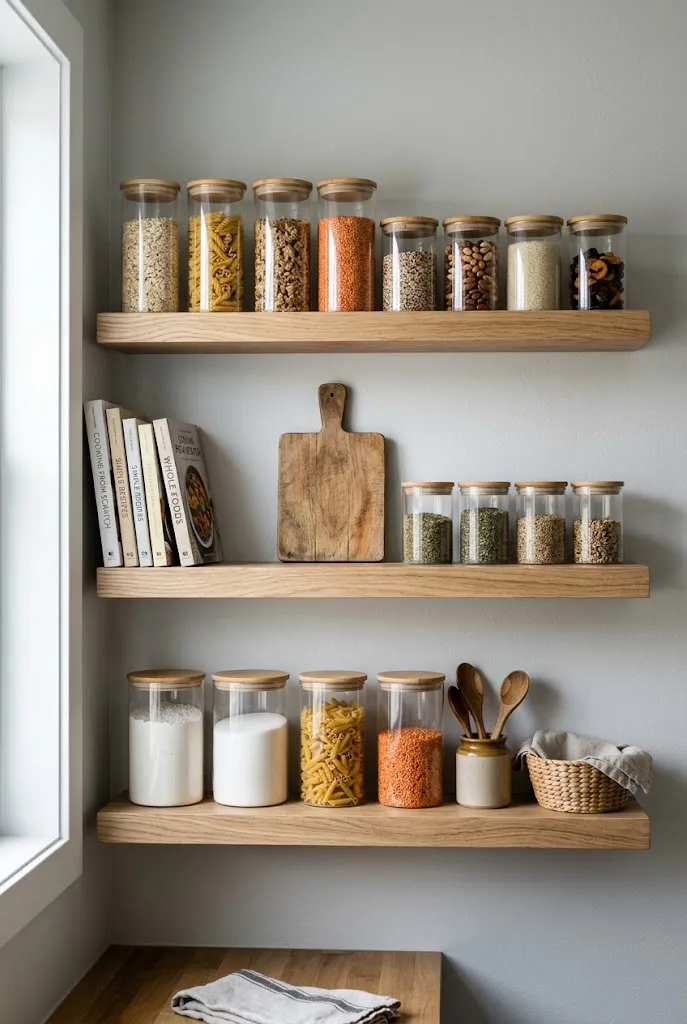
Open shelving works in pantries that have a clear wall and room for display. Floating wood shelves hold cookbooks, glass jars, and kitchen tools, and they can be spaced to suit the items you store. This approach requires careful planning, because open shelves show everything, so containers should be consistent in size and style.
Quick Tip: Use the same jar shape throughout the shelf run. Mixed shapes look busier, even when the items are neatly arranged.
29. Kids’ Snack Shelf at a Lower Height
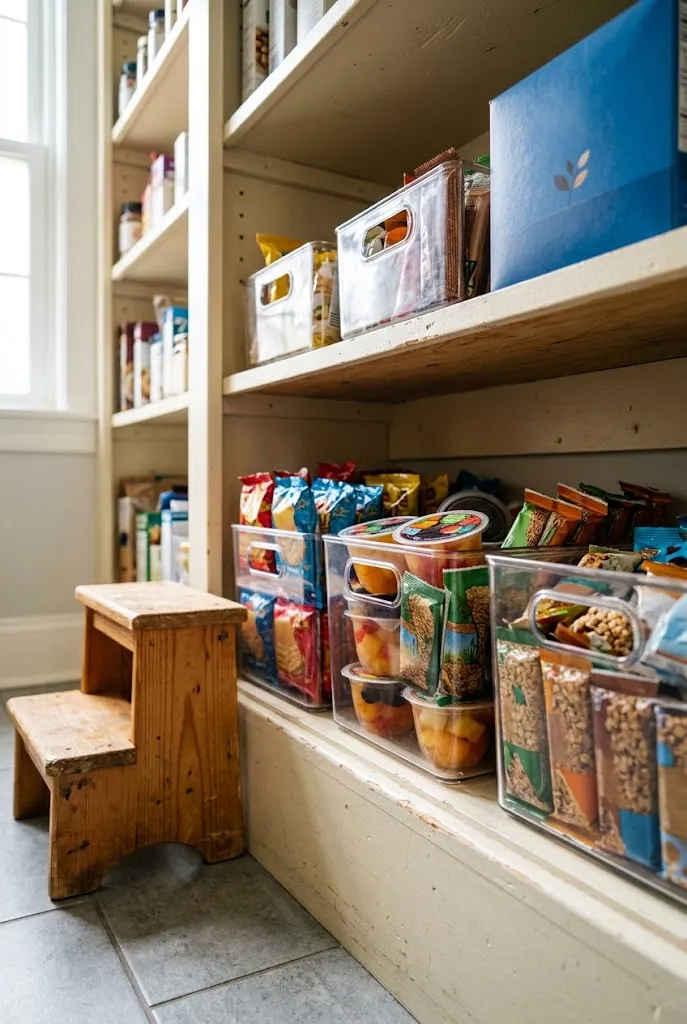
A lower shelf dedicated to snacks lets children get what they need without asking for help. It also reduces the number of interruptions during dinner prep. Keep the shelf stocked with portion-sized packages, and place it at a height where kids can reach comfortably but out of the way of heavier items. Clear bins with easy-open lids work well.
30. Pantry Cabinet Drawers With Flat Spice Inserts
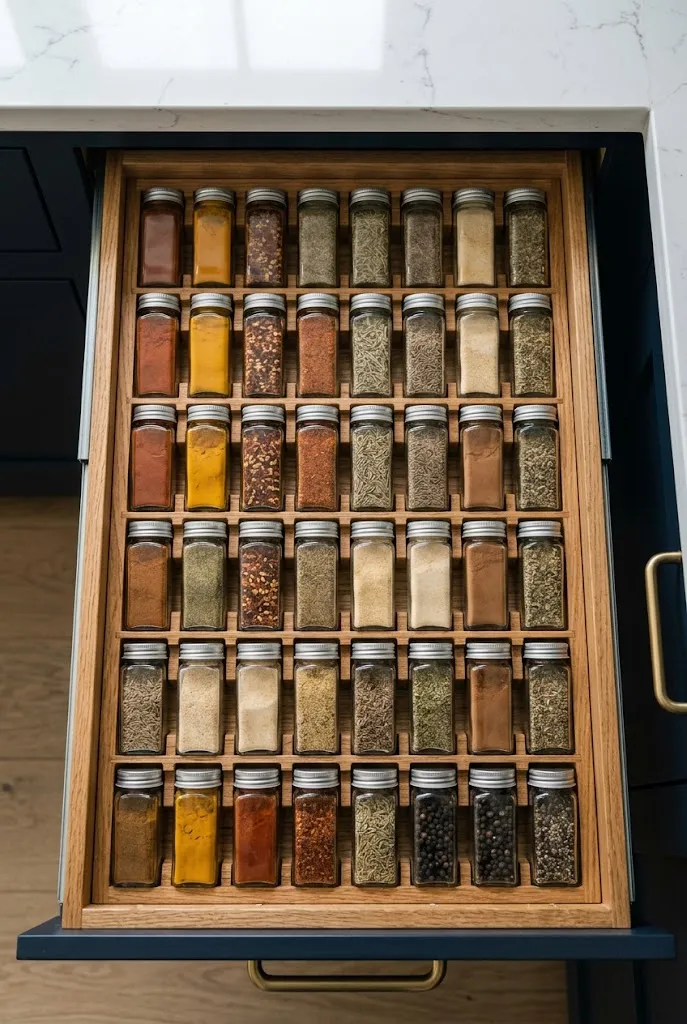
Spices stored flat in a drawer are easier to see than spices stacked on a shelf. A shallow drawer with a tray insert keeps jars upright and lets you read every label at a glance. This works best when the drawer is at least 3 inches deep and runs on full-extension slides. Choose inserts sized for your spice jars, and leave room in the layout for new additions.
Where to Start
You don’t need to tackle all 30 ideas at once. Start with the problem you notice most often. If you keep losing cans behind other cans, risers or a lazy Susan will make an immediate difference. If bulk buys have taken over the floor, a dedicated overstock corner or wire cart is the fastest fix. Renters can focus on low-cost, no-drill options like over-the-door racks, tension rods, and pegboard, while homeowners planning a remodel can consider built-in shelving, pull-out drawers, or a walk-in layout. Once the first change is working, add one more and see how it fits your routine. A pantry that matches how you cook will stay organized far longer than one that looks perfect for a single afternoon.