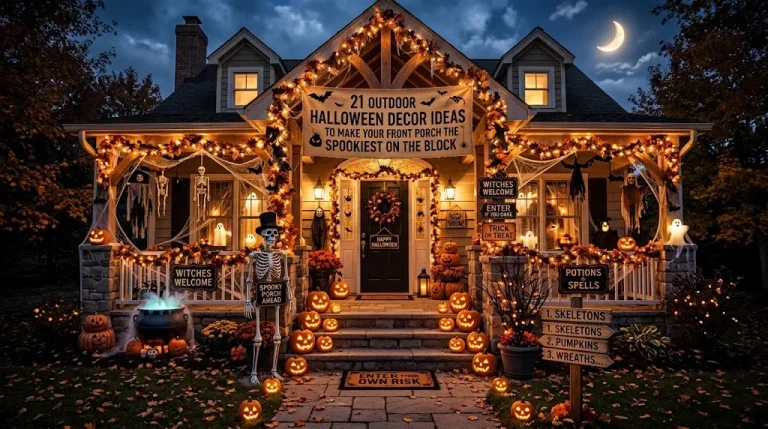

30 DIY Halloween Decor Ideas to Transform Your Home on a Budget
Halloween decorating adds up fast. A few packaged skeletons, a light-up inflatable, and a bag of fake webbing can cost more than the candy. The good news is that some of the most memorable DIY Halloween decor comes from things you may already own: old jars, cardboard boxes, black paint, cheesecloth, and a few spare branches.
This collection covers 30 projects for every part of the house, from porch steps and front doors to mantels, windows, and dining tables. Some take ten minutes, others need an afternoon. Several are kid-friendly, a few lean moody and grown-up, and all of them aim for a finished look that feels deliberate rather than cluttered. Where a project involves hot glue, spray paint, or lighting, you’ll find the safety notes right alongside the steps.
1. Paper Bag Luminaries With Cut-Out Bats
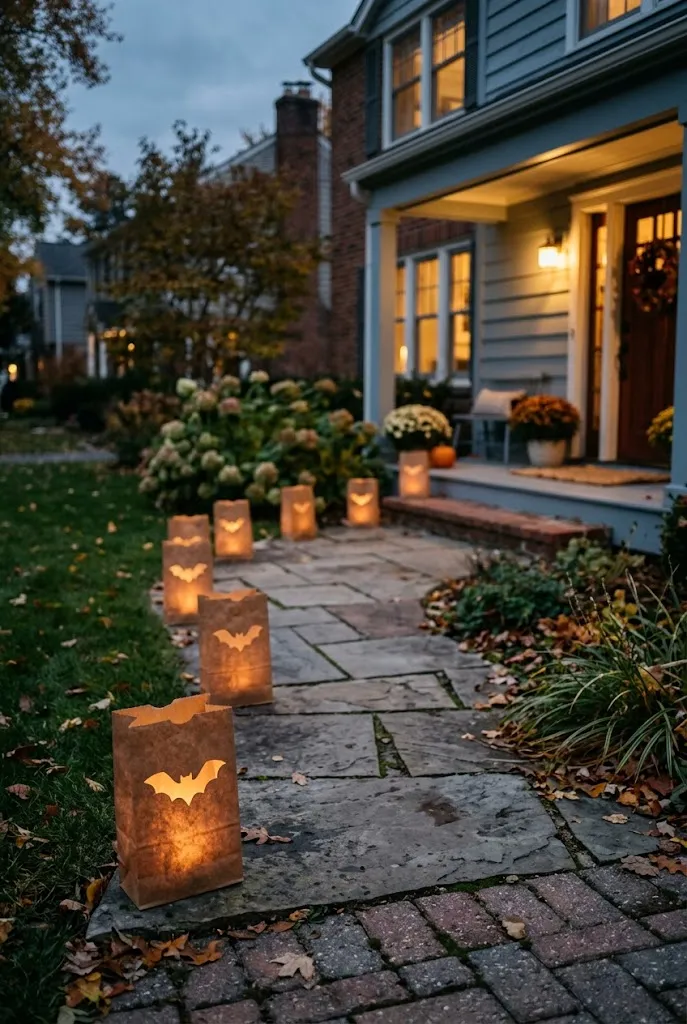
Plain brown lunch bags make some of the cheapest outdoor lighting you can build. Cut a bat silhouette into the front of each bag, fold the top rim down once for a sturdier edge, and drop a battery-operated tea light inside. Lined up along a walkway or porch steps, they cast soft bat-shaped glows.
- Trace a bat template onto black cardstock, or draw directly on the bag.
- Cut the shape out with a craft knife on a cutting mat.
- Add two inches of sand or pebbles to the bottom of each bag so it stays upright.
- Set an LED tea light on top.
Quick Tip: Use LED lights only. Paper and open flame don’t mix, and wind can tip bags over.
2. Matte Black Foam Pumpkins With Gold Stems
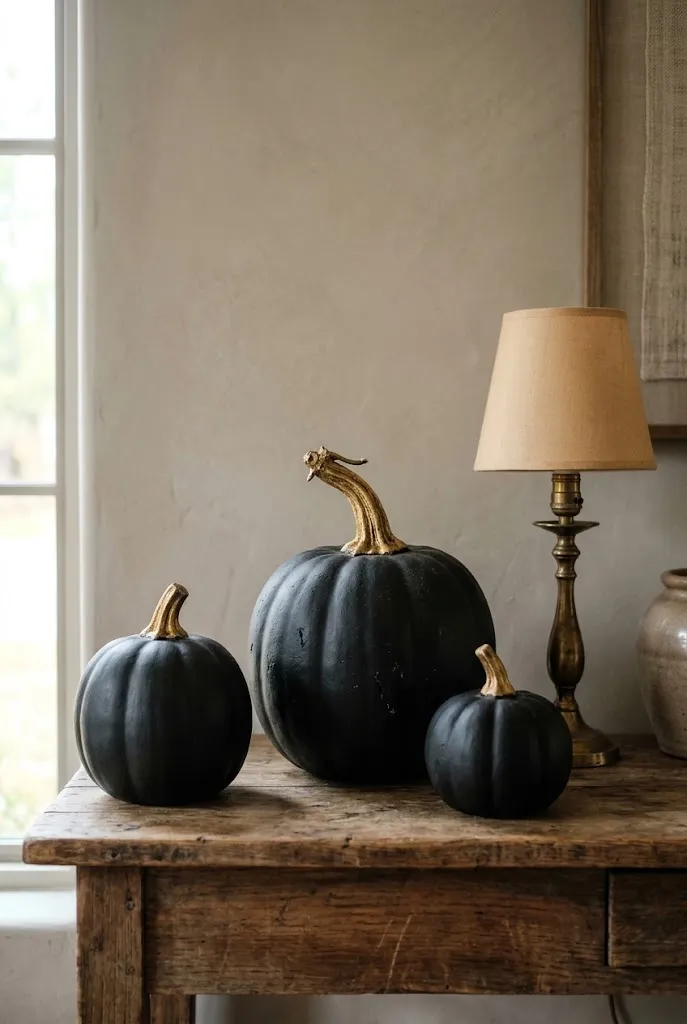
Craft-store foam pumpkins are lightweight, don’t rot, and take paint well. A coat of matte black acrylic, followed by gold paint on the stems only, turns inexpensive orange pumpkins into a moody grouping that looks far pricier than it is.
- Matte black acrylic or chalk-style paint, two thin coats
- Gold metallic paint or a gold paint pen for the stems
- Foam pumpkins in three sizes for height variation
- A cake stand or wooden riser to lift the tallest one
Group them in odd numbers on a console, entry table, or porch bench. Because foam is porous, paint with a sponge brush and let each coat dry fully to avoid streaks.
3. Cheesecloth Ghosts Draped Over Bottles
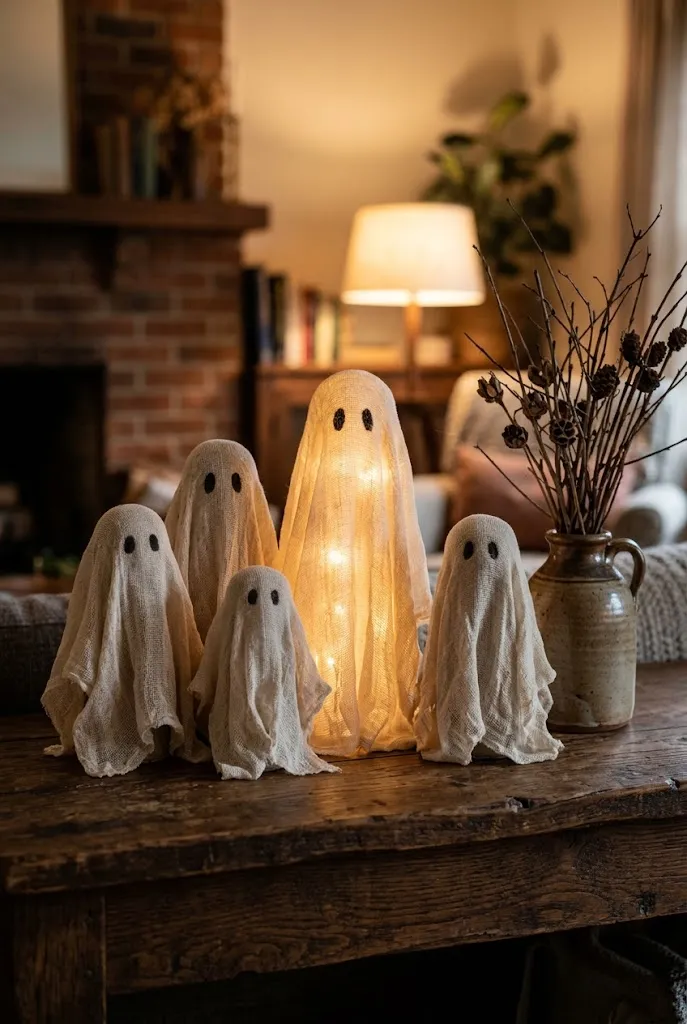
This classic works because it costs almost nothing and looks surprisingly eerie when lit from behind. Soak cheesecloth in fabric stiffener, drape it over a bottle or a balled-up piece of foil on a jar, and let it dry into a ghostly shape. Remove the form and you have a hollow, floating-looking ghost.
Best For: Mantels, bookshelves, porch tables
Investment: Accessible
Visual Effect: Soft, translucent, slightly uneven, like fabric caught mid-movement
Set it over a battery tea light for a gentle glow. Work on a protected surface, since the stiffener is messy, and let pieces dry completely, which can take a day.
4. A Swarm of Black Paper Bats Up the Staircase Wall
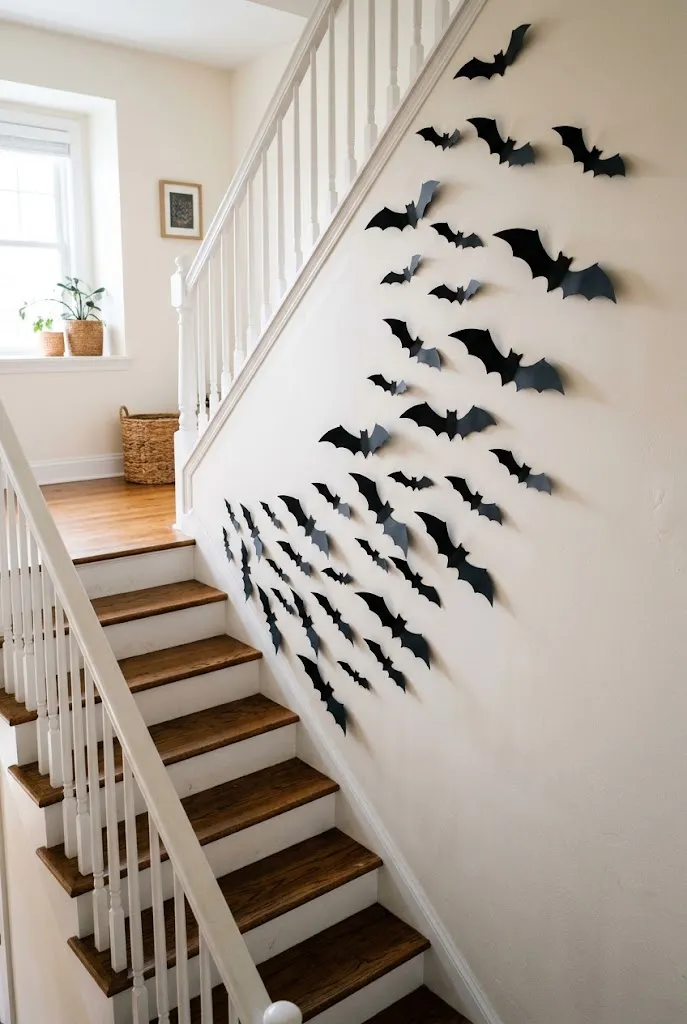
A bat swarm needs only black cardstock and a template, yet it can fill an entire stairwell. The trick is scale and spacing: cut bats in three sizes, then cluster them near the bottom and let them thin out as they climb.
- Fold each bat’s wings slightly forward so they catch light and shadow.
- Use removable adhesive putty or painter’s tape, especially in a rental.
- Place bats in loose arcs rather than straight lines, so they look as if they’re flying.
Common Mistake: Spacing bats evenly like wallpaper.
Better Approach: Crowd them in a cluster and let a few stray, which reads as movement.
5. Mason Jar Ghost Lanterns
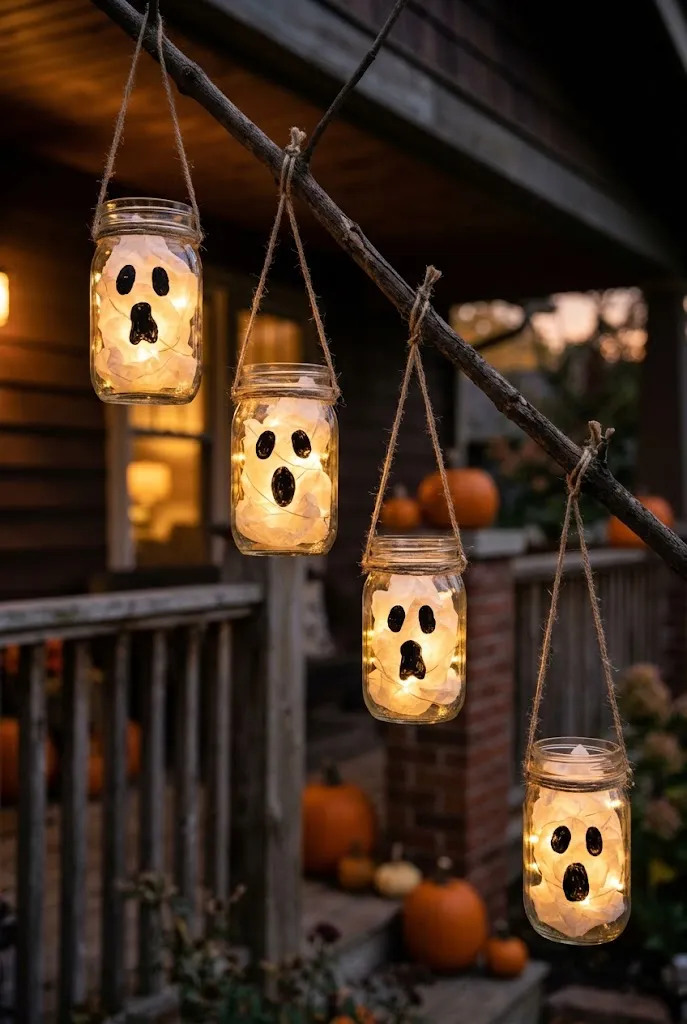
Ghost faces on glass jars are an easy afternoon project, and they’re well suited to kids. Paint the outside of a clean jar with white paint, or cover it with a thin layer of white tissue-paper decoupage, then add a simple face using black craft vinyl or paint.
For the glow, use a battery tea light or a small string of fairy lights tucked inside. Cover the jar rim with a twine bow or a loop of wire for hanging from a tree branch or porch hook.
| Finish | Look | Best Fit |
|---|---|---|
| Painted white | Opaque, solid ghost | Daytime visibility |
| White tissue decoupage | Softly glowing, translucent | Evening porch display |
Tissue decoupage gives a better glow after dark, while paint shows up better in daylight.
6. Embroidery Hoop Spiderweb Wall Art
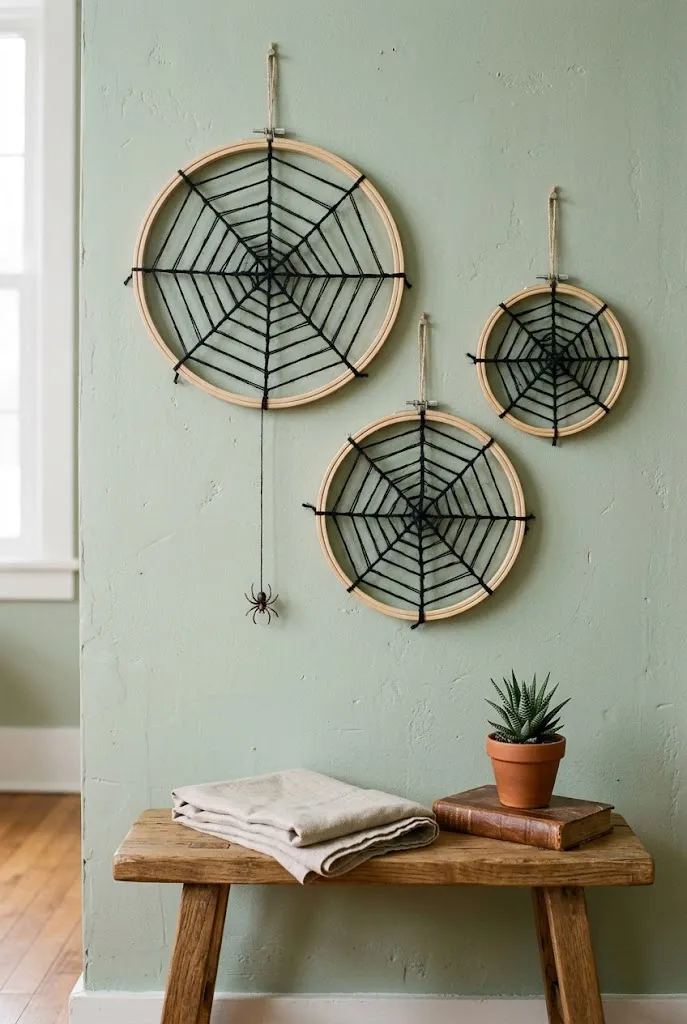
Wrapping black or white yarn across a wooden embroidery hoop makes a graphic spiderweb that hangs on a wall, door, or window. It reads as intentional wall art rather than novelty decor, especially in a group of two or three hoops at different sizes.
- Wrap the outer hoop’s inner ring with a strand of yarn so it frames the web.
- Cross yarn across the center to form six or eight spokes, knotting at each end.
- Spiral outward from the center, looping once around each spoke.
- Finish with a small plastic spider or a felt one on a line of thread.
Contrast matters: black yarn on a light wall, white yarn on a dark door.
7. A Thrifted Apothecary Shelf
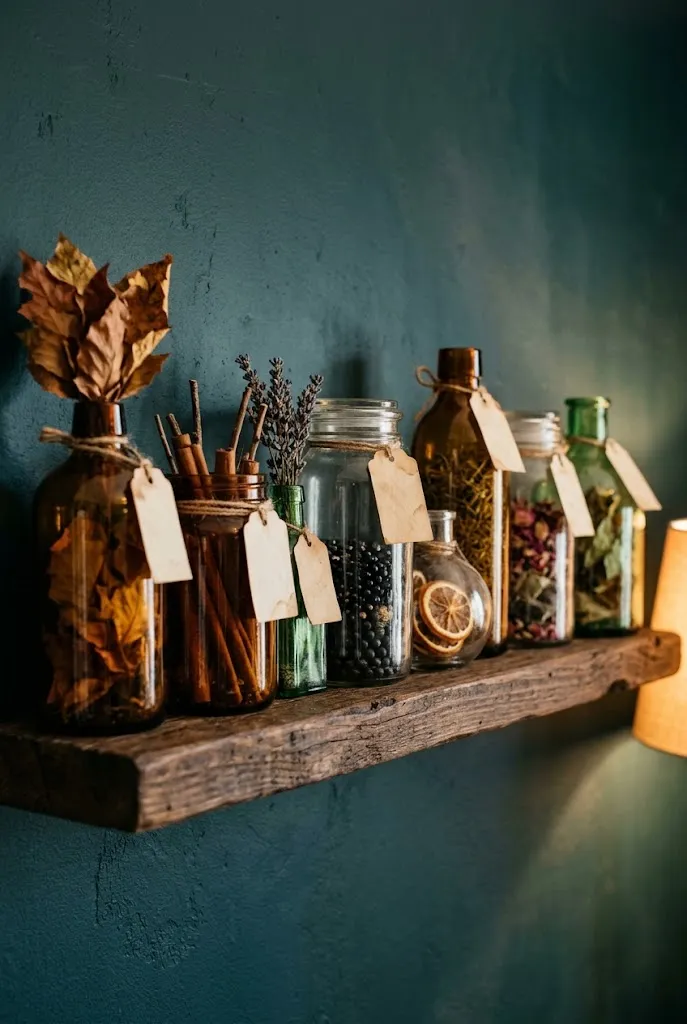
Mismatched thrifted glass jars, bottles, and canisters can become an “apothecary” display with little effort. Wash them, remove old labels, and fill them with things that look moody but cost little: dried leaves, cotton “cobwebs,” black beads, cinnamon sticks, or colored water.
- Tea-stained paper tags tied on with twine add age without needing any writing.
- Dark amber and green glass fits best; clear glass can be tinted with a drop of food coloring in water.
- Group by height, with the tallest bottles at the back.
Editor’s Note: Keep colored water in sealed containers and out of reach of curious pets and young children.
8. Black Branch Centerpiece With Hanging Ornaments
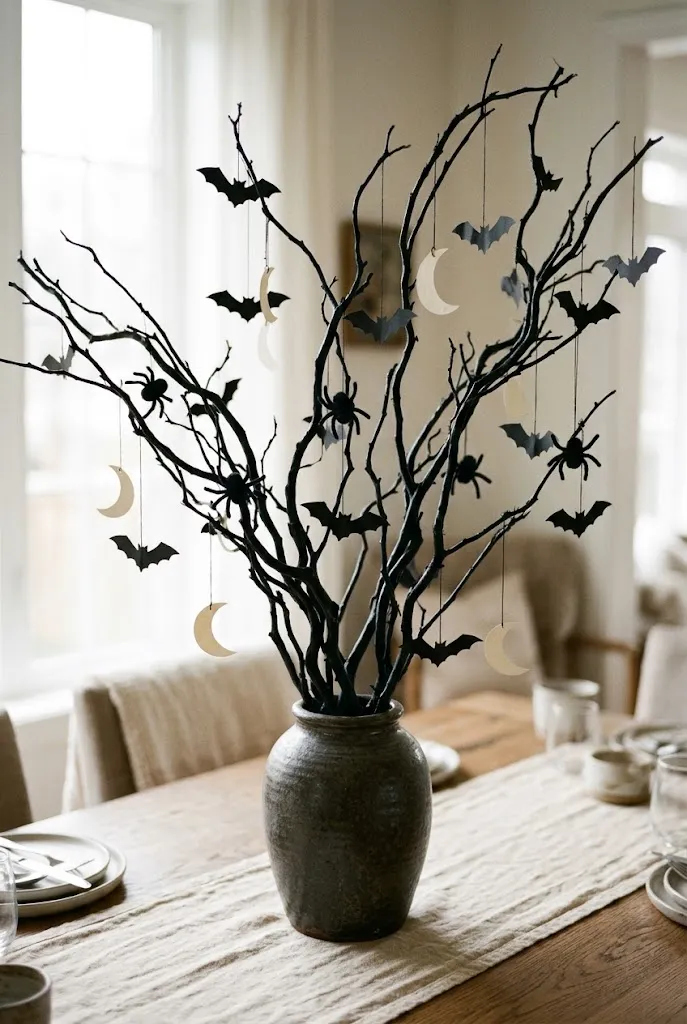
Sticks from the yard can make a dramatic table centerpiece. Spray-paint a handful of branches matte black (outdoors, following the label’s ventilation advice), stand them in a heavy vase or jar filled with pebbles, and hang small lightweight pieces from them.
Ornament ideas include paper bats, small cut-out moons, felt spiders, and mini pumpkins. Keep the arrangement narrow enough to talk over if it sits on a dining table, and weight the base well so it won’t tip.
9. A Feather Wreath for the Front Door
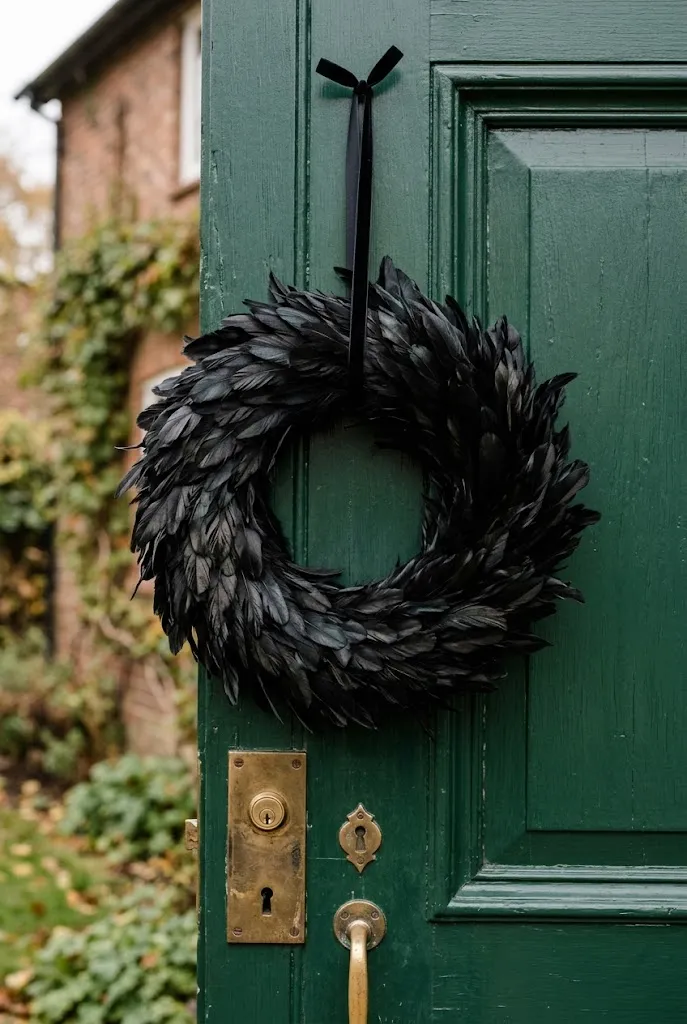
Black feathers on a plain grapevine or foam wreath form give a moody, raven-like texture. Craft feathers are sold in bulk and are inexpensive. Layer them in overlapping rows with a low-temp glue gun, starting from the inside edge and working outward.
Add one accent: a velvet ribbon, a few dried seed pods, or a small gold moon. Keep the rest restrained so the feather texture stays the focus.
Do: Overlap feathers in the same direction for a smooth flow.
Don’t: Pile on extra decorations, which flatten the texture.
Watch your fingers, as hot glue burns easily even on low settings.
10. Tassel Garland in Black, Orange, and Cream
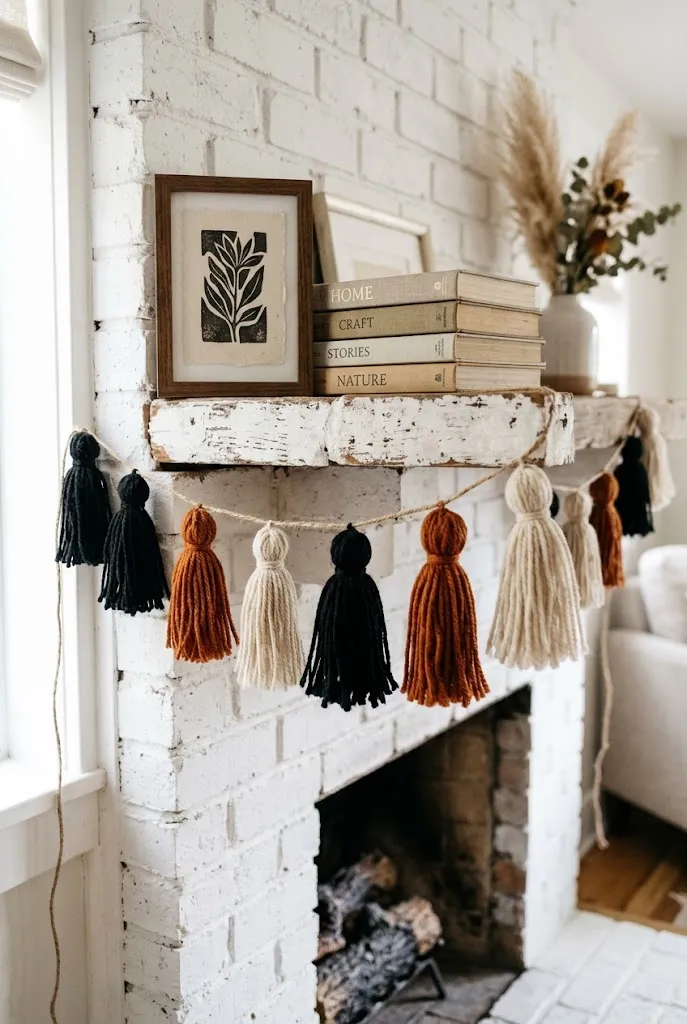
Tassels are easy and forgiving. Wrap yarn around a piece of cardboard, tie off the top, snip the bottom, and bind a “neck.” Make about twenty in a limited palette, then thread them onto twine.
Stay with three colors for a cohesive look. Mixed yarn weights and slightly different tassel lengths feel more handmade. Hang across a mantel, a bookcase, or a window frame, and use removable hooks if you’re renting.
11. Foam Board Tombstones for the Lawn
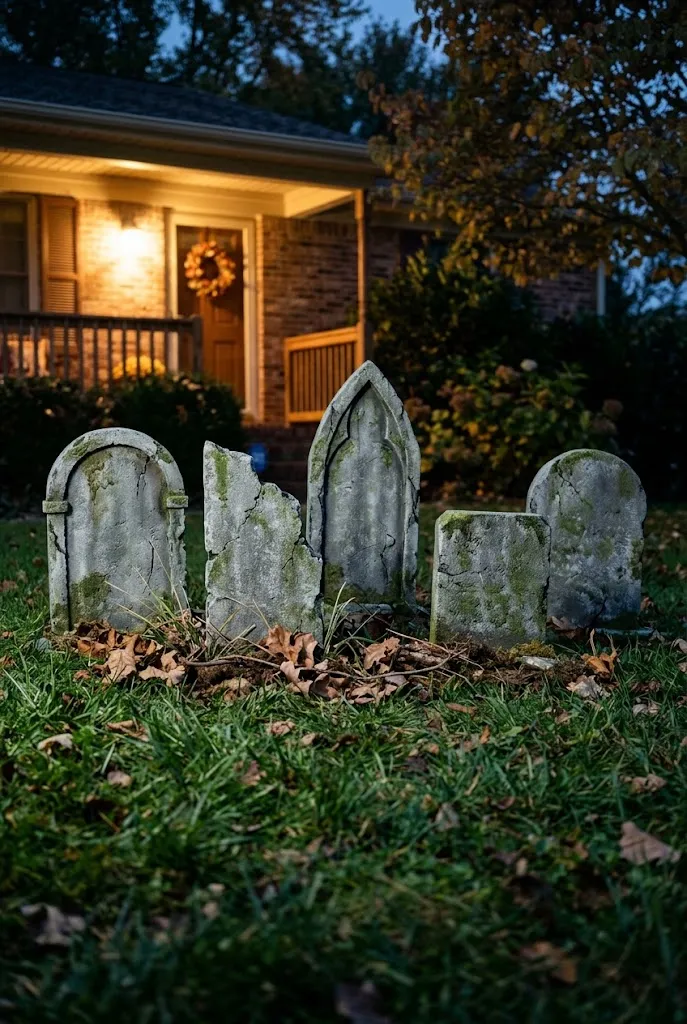
Insulation foam board from a hardware store is cheap, light, and easy to cut. Cut gravestone shapes with a serrated knife, round the tops, and paint with a stone-effect sponge technique in gray, black, and a touch of green.
- Cut the tombstone shape and bevel the top edge.
- Sponge on a gray base coat, then dab darker gray and moss green for age.
- Dry fully and seal with a clear outdoor sealer if rain is expected.
- Stake with wooden dowels or rebar for stability.
Safety Note: Use foam-safe paint, since some spray paints dissolve foam.
12. Felt Candy Corn Garland
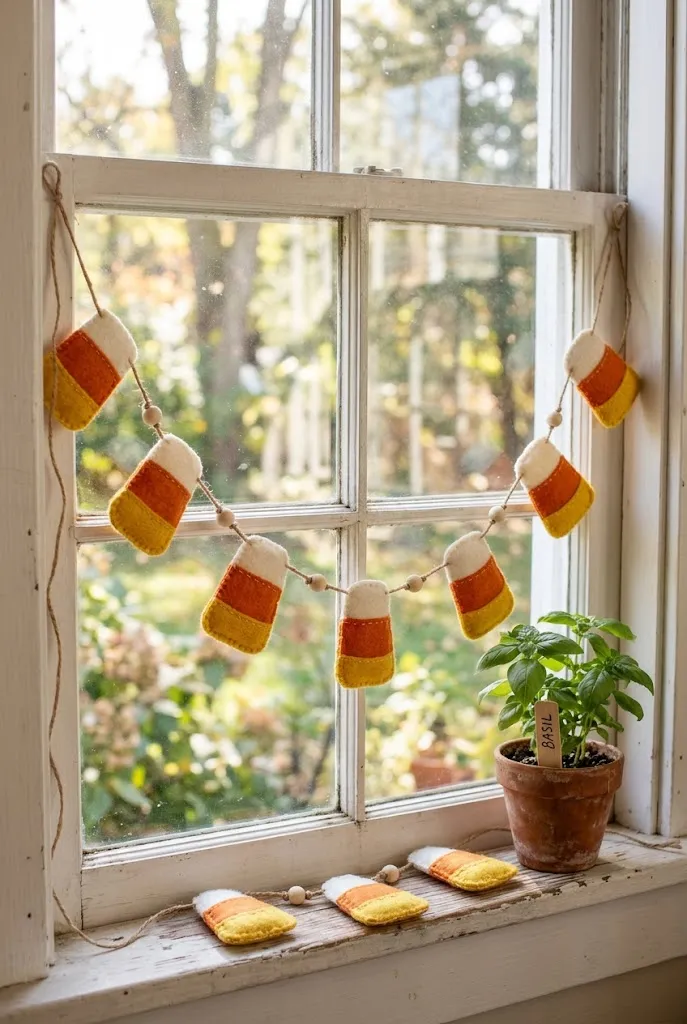
Felt triangles in white, orange, and yellow sew or glue together into candy corn shapes, then thread onto string for a cheerful garland. It’s a gentle option for families who want something less spooky.
- Cut triangles in the same size, then stack three colors to make one piece.
- Use fabric glue instead of hot glue for a softer finish.
- Add a bit of stuffing for a plump look.
Hang it across a window, a mantel, or a doorway.
13. Paint-Dipped No-Carve Pumpkins
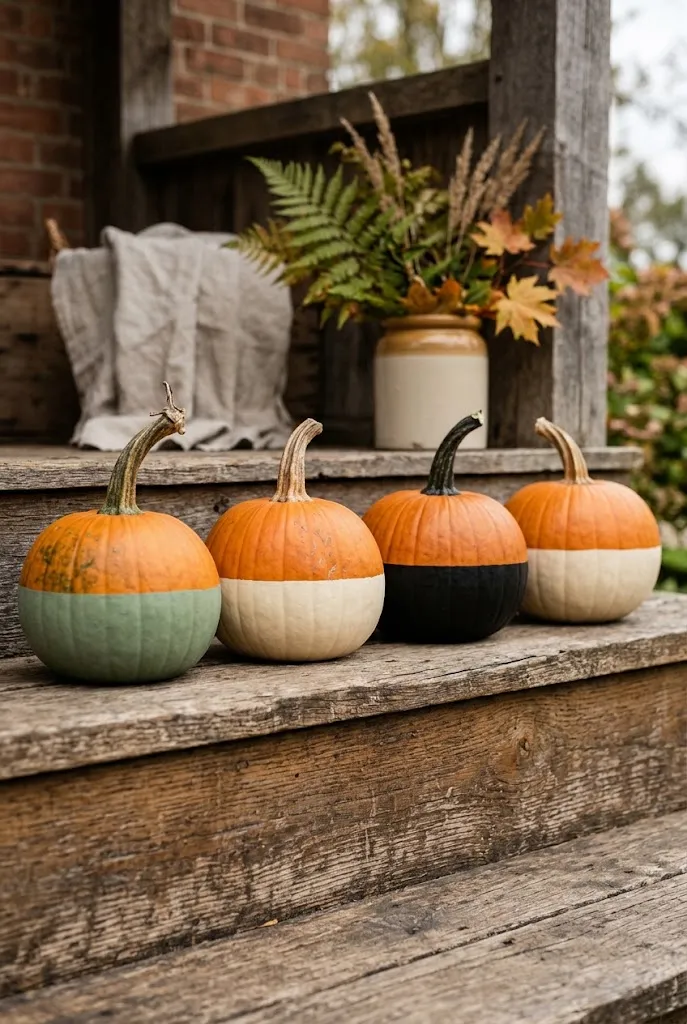
Dipping real pumpkins in paint gives a clean, modern finish without carving. Wipe the pumpkin, tape a straight line around its middle with painter’s tape, and paint one half black or white. Peel the tape before the paint fully dries for the cleanest edge.
This beats carving when you want pumpkins that last longer, or when small kids shouldn’t be handling knives. Try color-blocked halves in black, cream, and muted green to match a neutral porch.
14. Striped Pumpkin Stack With Painter’s Tape
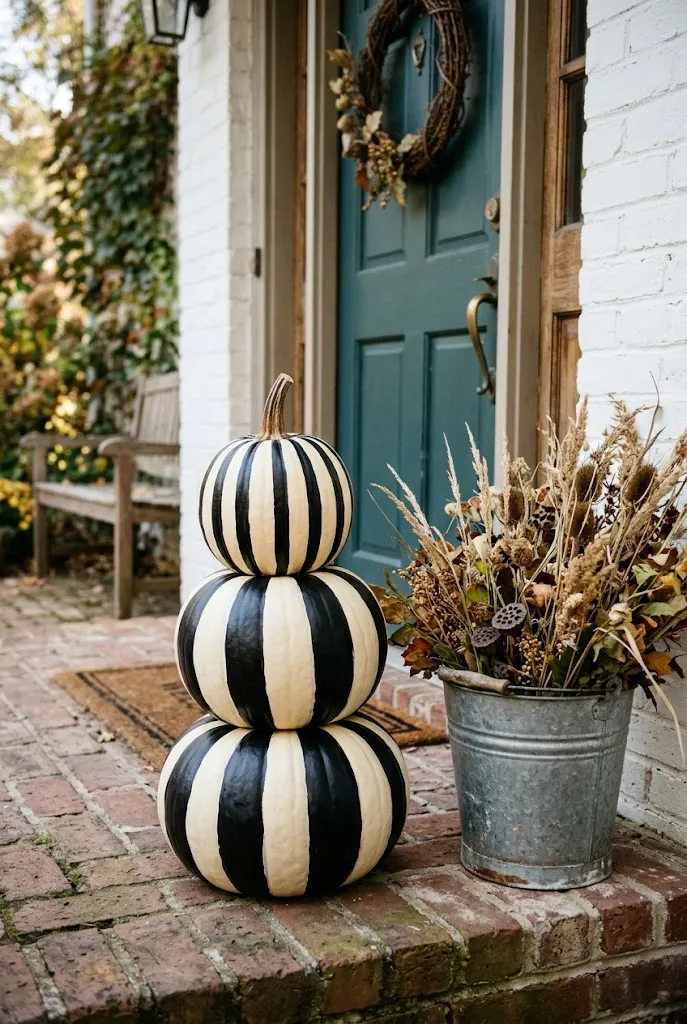
Painter’s tape makes crisp stripes on pumpkins. Tape the lines, brush paint across, and peel off the tape to reveal the pattern.
- Use black on white for a graphic look.
- Vary stripe width between pumpkins.
- Stack two or three with a flat-bottomed one at the base.
Quick Tip: Press the tape edge firmly with a fingernail so the paint doesn’t bleed underneath.
15. Floating Witch Hats Over the Dining Table
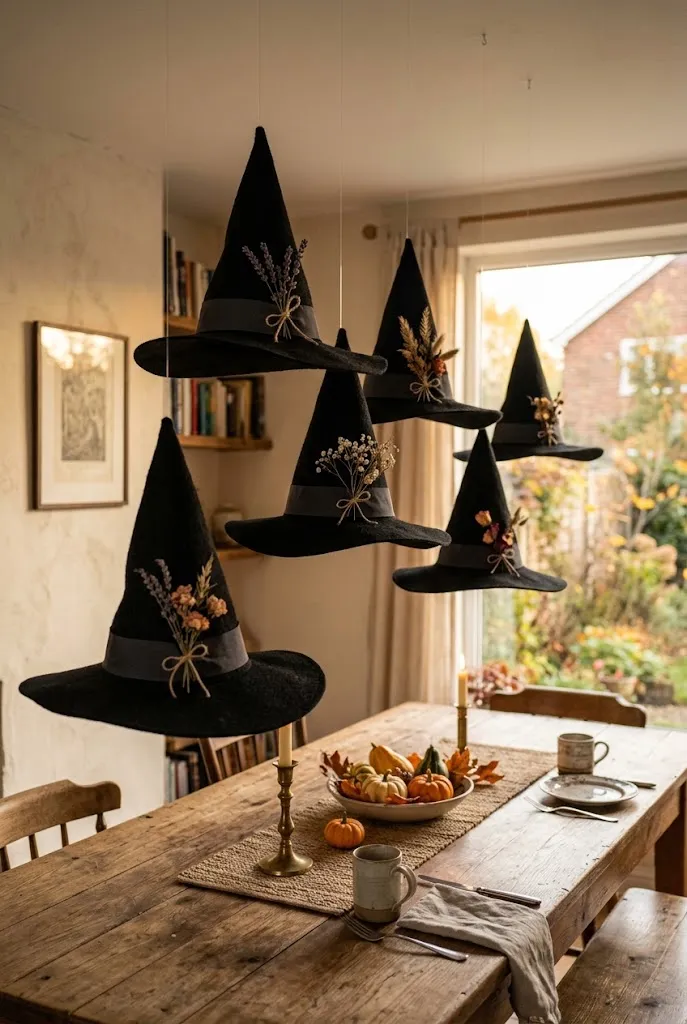
Black witch hats hung at different heights from clear fishing line create a fun overhead display. Dollar-store hats work, but adding a ribbon band or a bit of dried floral makes them look custom.
Hang them from ceiling hooks or a curtain rod, with each hat at a different height. Keep them out of the way of tall guests and anyone reaching across the table.
16. Spray-Painted Wine Bottle Candlesticks
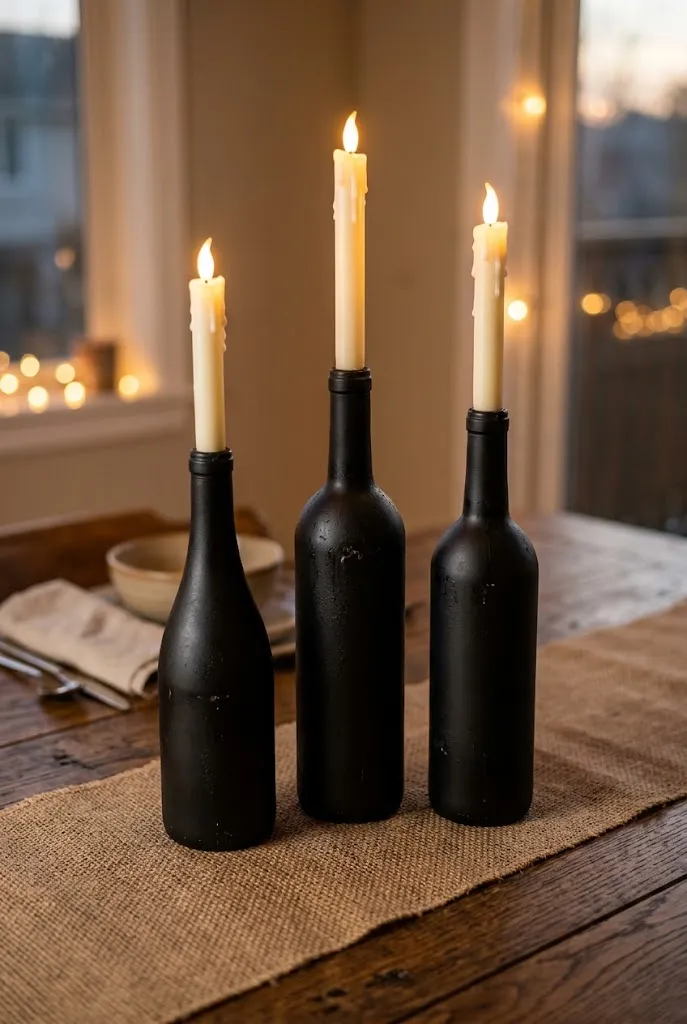
Empty wine bottles, painted matte black, become tall candlesticks with a simple LED taper in the neck. Clean the glass thoroughly, prime, and spray in light coats outdoors.
Add dripping wax detail with white craft paint or hot glue if you like. Use only LED tapers so nothing flammable sits near the decor.
17. Gauze-Wrapped Mummy Windows
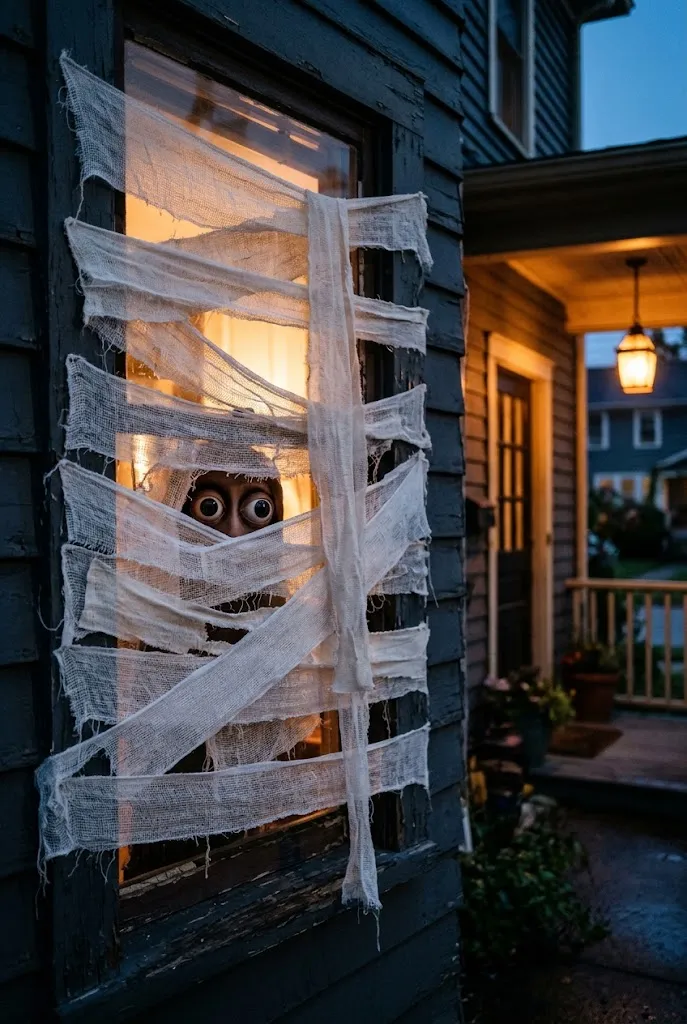
Wrap a window with strips of white gauze or torn old sheets and add two googly eyes in the gap, and the whole house has a face. It’s cheap, quick, and visible from the street.
- Run strips diagonally across the glass with removable tape.
- Overlap them for a layered look.
- Leave a gap for the eyes.
- Place a lamp behind the window for an evening glow.
Make sure nothing blocks ventilation, egress windows, or smoke alarms.
18. Paper Lantern Pumpkins
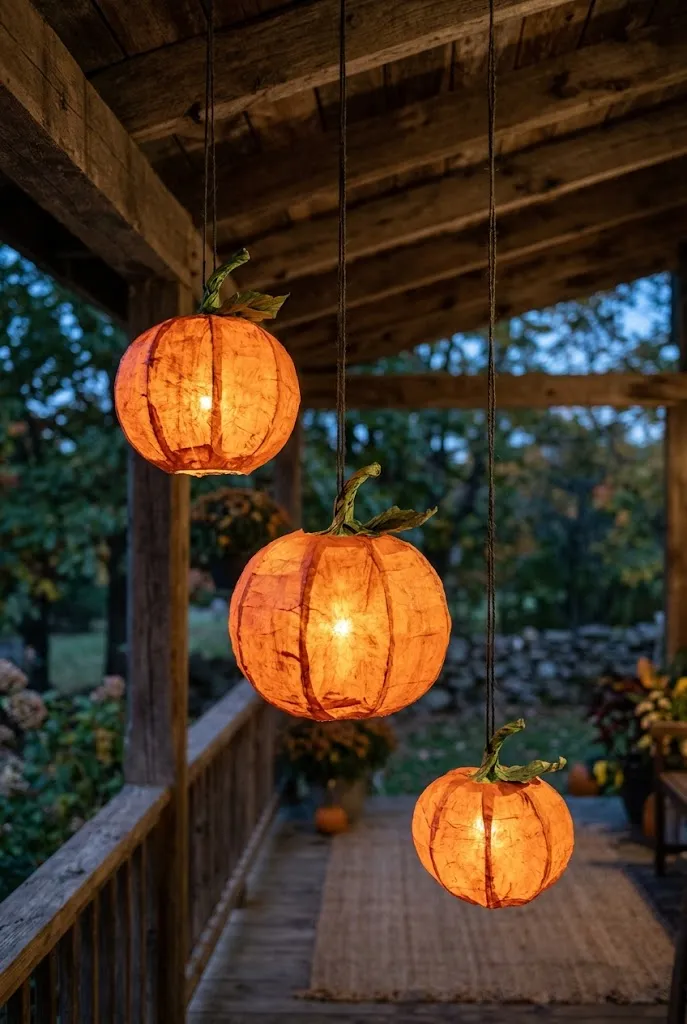
White paper lanterns painted orange make cheerful, light pumpkins that hang from porches, trees, or ceilings. Brush on diluted orange acrylic for a translucent glow, add a green paper stem, and curve a few lines in darker orange for ribs.
They look best in groups of three at different heights. They’re also very light, so a single nail or hook is enough.
19. Halloween Stained-Glass Window Silhouettes
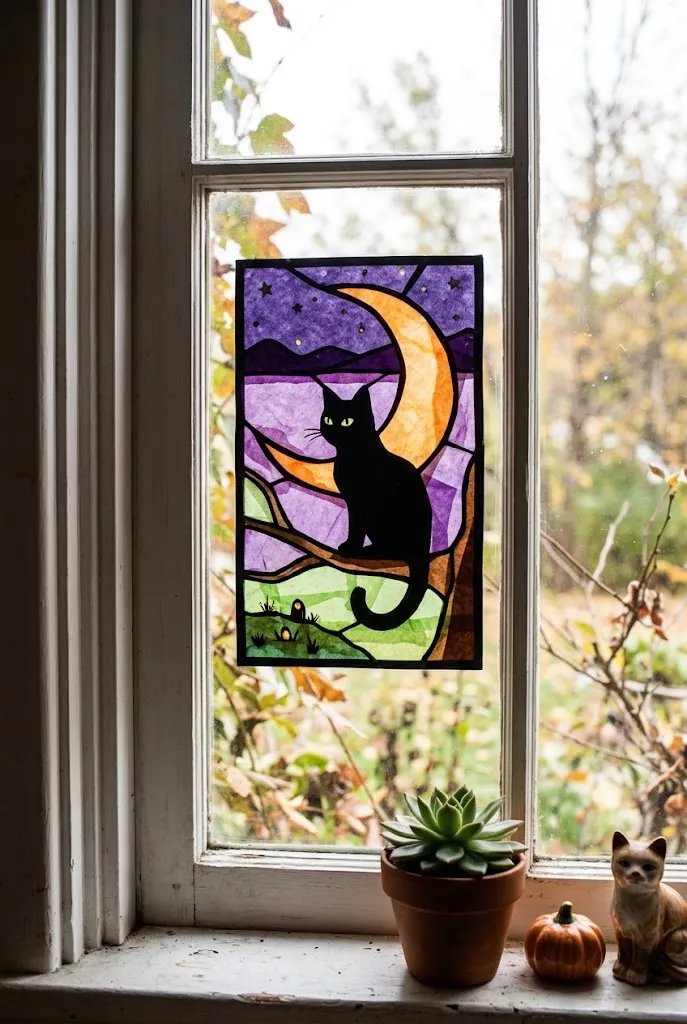
Black cardstock silhouettes and colored tissue paper turn a window into faux stained glass. Cut a haunted house, a cat, or a moon from black cardstock, back the openings with orange, purple, and green tissue, and tape to the glass.
Light behind the window makes it glow in the evening. It’s easy to remove and doesn’t damage the glass.
20. A Black Cauldron Porch Pot
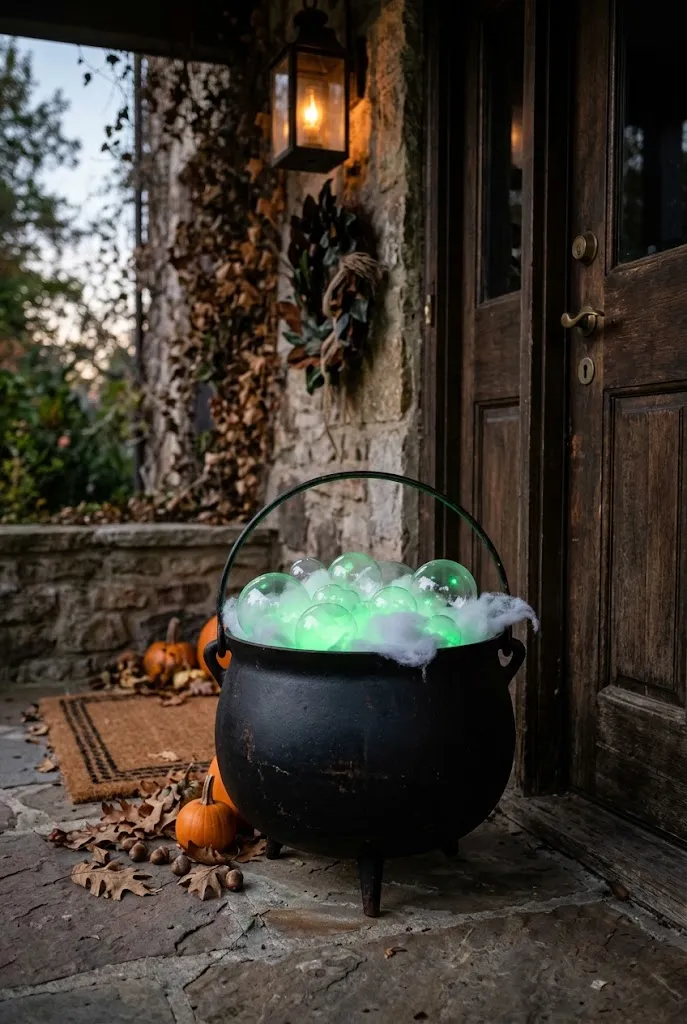
A plain plastic bucket or an old planter can become a witch’s cauldron with matte black paint and a few details. Fill it with crumpled paper to prop up lights, then top with green battery lights and cotton or fabric “mist.”
Add a few spooky “bubbles” made from clear plastic balls, or tuck in branches and faux foliage to keep it looking full.
21. Skeleton Hands Rising From a Planter
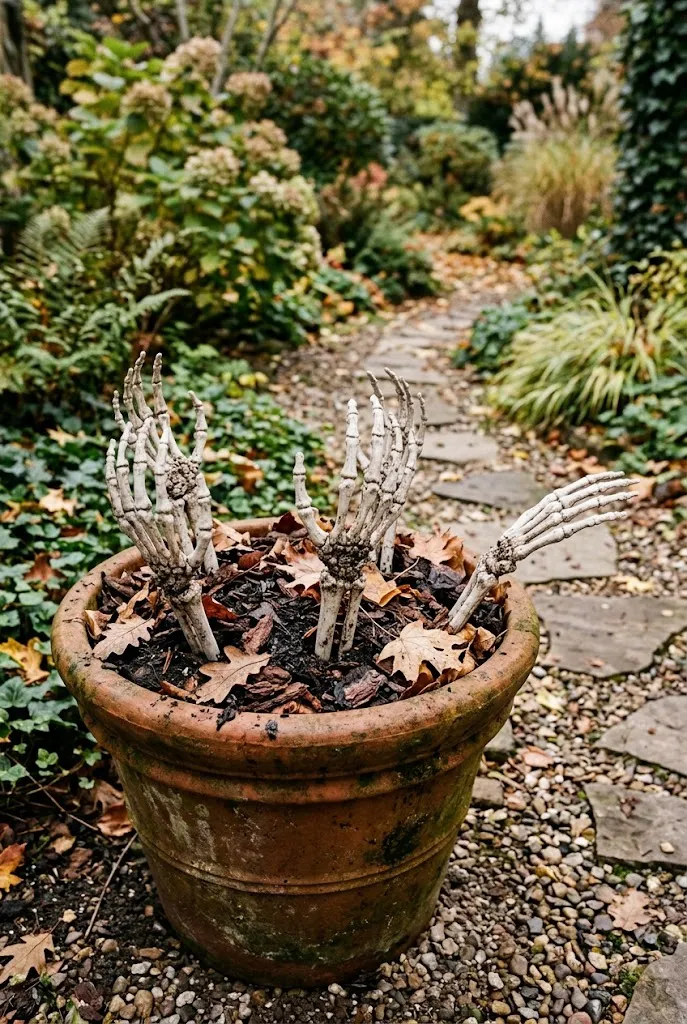
Dollar-store skeleton hands pushed into a planter of soil or crumpled paper create a “rising from the grave” look at almost no cost. Add dried leaves, a few faux mums, and bark mulch for realism.
For the best effect, angle the hands slightly and vary their heights. Keep them stable with a few stones in the base.
22. A Hanging Floating-Candle Cluster
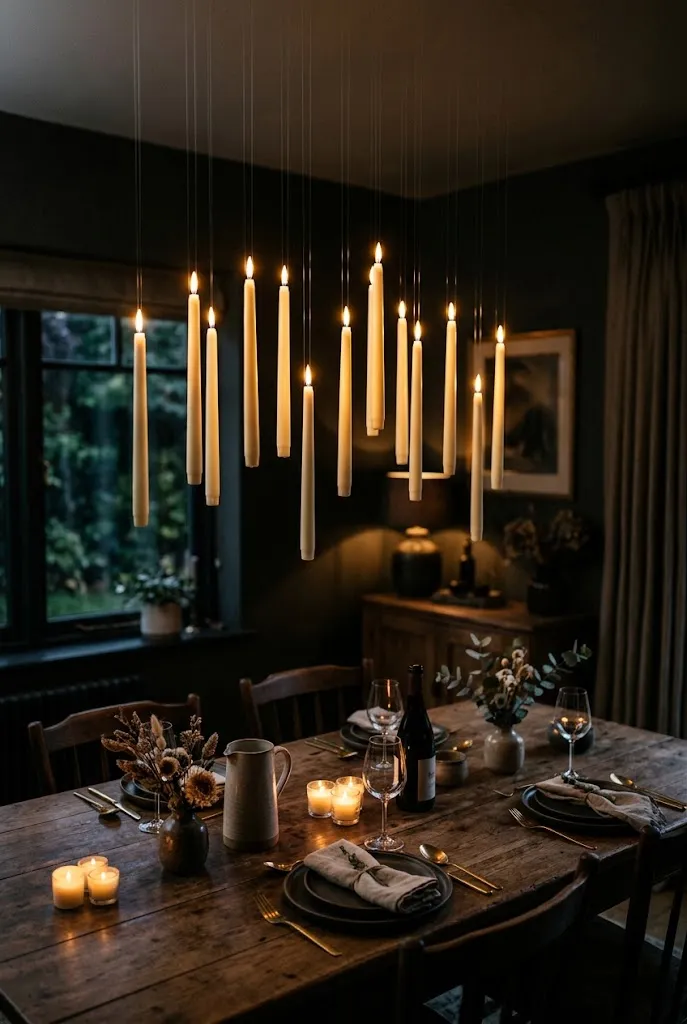
LED taper candles hung at varying heights from clear fishing line create a floating effect. Use eye hooks or a small drilled hole in the base, and hang with transparent line from a ceiling hook, beam, or branch.
Safety Note: Use LED only, and make sure the hanging point supports the weight.
23. Dried Leaf and Eucalyptus Mantel Garland
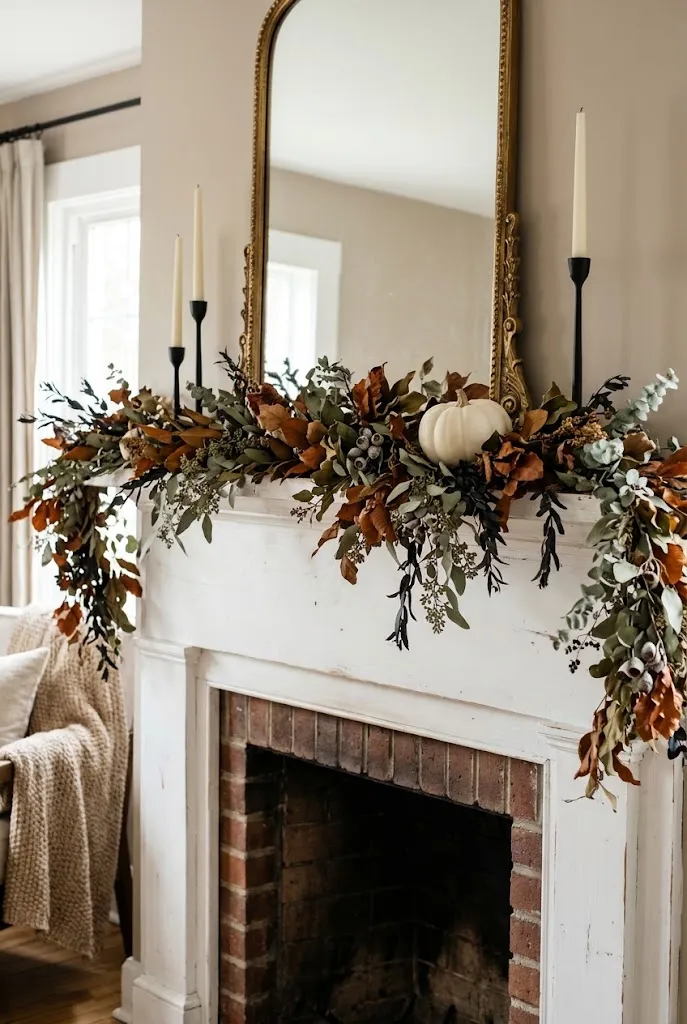
A garland of dried leaves, faux eucalyptus, and black accent stems bridges autumn and Halloween. Wire the stems together in overlapping bundles, then weave through the mantel with a few small pumpkins and a pair of candlesticks.
Neutral and dark tones (rust, olive, black) keep it grown-up.
24. Silhouette Art in Thrifted Frames
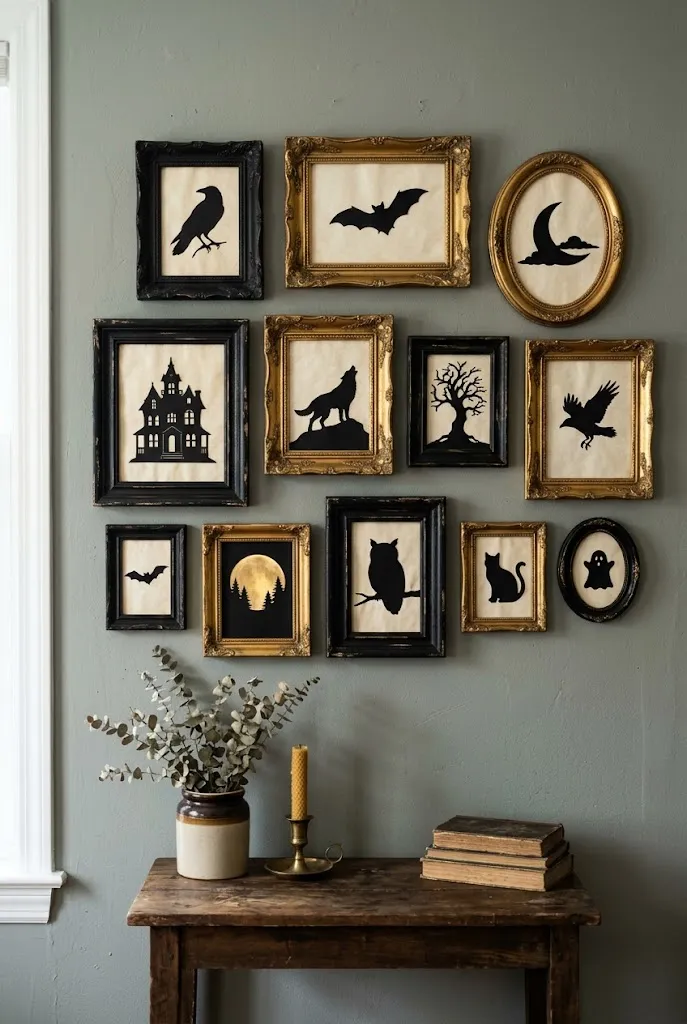
Thrifted frames in mismatched sizes make an inexpensive gallery. Paint them all black or gold, then insert black cardstock silhouettes, such as a raven, a bat, a haunted house, or a moon, over cream paper.
Group them on a wall or lean them along a ledge for a layered look.
25. Tea-Stained Spellbook Stack
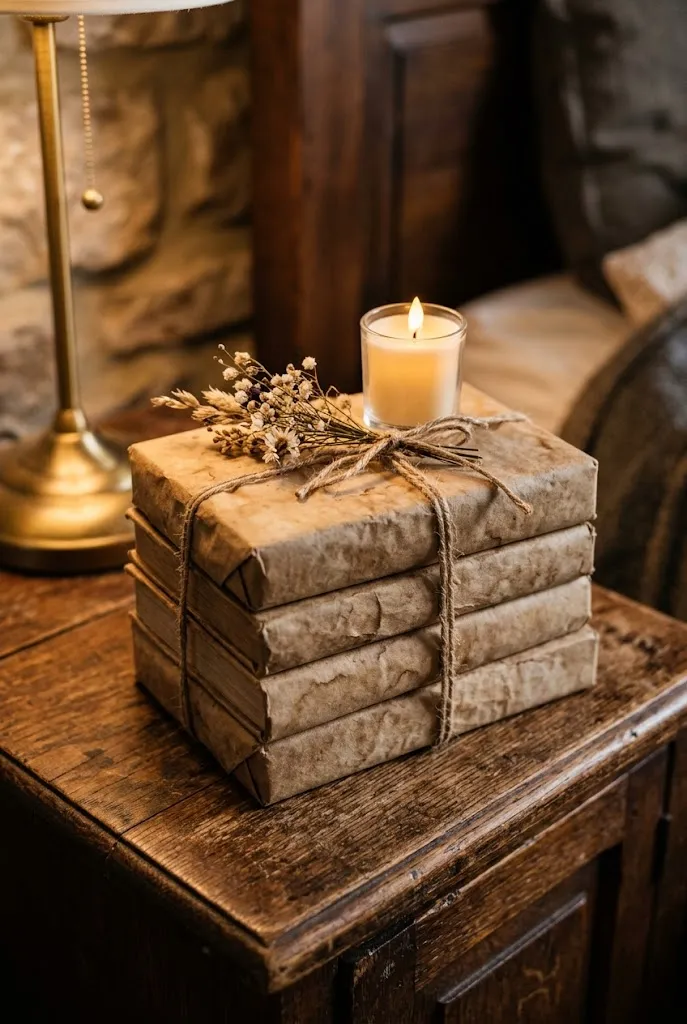
Thrifted hardcover books wrapped in tea-stained paper look like old spellbooks. Brew strong tea, brush it on plain paper, let it dry, then wrap the books and tie with twine or leather cord.
Stack three or four with an LED candle or a small pumpkin on top.
26. Wooden Spoon Ghosts in a Crock
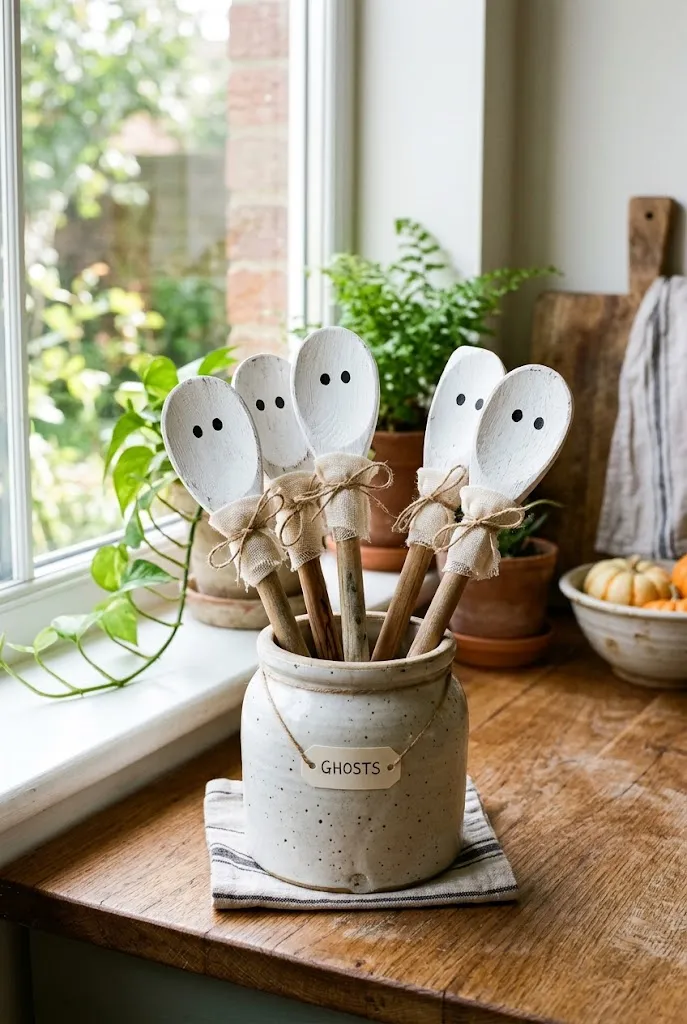
Wooden spoons painted white, with two black dots for eyes, make charming little ghosts. Stand them in a crock or jar and wrap each in a scrap of cheesecloth for a floating effect.
Kids can help paint, and they store flat after the season.
27. A Mini Haunted Village From Cardboard
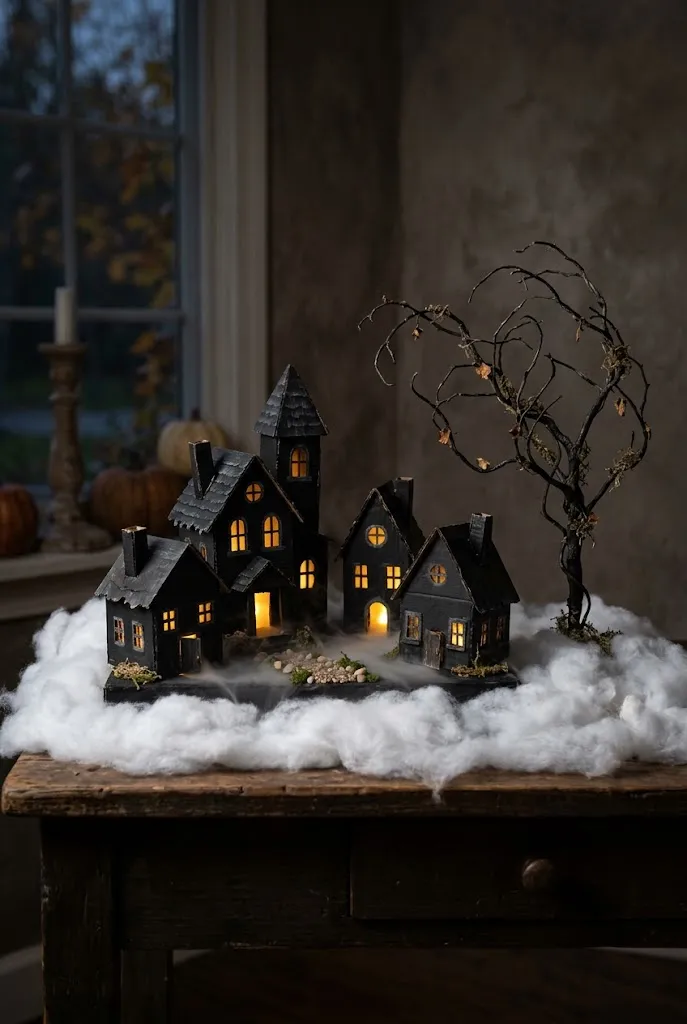
Cereal boxes and shipping cartons become a tabletop village. Cut windows, add a pitched roof from folded cardboard, paint everything black, and glue yellow tissue behind the windows. A battery light underneath makes it glow.
Vary heights and add a tiny dead tree from a twig.
28. Real Pumpkin Planters With Mums
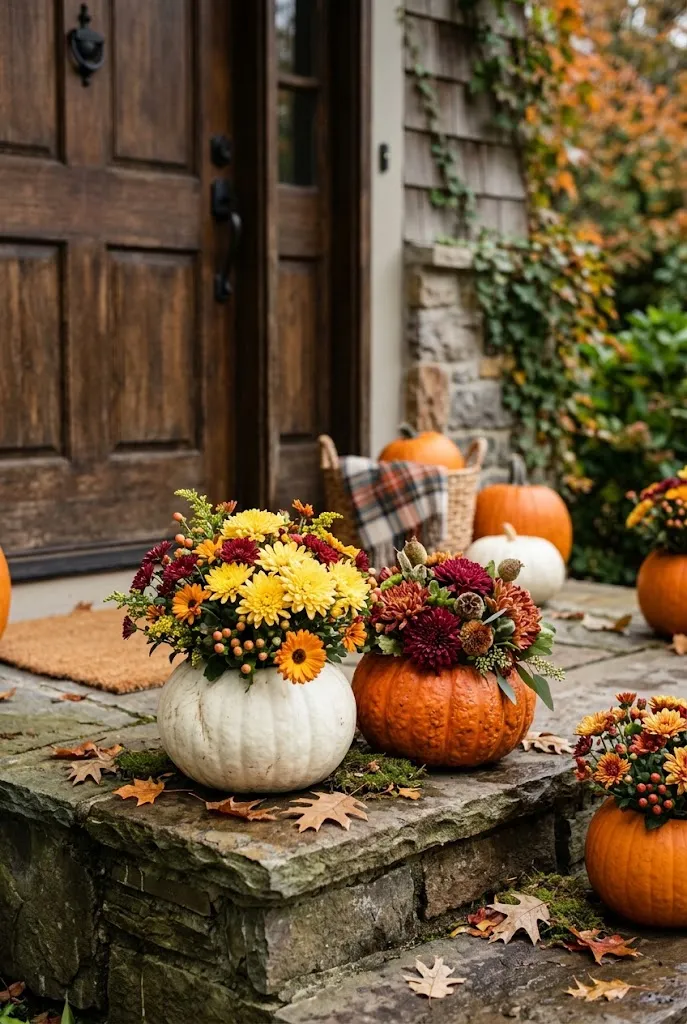
Carve out a pumpkin’s top, remove the seeds, and set a potted mum inside (leave it in its plastic pot for easier removal). It makes a living, long-lasting centerpiece.
Use white or heirloom pumpkins for a modern look. Water lightly so the pumpkin doesn’t rot quickly.
29. A Tulle and Spider Doorway Curtain
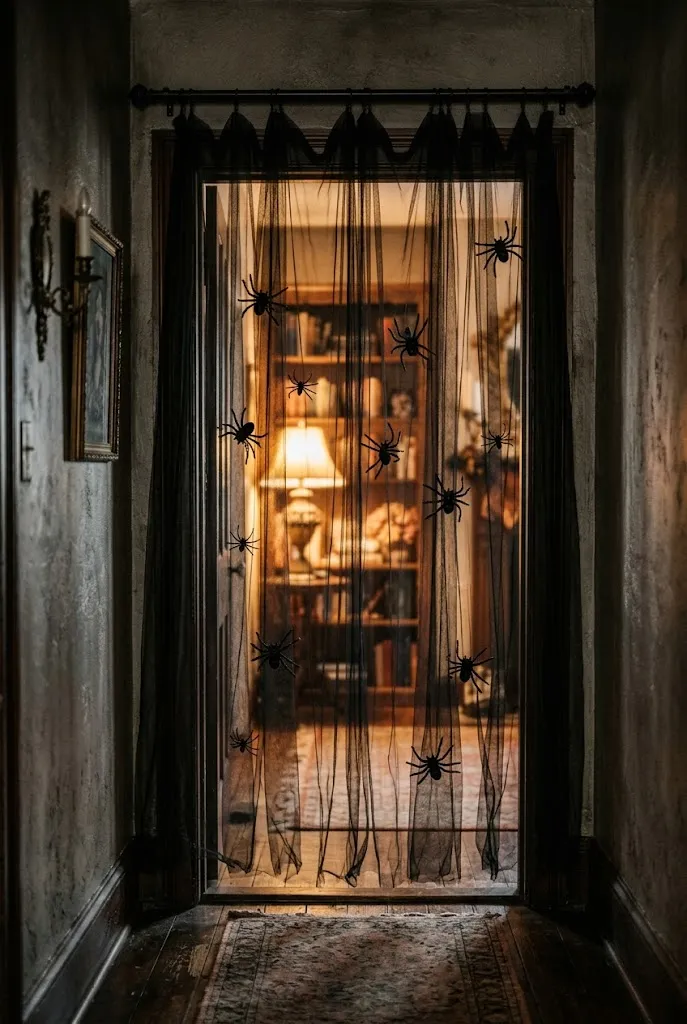
Black tulle gathered across a doorway with faux spiders makes a quick entrance. Cut panels, gather them onto a tension rod, and attach spiders with thread.
Keep it light enough to walk through without catching.
30. Faux Dripping-Wax Candlestick Trio
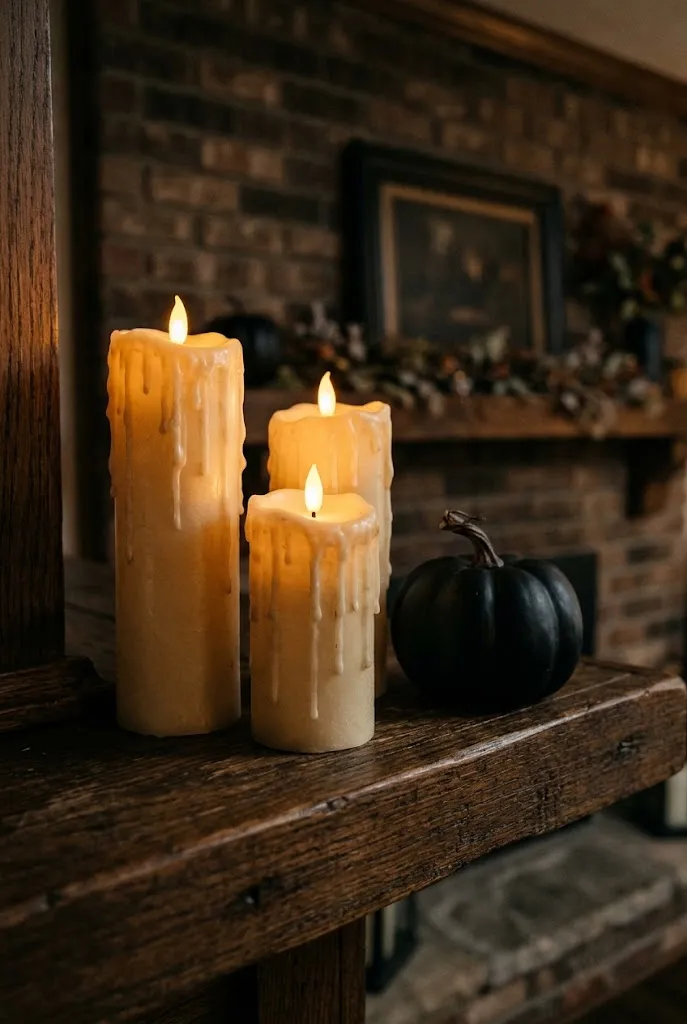
Hot glue dripped along a candlestick, then painted ivory, imitates melted wax. Use LED candles so the “wax” never goes near a flame.
Group three in different heights on a mantel or a table.
Where to Start
Pick one project for the porch, one for the table, and one for a window. That’s enough variety to make the house feel decorated without turning it into a weekend marathon. Start with items that take ten minutes, such as the paint-dipped pumpkins or the tassel garland, and save the foam tombstones or mini village for when you have a free afternoon.