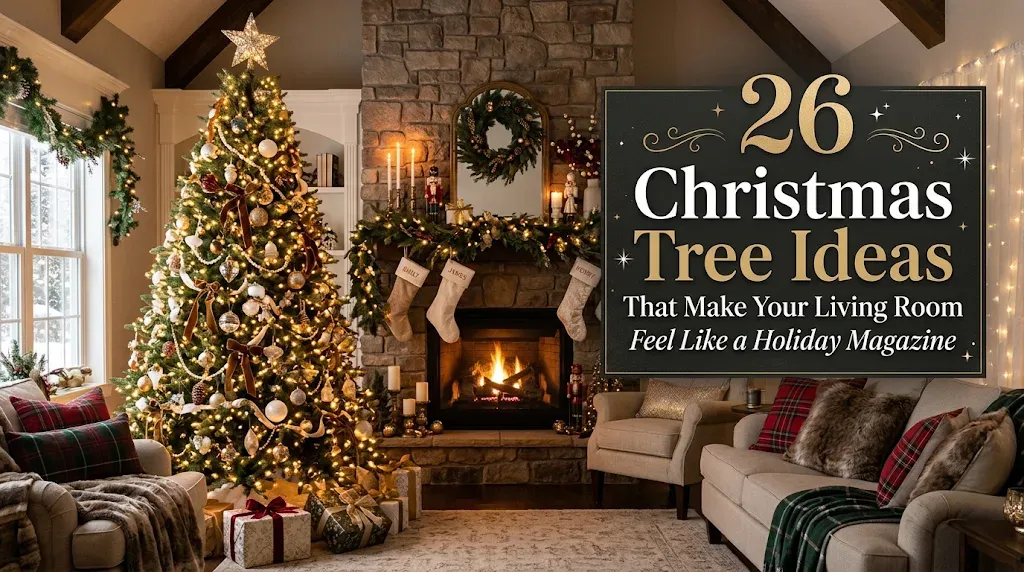
26 Christmas Tree Ideas That Make Your Living Room Feel Like a Holiday Magazine
The Christmas trees that look like they belong in a magazine rarely rely on more ornaments. They rely on decisions: one clear color story, lights that sit deep inside the branches, a base that looks finished, and a tree that suits the proportions of the room around it. That’s good news if your living room is small, your budget is modest, or your ornament box is a mix of everything you’ve collected over the years.
These 26 Christmas tree ideas cover a wide range of looks, from flocked and pencil trees to velvet ribbon, dried citrus, mercury glass, and bold jewel tones. Some need only a few ribbon spools and a bit of patience. Others are bigger investments for a taller tree or a more custom setting. Each one explains what makes the look work and how to recreate it, so you can borrow the principle even if you can’t copy the exact tree.
1. Wrap Warm White Lights Deep Into a Full Green Tree
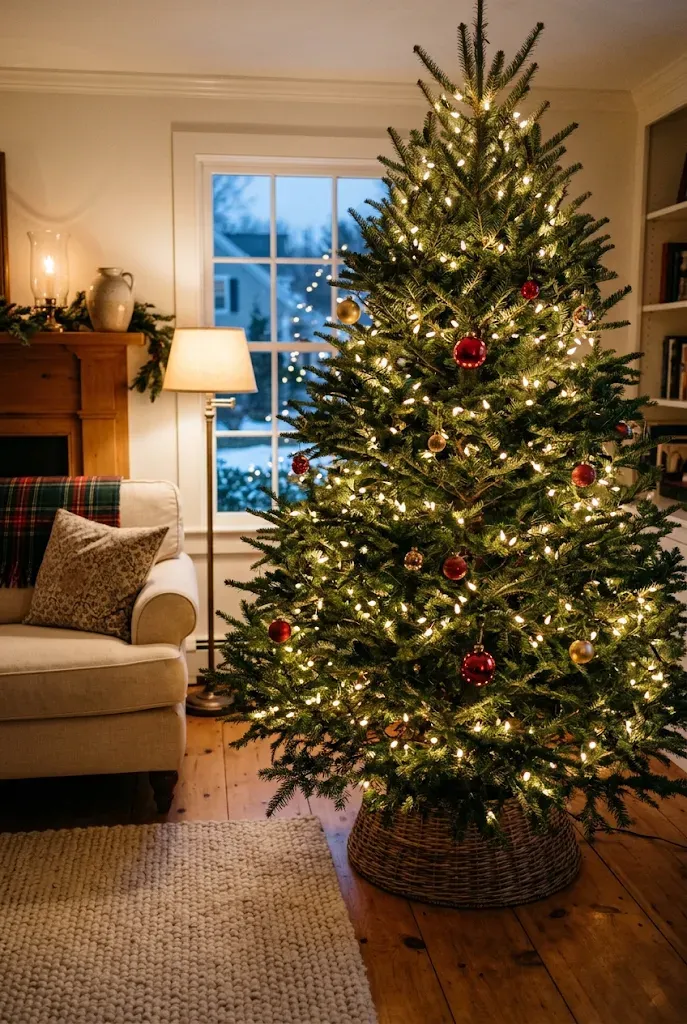
Before any ornament goes on, the lights decide how the tree will read at night. Instead of circling the outside tips, weave the strand in toward the trunk and back out along each branch. That creates depth, so the tree glows from within rather than looking outlined.
A common rule of thumb is about 100 mini lights per foot of tree height, which you can raise for a fuller glow or lower for a quieter one. Warm white tends to flatter wood floors, brass, and cream upholstery in most American living rooms.
Tips & Tricks
- Test every strand before you start, not after.
- Work in vertical sections from bottom to top so you don’t run out of cord mid-branch.
- Tuck the plug end near the base so the power cord stays out of sight.
- Add ornaments only after the lights are fully in place.
2. Cascade Burgundy Velvet Ribbon in Long Vertical Tails
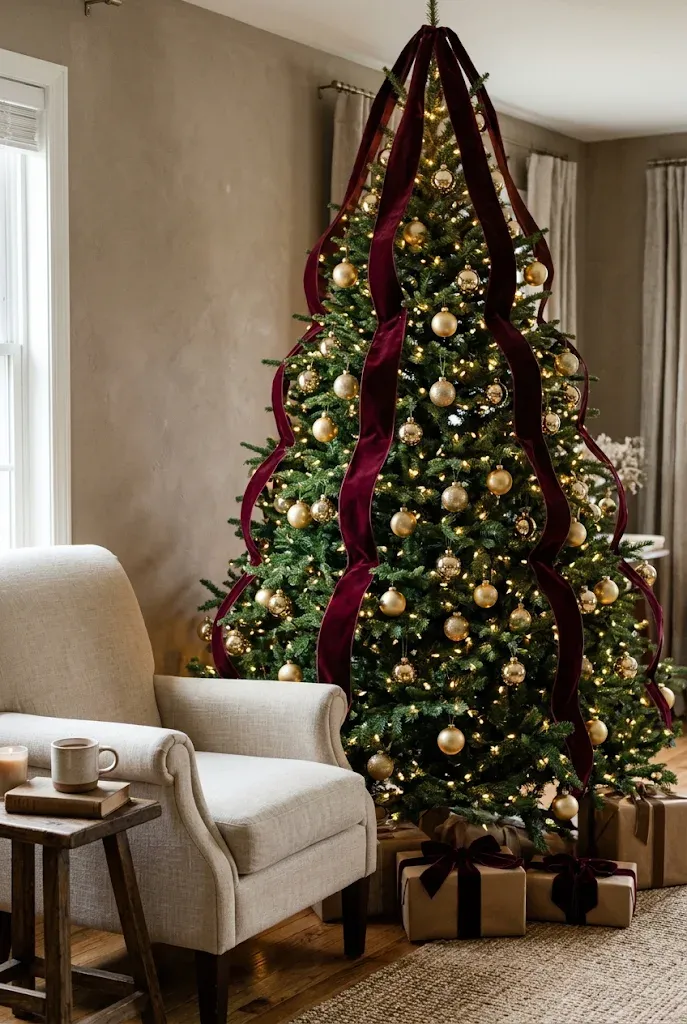
Ribbon is one of the most affordable ways to make a tree look planned. Instead of wrapping it around the tree in a spiral, anchor the ribbon at the top and let it fall in loose, vertical waves, tucking it into the branches every foot or so. The long lines make the tree look taller, and the velvet catches light in a soft, matte way that plastic bulbs can’t.
Wired ribbon holds its shape best. Choose one width, about 2.5 inches is easy to work with, and stick with it for a cohesive look.
Quick Facts
Best For: Rooms with 8-foot ceilings that need more vertical emphasis Investment: Accessible Visual Effect: Elongated, richly textured
Common Mistake: Mixing three or four ribbon widths and patterns.
Better Approach: Use a single solid velvet, then repeat one ornament color to tie it together.
3. Frame a Flocked Tree in a Bay Window
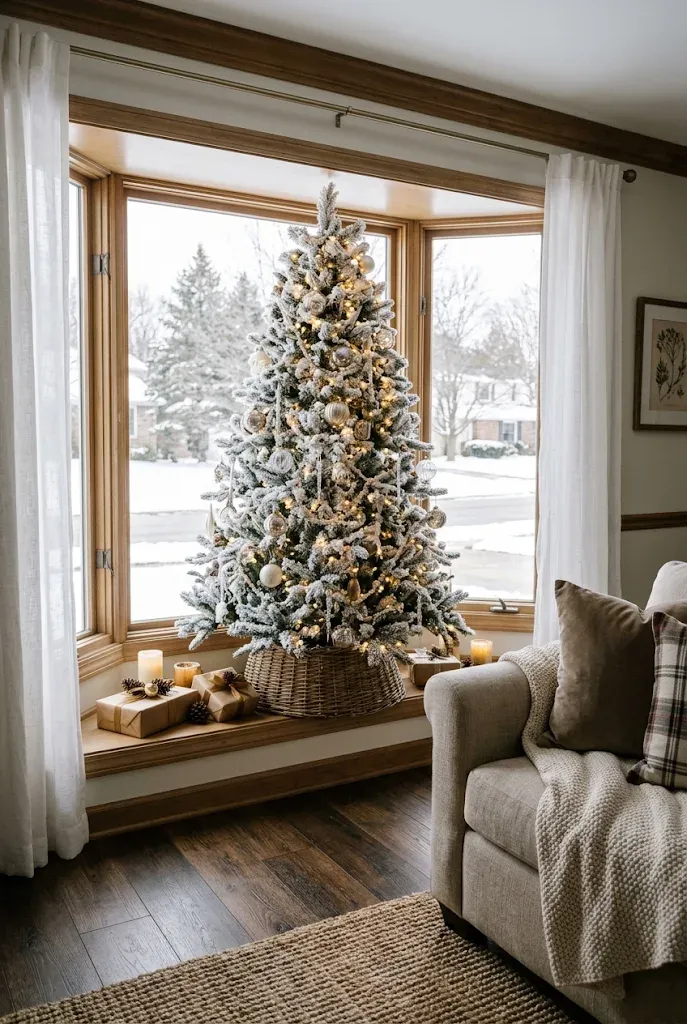
A flocked tree already has a sculptural, snow-dusted look, so it needs less decoration than a standard green one. Placed in a bay window, it picks up light from several angles during the day and reflects the glow of its own lights on the glass at night.
Keep the palette tight: ivory, clear glass, and brushed brass ornaments work especially well against the white. Sheer curtains soften the glass and keep the focus on the tree.
| Option | Effect | Best Fit |
|---|---|---|
| Pre-flocked artificial tree | Even, consistent coverage | Reusable year after year |
| Flocking spray on a live tree | Softer, more irregular look | One-season use |
Flocking can shed, so place a washable mat under the tree and expect to vacuum around it.
4. Slot a Pencil Tree Between Built-In Shelves
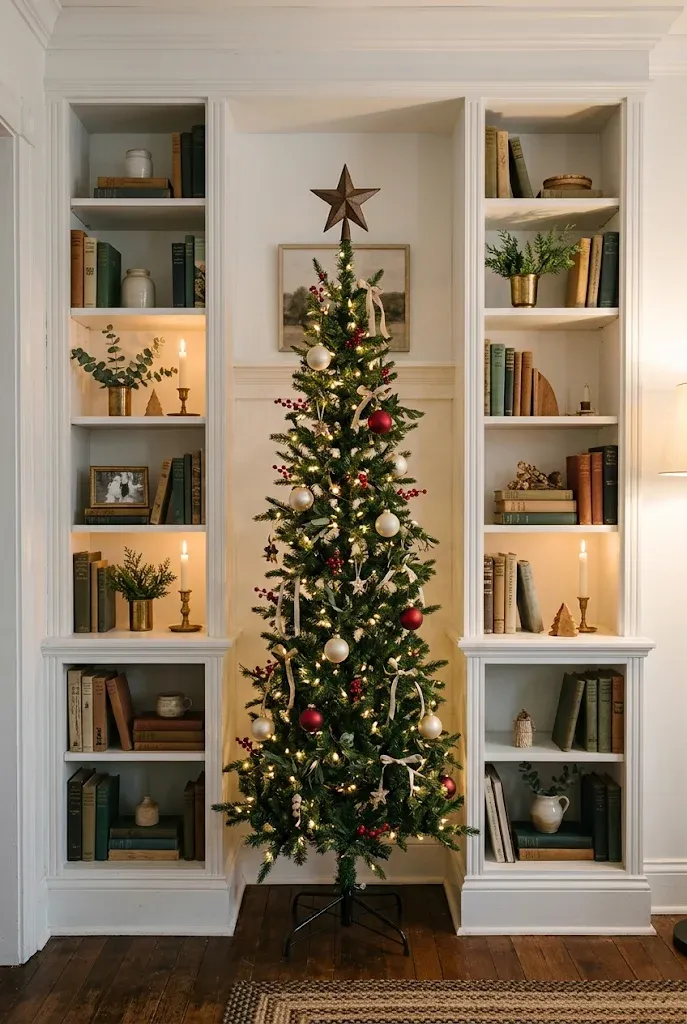
In a living room with built-ins or an alcove, a slim tree can sit inside the architecture instead of competing with it. A pencil tree takes up a fraction of the floor space of a full-width tree, which leaves room for the walking path and the sofa. The shelves on either side can carry matching decorations, such as greenery, small lights, and a few ornaments, so the whole wall feels coordinated.
A tree this narrow needs smaller ornaments. Large baubles will overwhelm the branches.
- Choose ornaments in the 1.5 to 2.5 inch range.
- Repeat one of the tree’s colors on the shelves.
- Keep the shelf styling lighter than the tree.
- Use a narrow stand or a basket cover to keep the base tidy.
5. Swap the Tree Skirt for a Woven Seagrass Collar
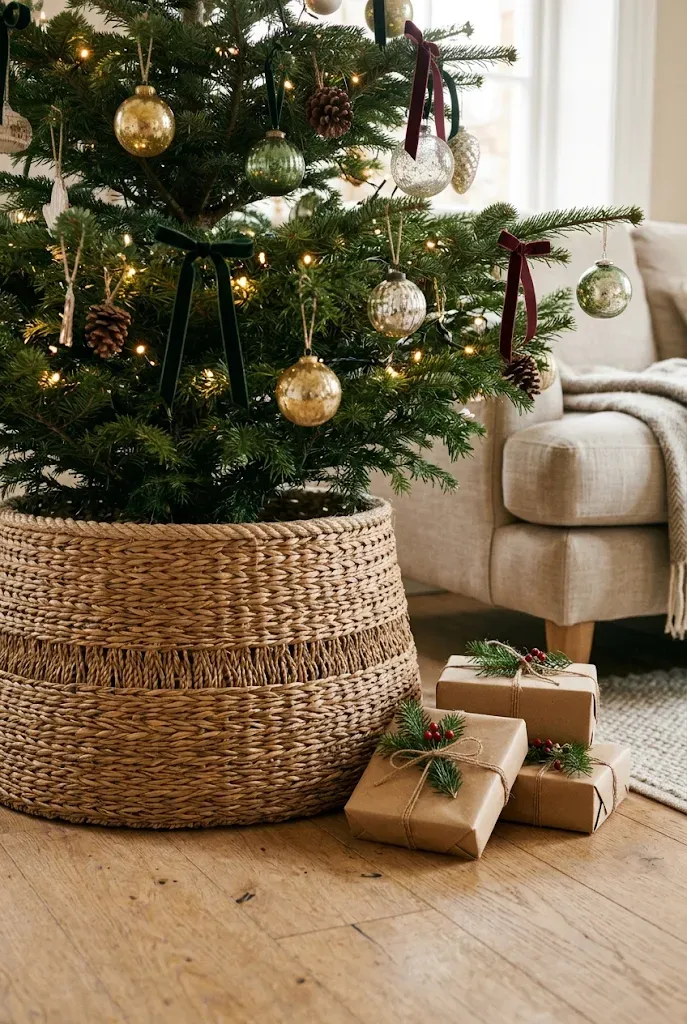
The base is where many trees lose their polish. A woven seagrass or rattan collar gives the bottom a finished, natural look and hides the stand and cords without covering the floor with fabric. It pairs well with wood-toned and neutral rooms and works for both live and artificial trees.
Measure the stand’s width first and buy a collar that sits just past it. If it is too wide, the tree looks like it’s sitting in a bucket.
Editor’s Note: If your tree sits near a vent or heater, a collar can make it harder to notice how dry a live tree is getting. Check the water level often, and keep live trees away from direct heat sources.
6. Keep It Quiet With a Champagne and Cream Palette
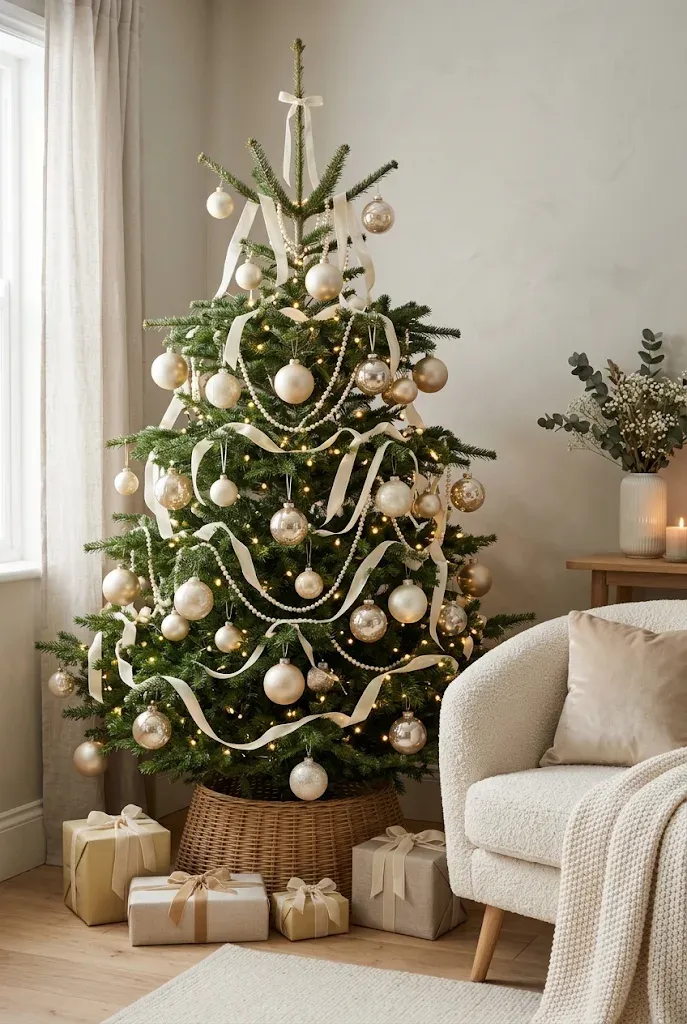
Not every tree needs contrast. A tree styled in soft champagne, cream, and pale gold has a calm, tonal look that fits living rooms with neutral furniture. The key is variety in finish rather than color: matte, shiny, and glittered ornaments all in the same tonal family give depth without introducing a new hue.
Add a single texture, such as pearl strands or ivory ribbon, to prevent the tree from looking flat.
Common Mistake: Using only shiny ornaments, which can read as one reflective blur.
Better Approach: Mix matte, satin, and glossy finishes in the same color.
7. Build a Natural Tree With Dried Oranges, Cinnamon, and Cedar

Dried orange slices, cinnamon sticks, and sprigs of cedar or pine bring a scent-and-texture approach that feels collected rather than store-bought. Pair them with plain wood beads and jute twine, and add warm white lights to keep the glow.
Making the orange slices at home is inexpensive, though it takes time. Slice oranges thinly, pat them dry, and bake them at a low temperature until they are fully dried out, turning once. Fully dried slices keep longer and are less likely to mold.
- Slice and dry the oranges well in advance of decorating.
- Poke a small hole near the top and thread jute through.
- Hang them on the outer branches so the light shines through the slices.
- Fill in with cinnamon sticks tied in small bundles and cedar sprigs.
8. Style the Tree Beside a Stone Fireplace
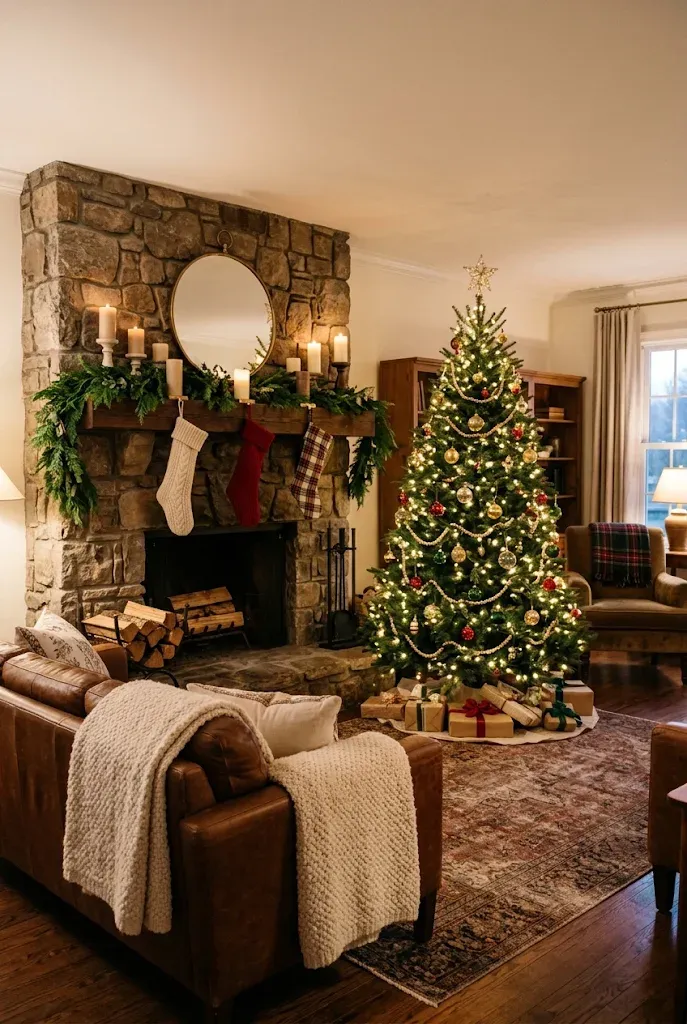
A tree next to a fireplace and mantel can make the whole wall feel like one composition. Echo the tree’s colors on the mantel, such as greenery, candles, and a couple of ornaments, but don’t match them exactly. A little variation feels more natural.
Safety matters here. Keep live trees well away from a working fireplace, and don’t hang stockings so they dangle over open flames. An artificial tree is a practical choice for a room where you use the fireplace regularly.
Quick Facts
Best For: Living rooms with a defined fireplace wall Investment: Moderate Visual Effect: A layered, cohesive focal wall
9. Go Navy and Silver for a Cool Winter Look
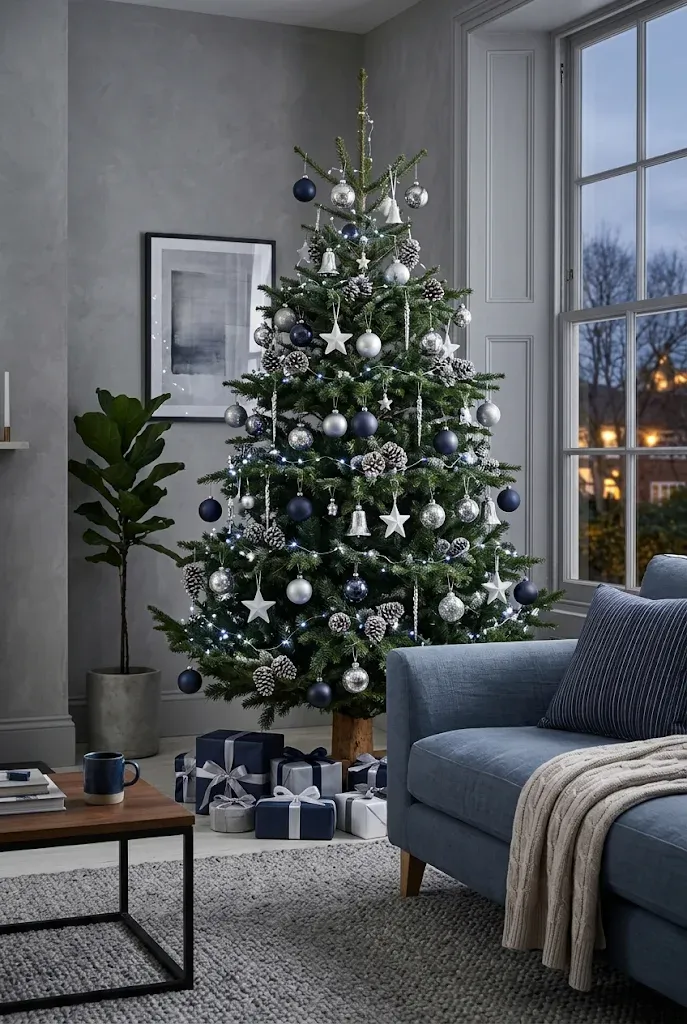
Navy, silver, and white create a crisp winter palette that suits modern living rooms with gray, white, or blue-toned furniture. Use matte navy ornaments for depth, silver and mirrored finishes for sparkle, and a handful of white elements, such as snowflakes or frosted pinecones, for lightness.
Cool white lights will match this palette, but warm white can soften it if the room feels too cold. Try both before committing.
| Light Color | Effect | Works Best With |
|---|---|---|
| Cool white | Crisp, icy | Gray and white rooms |
| Warm white | Softer, cozier | Wood and natural fabrics |
10. Make Paper Stars and Handmade Ornaments the Main Event
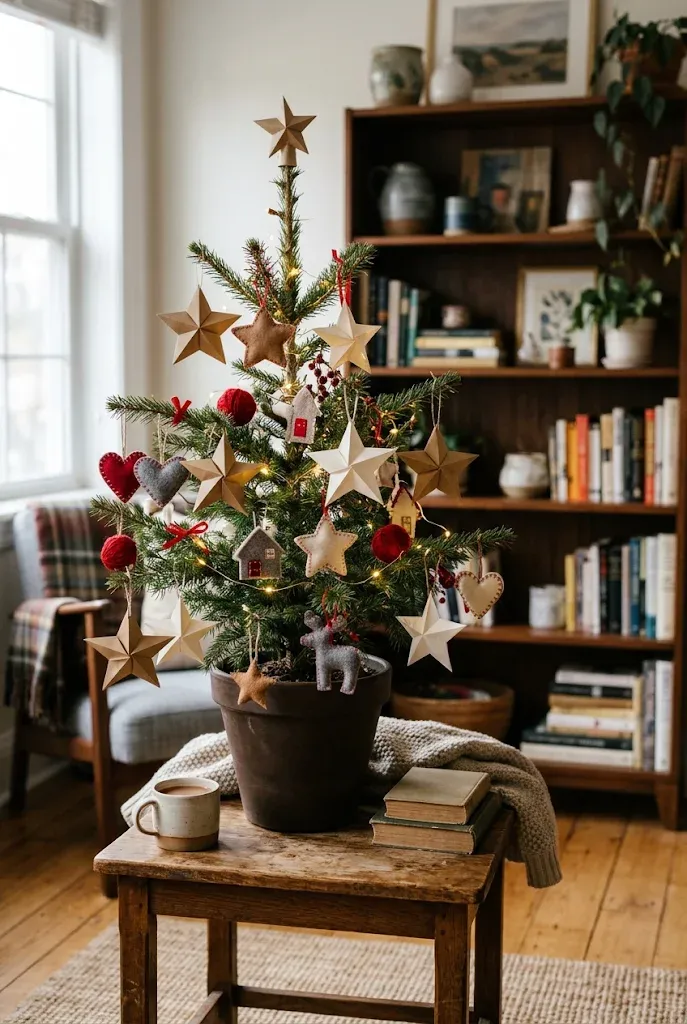
A handmade tree can still look polished if the materials are consistent. Paper stars, felt shapes, or salt-dough ornaments in a limited palette look intentional, and the tree feels personal rather than purchased.
Choose one or two materials and one color family. Kraft paper, white paper, and a small amount of red is an easy combination. Build the ornaments in batches over a few evenings.
Tips & Tricks
- Use cardstock rather than printer paper, which droops on the branch.
- Make ornaments in three sizes for visual rhythm.
- Seal salt-dough ornaments if you plan to reuse them.
- Hang the heaviest handmade pieces nearest the trunk.
11. Top the Tree With an Oversized Plaid Bow
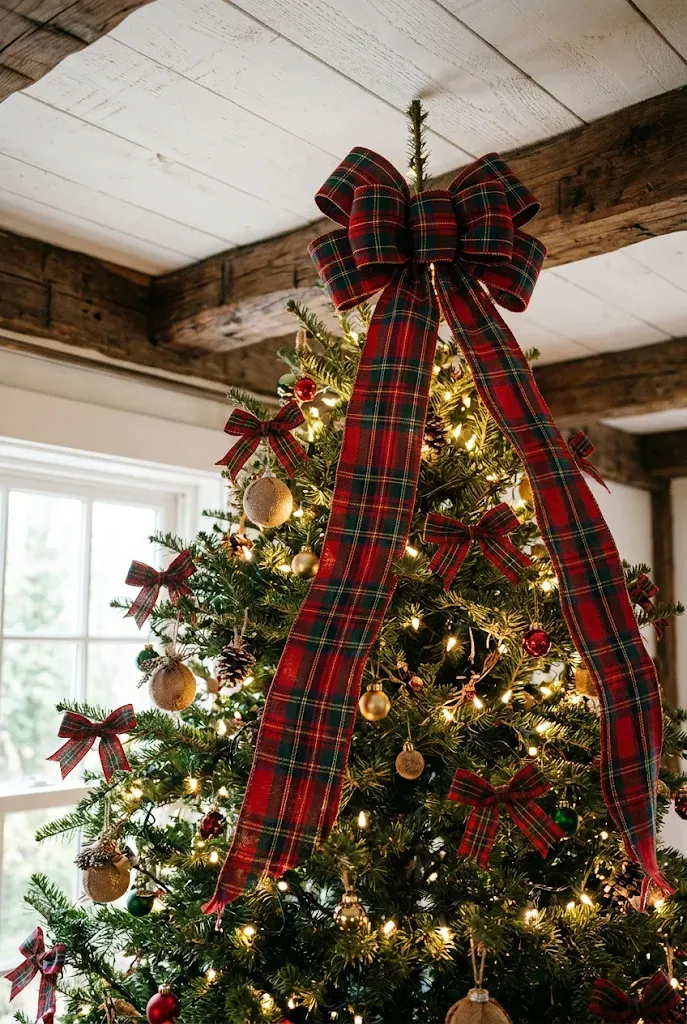
A large bow can replace a traditional topper and give the tree a clear point of interest. Use wired ribbon, at least 4 to 6 inches wide, and make the bow large enough to read from across the room.
Plaid brings a casual, cozy tone, and a classic red and green check suits farmhouse and traditional rooms. Repeat the ribbon in smaller bows or streamers lower on the tree to unify the look.
Do
- Attach the bow to the top branches with floral wire.
- Let the tails fall naturally down the front.
Don’t
- Choose a bow so heavy it bends the tip.
- Mix several plaids in different scales.
12. Fit a Tabletop Tree on a Console in a Small Apartment
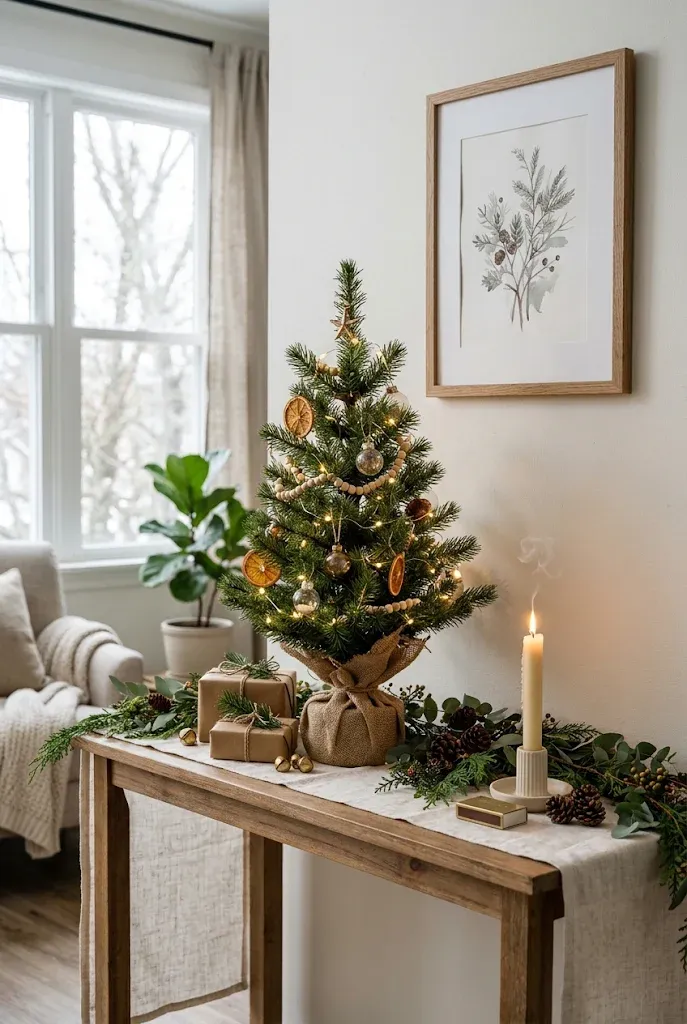
When floor space is limited, a tabletop tree on a console, sideboard, or sturdy bookcase gives you a tree without taking up the walking path. Pick a tree that is about two-thirds the width of the surface so it looks anchored, and add a tray or cloth underneath.
The surrounding surface matters as much as the tree. A few small gifts, a candle, and a short garland can turn a minimal tree into a mini holiday scene.
Quick Facts
Best For: Apartments, condos, and narrow rooms Investment: Accessible Visual Effect: Compact, layered
13. Collect Mercury Glass Ornaments for Soft, Antique Shine
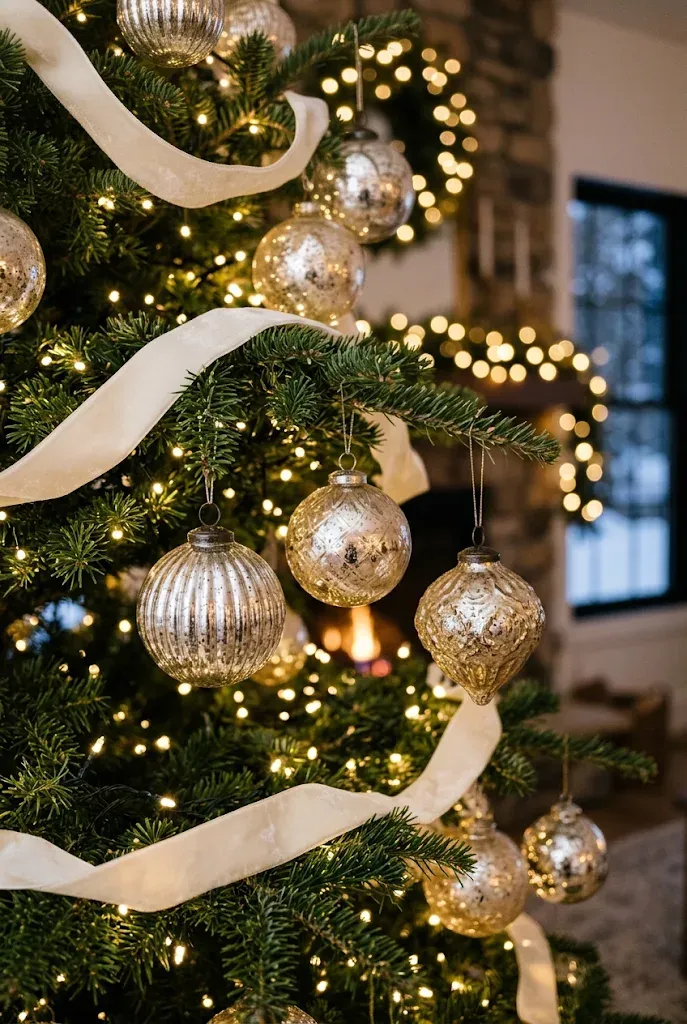
Mercury glass has a gently mottled, aged-silver look that doesn’t read as flashy. Used in silver, gold, or pewter tones, it gives a tree a vintage feel even when the ornaments are new.
Cluster larger ornaments close to the trunk and use smaller ones at the tips so the tree has depth. Pair mercury glass with plain velvet ribbon and avoid too many glitter pieces, which can compete with the subtle finish.
- Mix silver, champagne, and soft gold.
- Add a few matte ivory ornaments for contrast.
- Keep lights warm white so the metallics look softer.
14. Set a Green Tree Against Deep Forest Walls
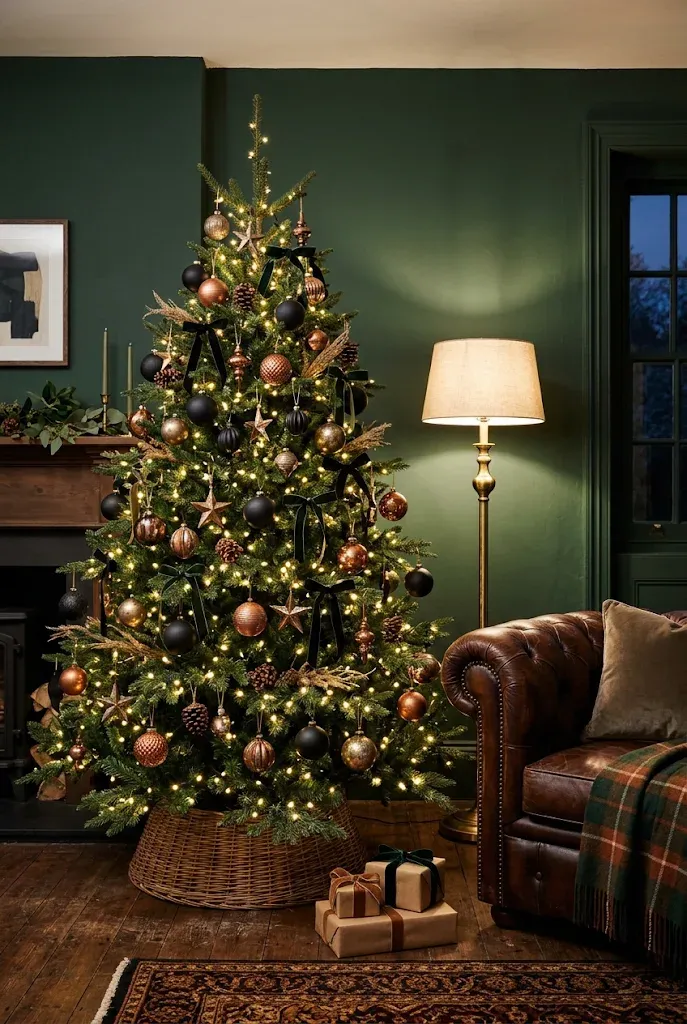
Dark walls can make a Christmas tree feel dramatic, because lights and ornaments pop against the contrast. A deep green, charcoal, or navy wall gives the tree a backdrop that makes metallic ornaments and warm lights stand out.
Use matte black, copper, or antique gold ornaments to match the moody palette, and keep the rest of the decor simple so the tree remains the focus.
| Wall Color | Ornament Pairing | Mood |
|---|---|---|
| Forest green | Antique gold, cream | Rich, traditional |
| Charcoal | Copper, black, brass | Modern, dramatic |
15. Soften the Look With Blush, Cream, and Gold
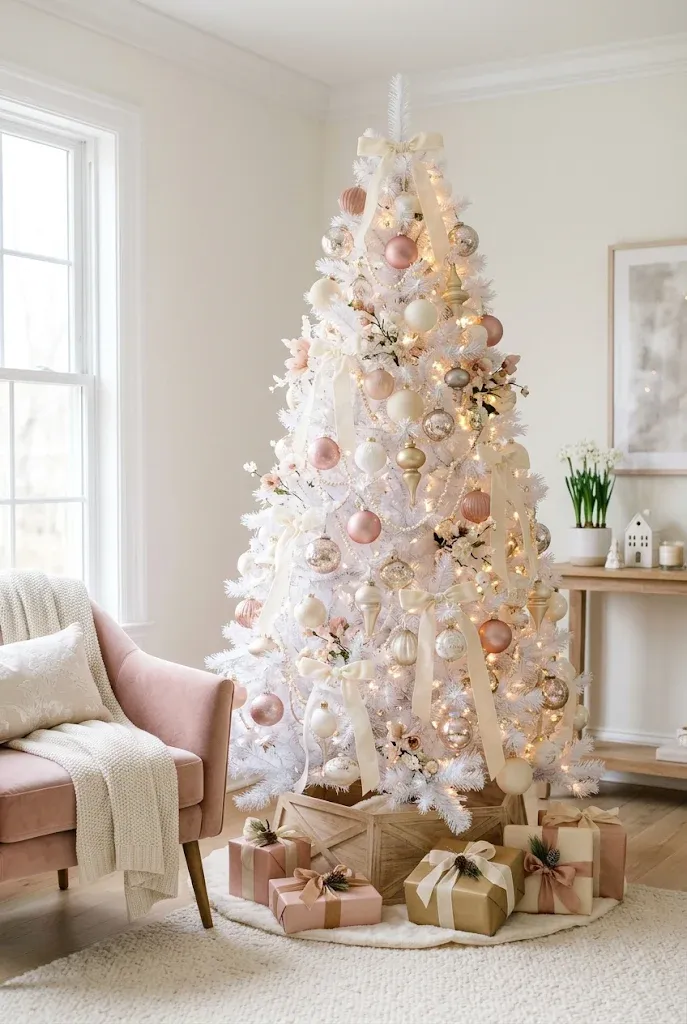
Blush pink on a Christmas tree can feel gentle rather than sweet if it’s balanced with cream and gold. Use pink as an accent, not the dominant color, and choose muted dusty tones rather than bright pinks.
A white or flocked tree makes a good base, but a natural green tree works too if you want a softer contrast. Pearl strands and ivory ribbon fill in the neutral layer.
Common Mistake: Using too many bright pink ornaments, which can look childlike.
Better Approach: Choose dusty or muted blush and balance with cream and metallics.
16. Use a Tall Tree to Fill a Two-Story Living Room
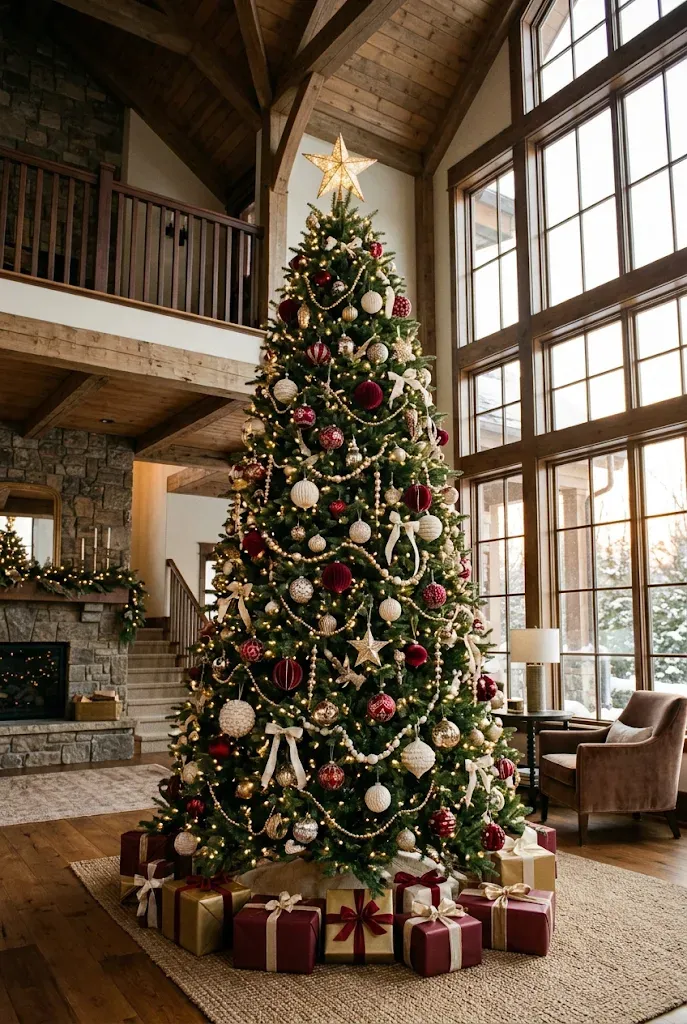
In a room with a vaulted or double-height ceiling, a small tree can look lost. A tall tree, often 9 to 12 feet, fills the vertical space and creates a clear focal point. It is a bigger investment in the tree itself, the stand, and the ornaments, but the effect is striking when the scale suits the room.
Plan for the extras: sturdy stand, extra lights, a ladder, and a topper that is proportional to the height.
Editor’s Note: Fill the tree in layers, with larger ornaments deeper inside and smaller ones outside. A tall tree with sparse decorations looks bare quickly.
17. Mix in Dried Florals and Feathers for a Boho Tree
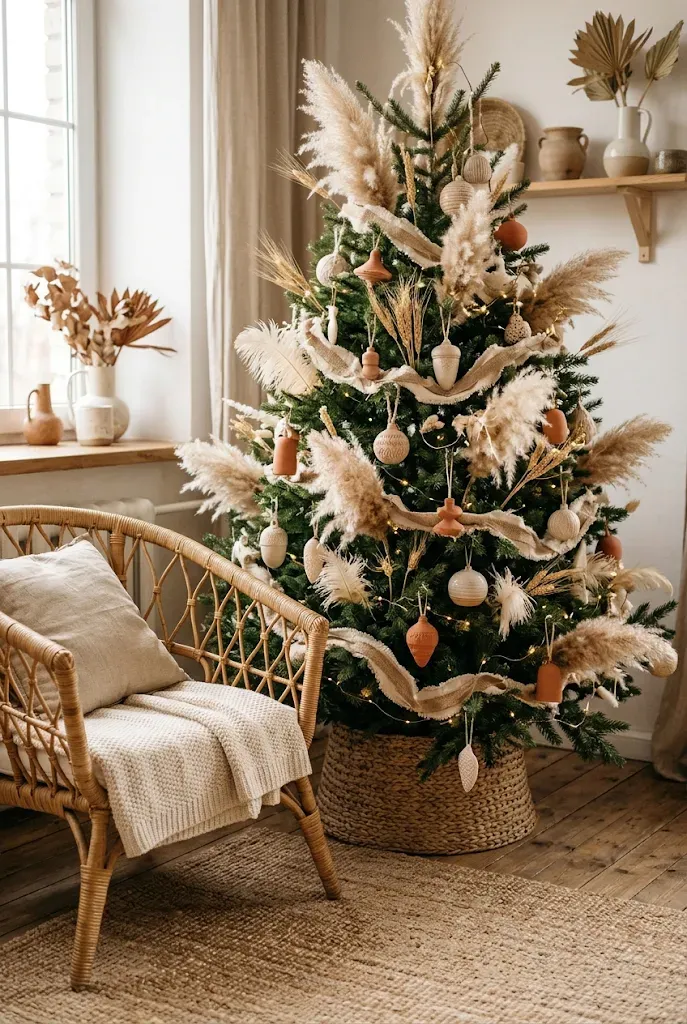
For a relaxed, bohemian look, replace some standard ornaments with dried pampas grass, wheat stems, and feather picks. These lightweight elements add soft movement and neutral color, and they work well with wood beads and woven ornaments.
Use them as fillers between the branches, not as the whole decoration. Anchor the look with a few solid ornaments, such as terracotta or ivory baubles, so the tree doesn’t look sparse.
- Start with lights and a simple macramé or fabric garland.
- Tuck dried stems in at angles so they extend outward.
- Fill with terracotta and ivory ornaments.
- Step back and fill any gaps with feathers.
18. Build a Farmhouse Tree With Buffalo Check and a Crate Base
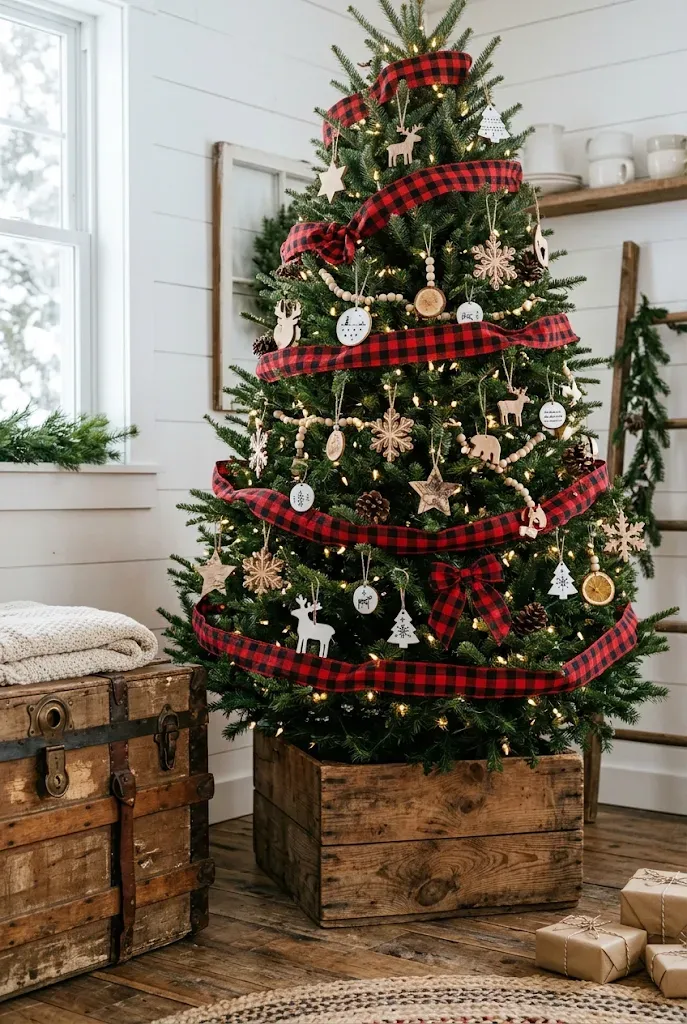
A farmhouse look depends on contrast between rough and soft textures. Buffalo check ribbon, wooden ornaments, and small enamel pieces add personality, and a wooden crate or galvanized tub around the base gives it a finished, rustic anchor.
Use a mix of natural wood, black, and red, and keep the lights warm. Avoid overly distressed or kitschy pieces that make the tree feel cluttered.
Quick Facts
Best For: Farmhouse, cottage, and traditional living rooms Investment: Accessible to moderate Visual Effect: Cozy and textured
19. Light the Tree From Behind With Sheer Curtains
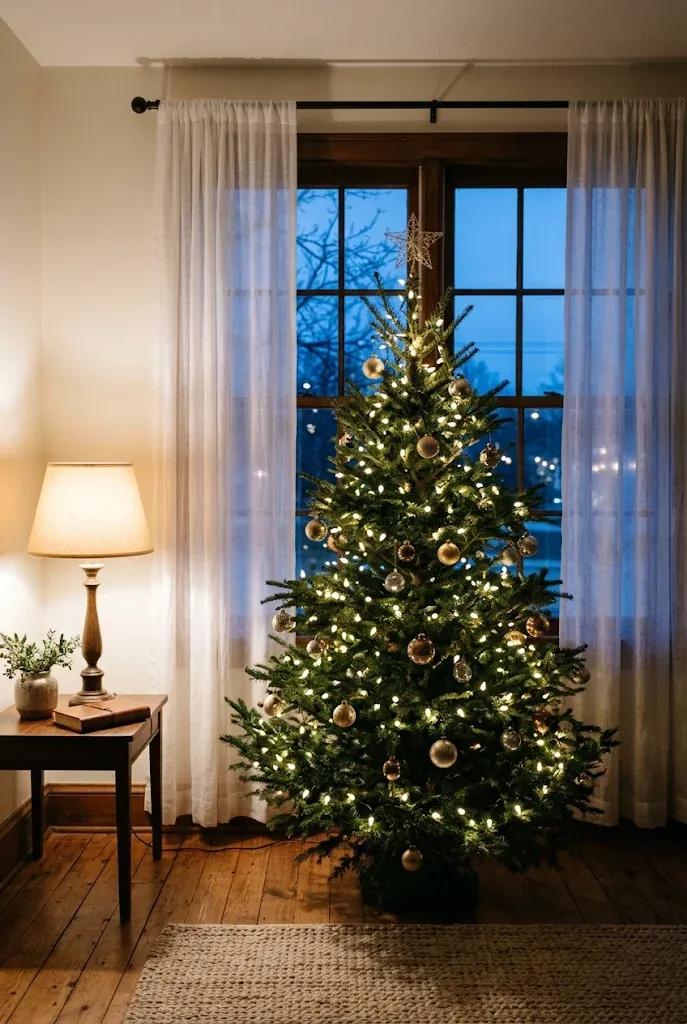
A tree in front of a window can glow at night if the window is dressed with sheers. The curtain diffuses the outdoor light and the tree’s lights, so the whole window looks softly lit from both sides.
Keep the branches slightly away from the glass and use warm white lights. The tree will also be visible from the street, which can add to the holiday feel of your home from the outside.
Tips & Tricks
- Choose sheers in white or ivory, not patterned.
- Leave a few inches between the tree and the window.
- Use a dimmable lamp nearby to fine-tune the room’s glow.
20. Play With Retro Color and Vintage-Style Bulbs
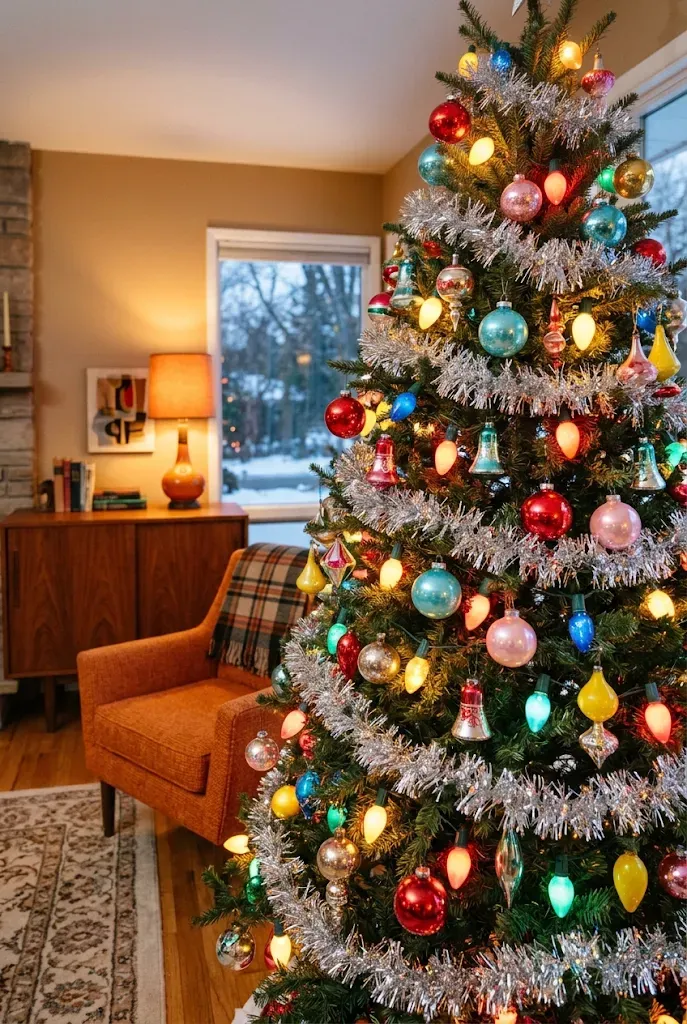
For a playful, nostalgic look, use multicolored lights with larger vintage-style bulbs and a mix of colorful ornaments in red, aqua, pink, and yellow. Retro trees work best when the palette is bright but controlled, with a few repeated colors rather than every color at once.
Silver or aluminum tinsel garlands and glass ornaments in a mid-century shape add to the effect. This is a lighthearted choice and fits living rooms with mid-century furniture.
Common Mistake: Mixing every color and style.
Better Approach: Choose four colors and repeat them across the tree.
21. Keep It Scandinavian With White, Wood, and Straw
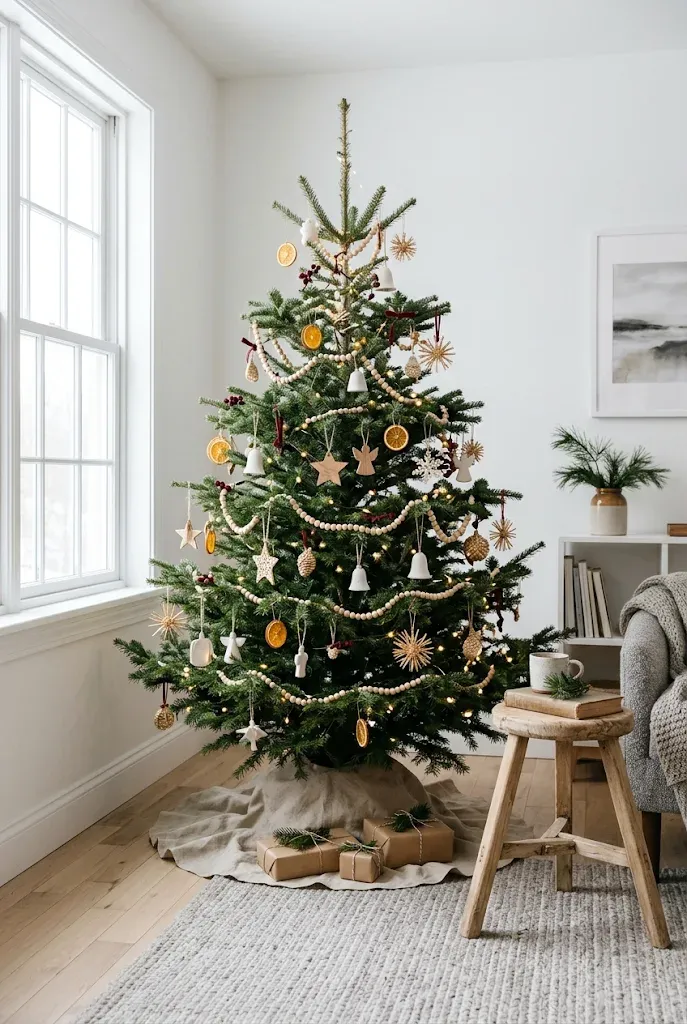
Scandinavian-style trees lean on simplicity: natural wood ornaments, white and red accents, straw stars, and plain paper decorations. The tree looks light and uncluttered, with space between ornaments.
Use fewer decorations than you would on a traditional tree and let the branches show. A simple white or natural linen skirt and a light wood stool or basket nearby complete the look.
- Choose ornaments in wood, straw, and white ceramic.
- Add a few red accents for contrast.
- Use a simple star or no topper.
- Keep the lights warm and small.
22. Set the Tree in a Galvanized Tub With Faux Presents

A galvanized tub or large metal bucket makes a durable, stylish base for a tree, especially for a farmhouse or industrial look. Fill the space around the stand with crumpled paper or faux presents so the base looks full.
Check that the tub is wide and stable enough for the tree’s weight. If you’re using a live tree, make sure the water reservoir is still accessible.
| Base Type | Advantage | Consideration |
|---|---|---|
| Galvanized tub | Sturdy, rustic | Heavy; check stability |
| Fabric skirt | Soft, easy to store | Can hide water level |
23. Layer Emerald and Gold Over Velvet Drapes
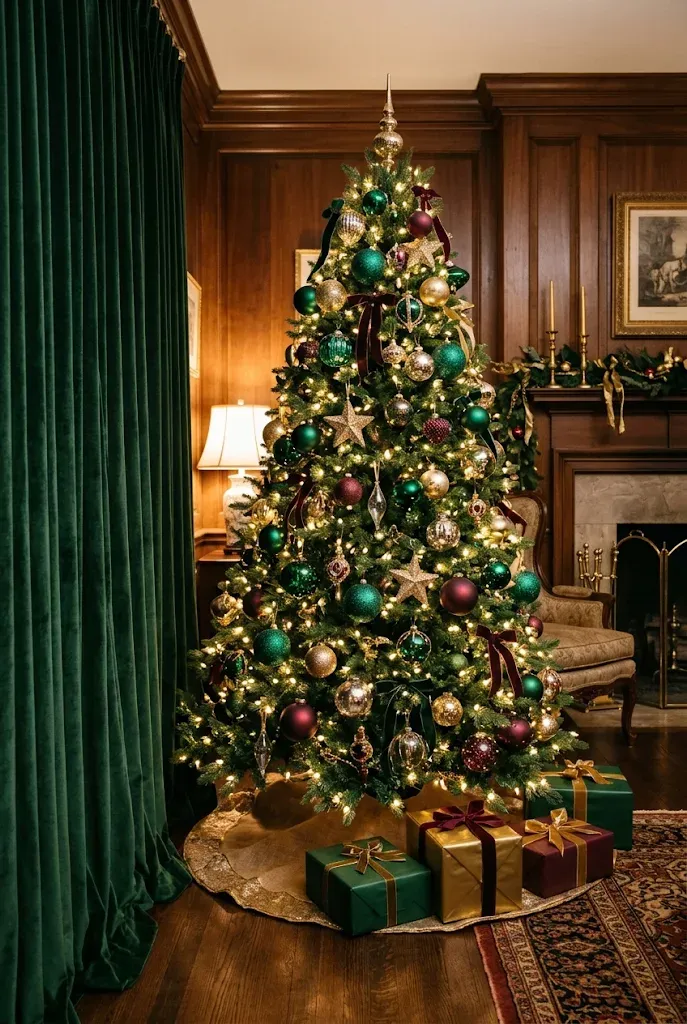
Jewel tones bring richness without clutter. Emerald green, deep gold, and a touch of burgundy look especially good in rooms with velvet curtains, wood paneling, or dark furniture. The palette feels traditional but not dated if you keep the shapes simple and the finishes consistent.
A tree like this benefits from heavier ornaments and sturdier branches, so choose a quality artificial tree or a full live tree. This is a more premium-leaning look, though you can borrow it by using fewer, higher-quality ornaments.
Editor’s Note: Jewel tones can look flat if every ornament has the same finish. Mix matte, glitter, and glass for depth.
24. Add Icy Silver and Crystal to a White Tree
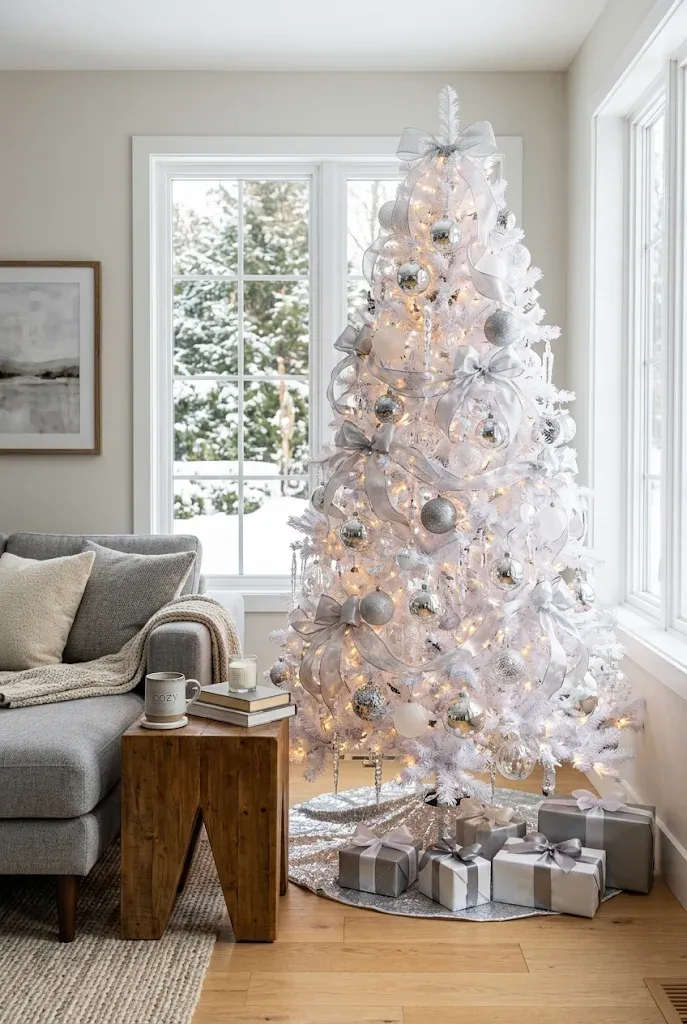
A white artificial tree with silver and clear crystal ornaments has a glamorous, snowy look. Use icicle-shaped ornaments, mirrored baubles, and a silver ribbon, with cool or warm white lights depending on your room.
It’s a good fit for modern living rooms with gray, white, or silver accents. To avoid looking cold, add one warm element, such as a wood side table or a cream throw nearby.
Do
- Mix clear glass, silver, and matte white.
- Add a warm light source nearby.
Don’t
- Use only reflective pieces without any matte contrast.
- Crowd the tree with too many ornaments.
25. Organize Heirloom Ornaments Into One Color Story
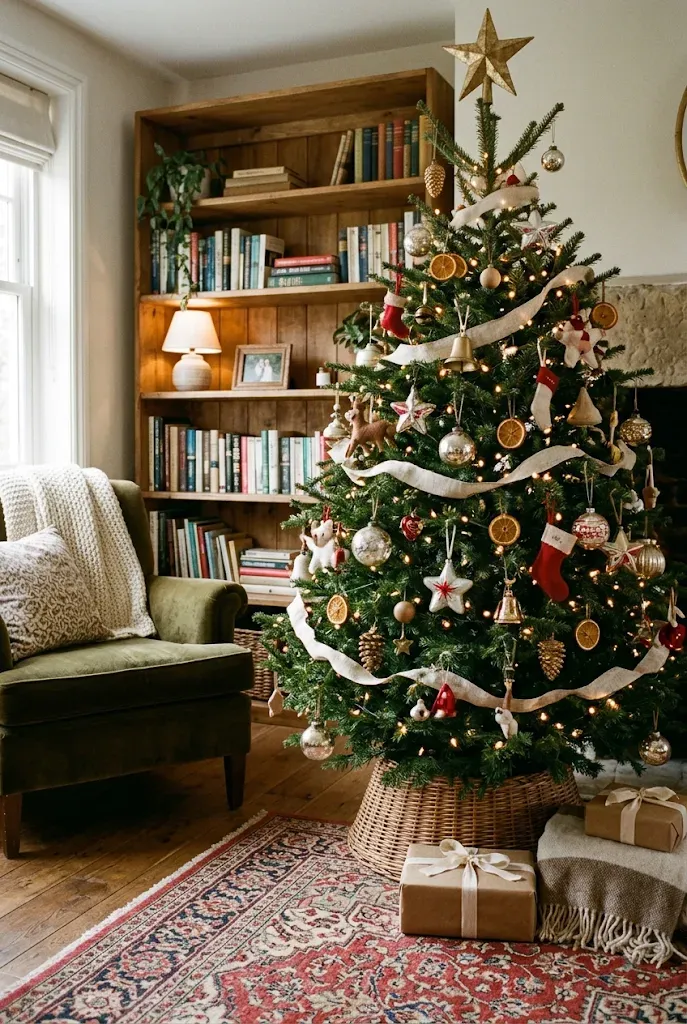
If your ornament collection is a mix of colors and styles, you can still make it look cohesive. Sort the ornaments by color, pick the two or three that appear most often, and use those on the visible front of the tree. Use the rest deeper inside or on the back.
This approach keeps sentimental pieces on the tree without producing a chaotic look. Add a simple ribbon or garland in one of the main colors to tie it all together.
- Lay out all ornaments and sort by color.
- Choose two main colors and one accent.
- Place those on the front and sides.
- Tuck the extras deeper or on the back.
26. Make the Gift Wrap Part of the Tree Design

The area beneath the tree is part of the picture. Wrapping gifts in a limited palette, such as kraft paper with twine, or white paper with velvet ribbon, makes the whole setup look coordinated. Vary the size and height of the gifts to create a natural cluster.
Repeat one ribbon or color from the tree in the gift wrap. That small detail ties the base to the branches and makes the whole corner look planned.
Quick Tip: Place larger boxes at the back and smaller ones in front, and rest a couple of gifts at slight angles so they don’t look like a row.
Choosing Where to Start
You don’t need to follow one idea exactly. Pick a palette, decide on a base and a topper, and then decide how much you want to spend. A tree with warm lights set deep in the branches, one repeated ribbon, and a tidy base already looks more finished than most. From there, add ornaments in the finishes and colors your room can support.